


INTRODUCTION
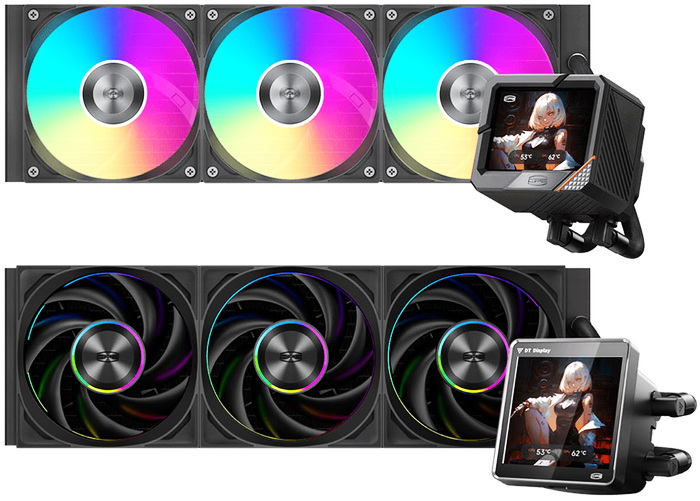
Keeping modern CPUs cool under sustained load demands hardware that can move heat quickly and consistently, which is why AIO liquid coolers dominate performance‑oriented builds. Their combination of copper cold plates, high‑flow pumps, and large radiators gives them a clear advantage over air coolers when dealing with aggressive boost behavior and high ambient temperatures. CPS PcCooler’s GT360 ARGB and DT360 ARGB High Performance AIO CPU Coolers enter this segment as two 360mm options built for users who want strong thermal results, solid component quality, and synchronized ARGB lighting as part of a cohesive system aesthetic.
Shenzhen Fluence Technology PLC, established in 2005, is mainly engaged in lithium battery cathode materials, new cooling devices for electronic products and LED industry chain-related businesses, which is recognized as a national high-tech enterprise.
CPS PcCooler’s LCD 360mm AIO CPU Cooler lineup splits into two distinct designs the GT360 ARGB and the DT360 ARGB, each built around a high‑resolution IPS display but tuned for different cooling priorities. The GT360 ARGB features a 3.5" 640x480 IPS screen, a 2600RPM pump, and a precision‑machined copper cold plate, feeding a 397x120x27mm radiator with three 3000RPM ball‑bearing ARGB fans (99CFM/5.33mmH2O/41.5dBA) designed for stronger airflow and balanced acoustics. The DT360 ARGB on the other hand counters with a 3.4" 480x480 IPS display mounted on a magnetic detachable module, paired with a 2600RPM pump and a 14 channel high‑density radiator that increases coolant contact area for sustained thermal performance. Its three ball‑bearing 120mm fans also run at 3000RPM, delivering up to 83CFM with 5.7mmH2O air pressure at a quieter 33.1dBA. With almost identical pump and fan performance, the GT360 ARGB becomes the more visually expressive, higher‑resolution option, while the DT360 ARGB emphasizes radiator density, modular display flexibility, and a cleaner, more understated lighting profile.
SPECIFICATIONS AND FEATURES

PACKAGING AND CONTENTS

Both boxes have a product picture at the front along with the company logo.

At the rear we find the complete specifications table.

The coolers and their bundles are placed inside a thick piece of foam.

Inside both boxes you'll find the AIO coolers, LCD screens, thermal paste tubes, user manuals, backplates and all the necessary bits to install the coolers onto Intel LGA 1150/1151/1155/1200/1700/1851 and AMD AM4/AM5 motherboards. However, the DT360 ARGB also comes with fan extension cables and a 8-fan ARGB hub.
THE GT360 ARGB & DT360 ARGB

Both the GT360 ARGB and DT360 ARGB AIO CPU coolers look almost the same (they both use 394mm long, 120mm wide and 27mm thick aluminum radiators).


Radiator thickness with and without the fans is roughly 52mm/27.2mm for the GT360 ARGB and 56mm/27.8mm for the DT360 ARGB (thicker fans).


FPI (fins per inch) count for both radiators is around 20.

 Even though the three 120mm ARGB fans of the GT360 ARGB model look better the ones used with the DT360 ARGB are probably more durable.


Tube length for both coolers is 400mm so you shouldn't have an issue with installation (perhaps in super towers).


The base of the GT360 ARGB features a detachable LCD screen and even though the base of the DT360 ARGB also features a detachable LCD screen it's one which you can position anywhere on your tower (for people who many decide to do so the base also has basic ARGB lighting).


You can move the tubes of both AIO coolers from their bases as usual.

 Both models feature copper cold plates of roughly the same total surface.
INSTALLATION


Typically, I start by mounting the radiator with the pre-installed fans as seen above.

As with past AIO coolers base installation starts by attaching the backplate.


After that just attach the spacers and then mount the base (I chose to mount both bases with the tubes as shown on the exterior of each box).


The LCD screen of the GT360 ARGB looks sharper but the one used with the DT360 ARGB is far more versatile since you can attach it anywhere in your case (will still need to power it with the USB-C to motherboard header cable). As always, a short clip (for uknown reasons my GT360 ARGB video was corrupt and so I couldn't use it) is available both in YouTube and TikTok.
DISPLAY SOFTWARE
To control either AIO you will need to connect them to your motherboard's USB header and download the CPS Display software.
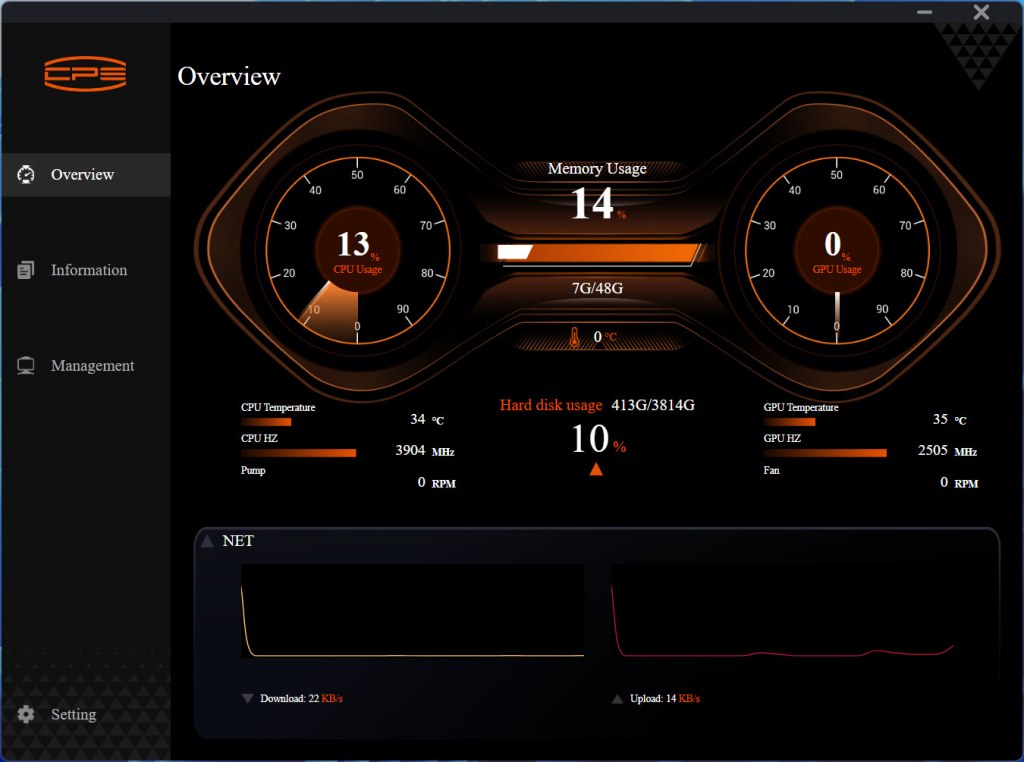
The initial tab of this software is basically a system monitor tool.
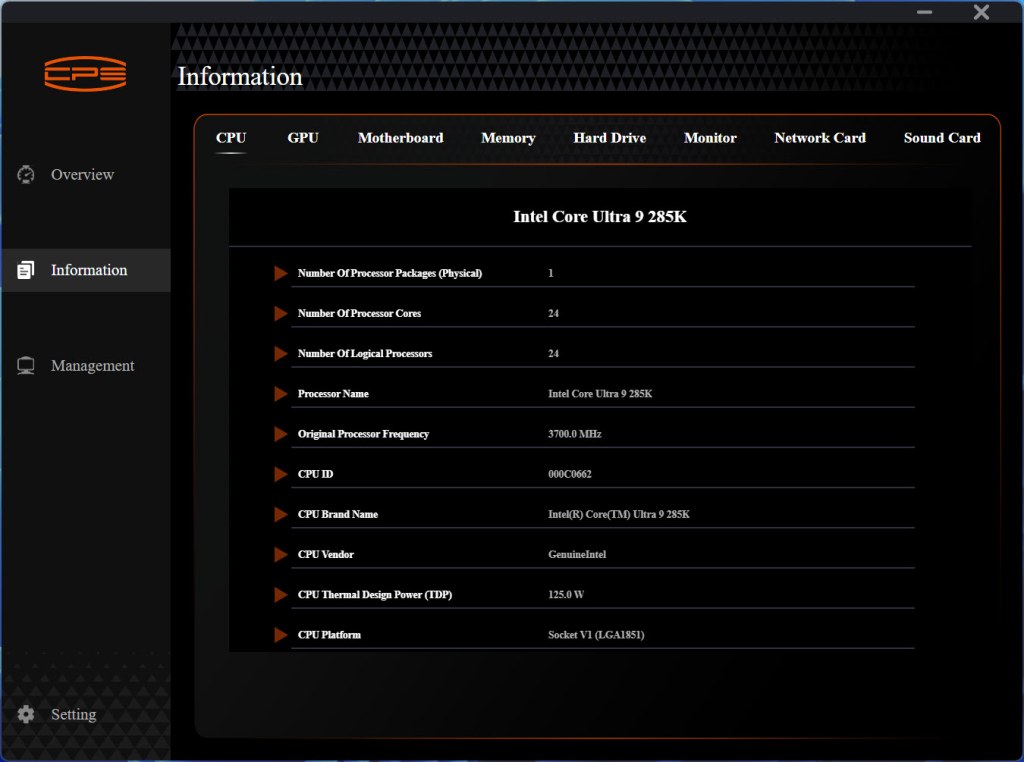
You can also access system information from the second tab.
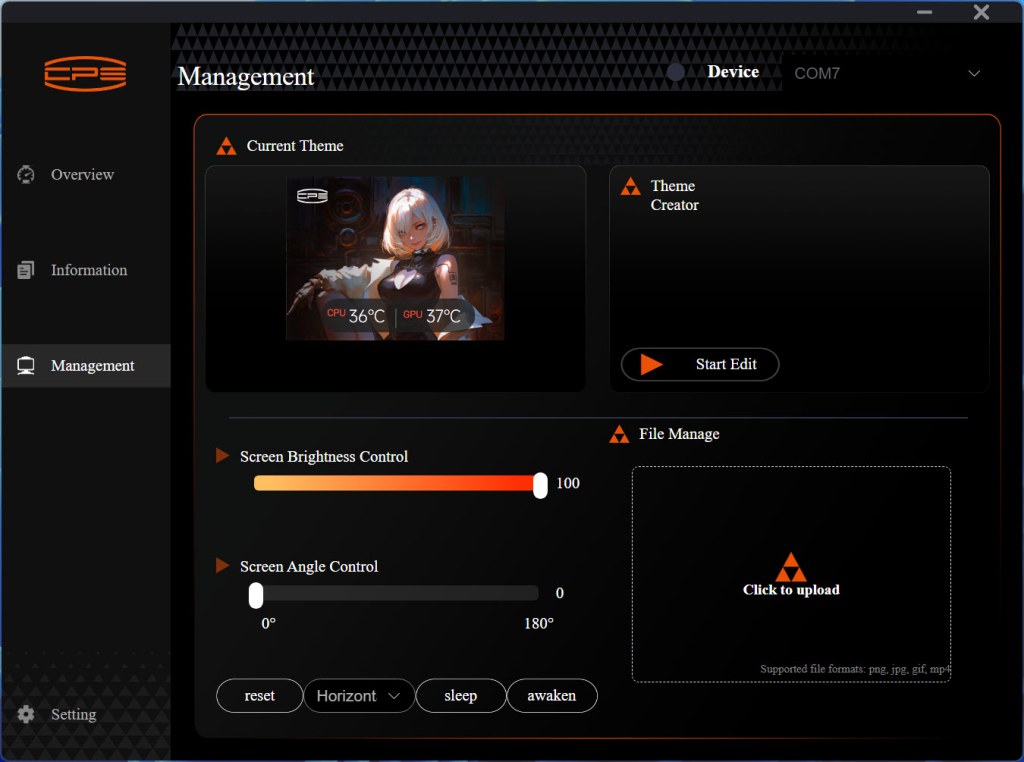
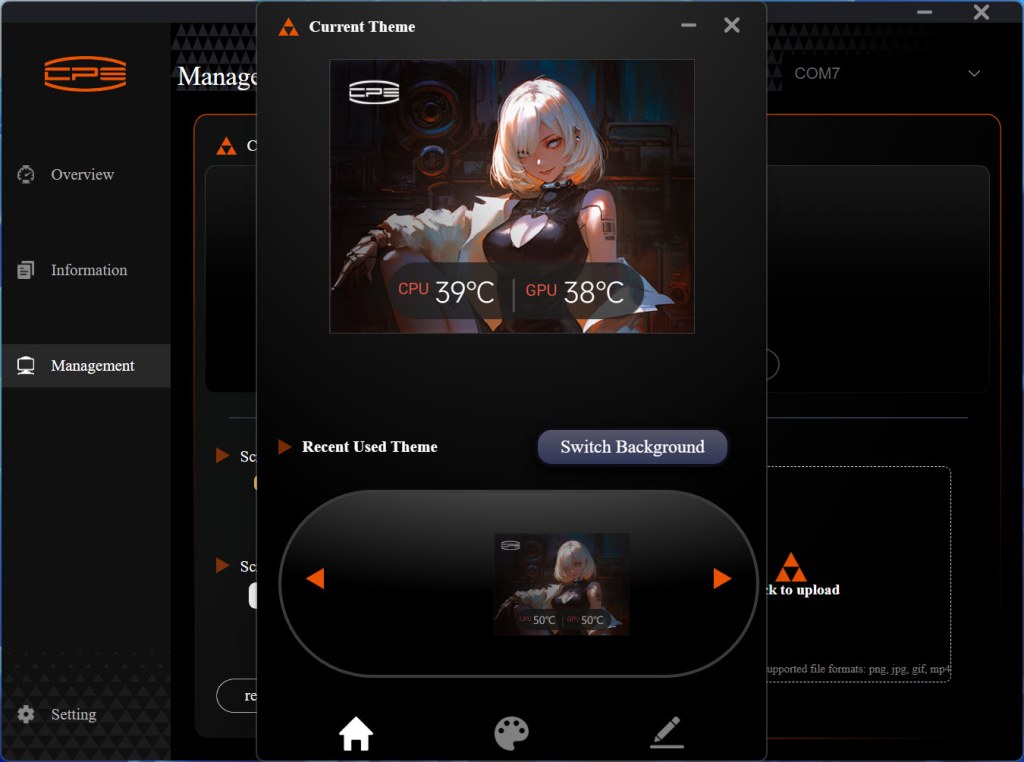
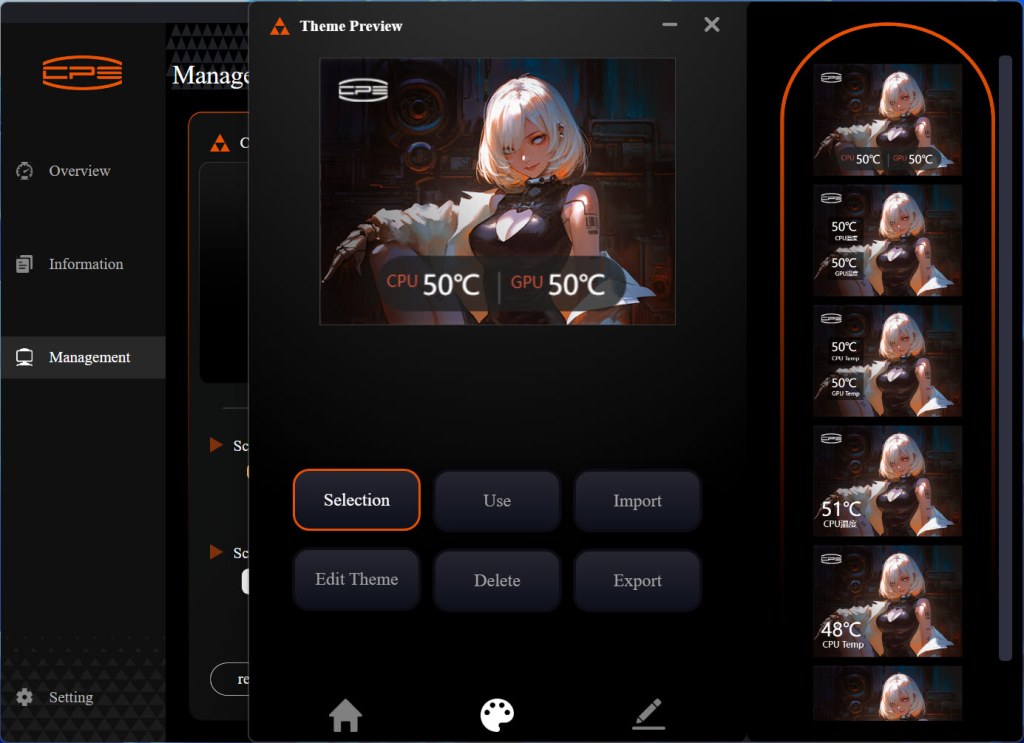
From the management tab you can control the LCD screen brightness, screen angle, background (input pictures), temperature location, and even edit the graphic of the screen.
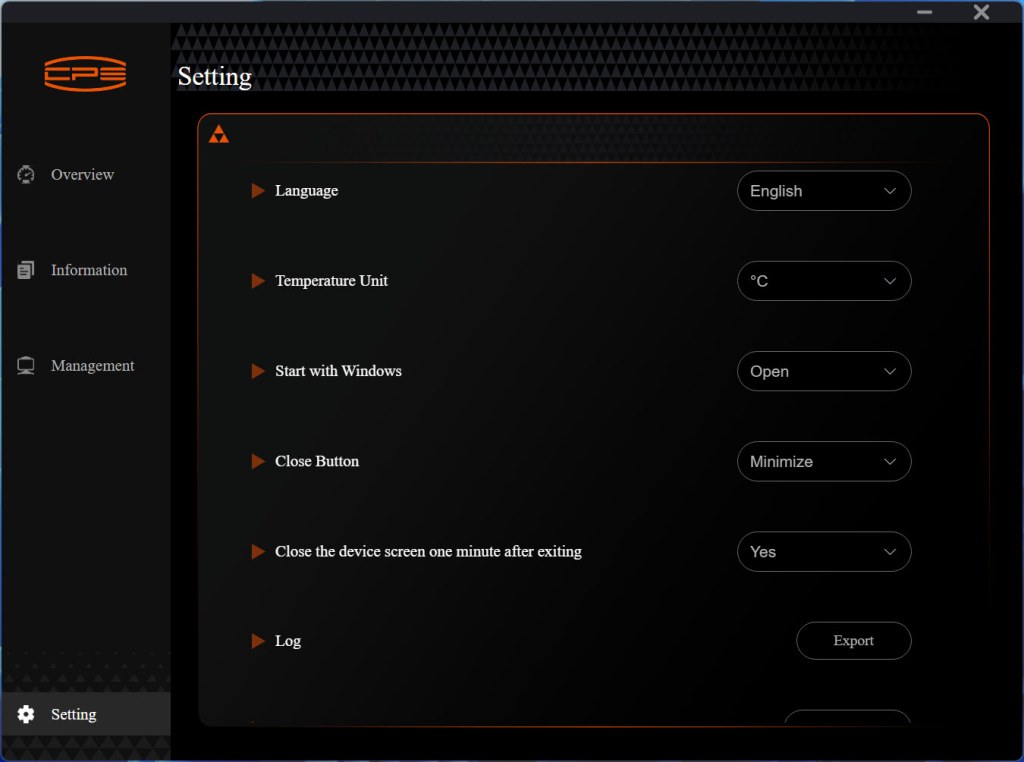
Finally, from the settings tab you can change the language and temperature unit.
TEST BED

TESTING METHODOLOGY
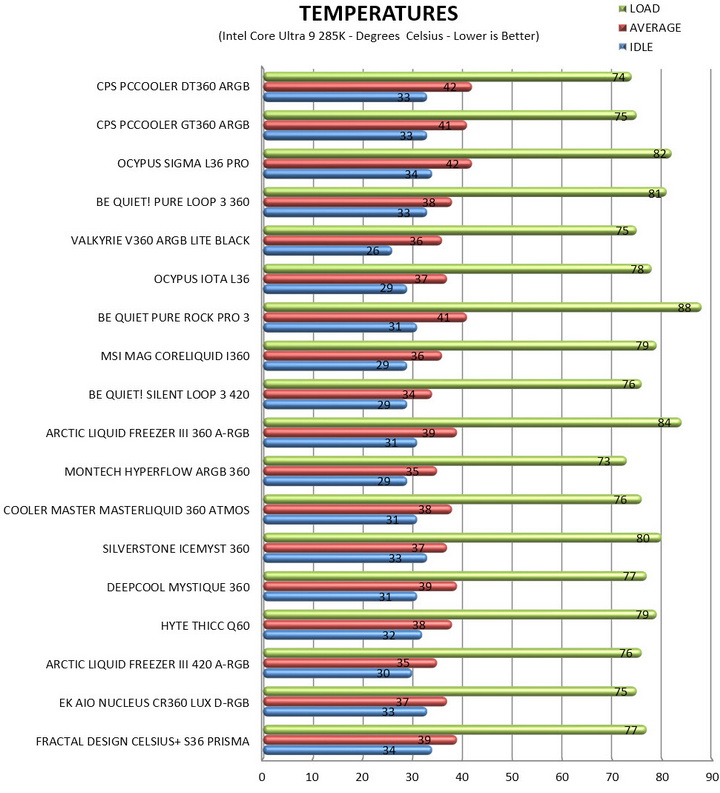
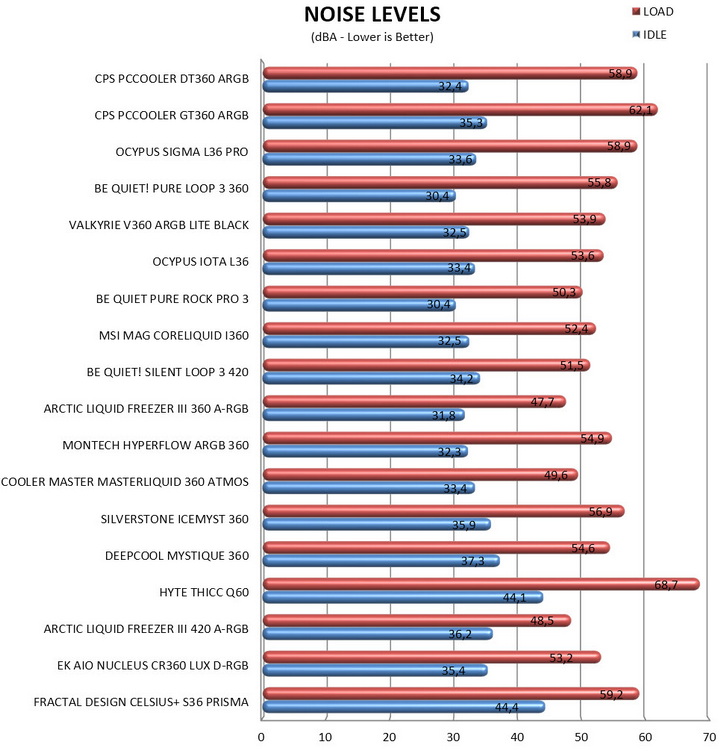
Testing complete water cooling kits or individual radiators is no different than testing CPU Coolers and since we want all of you to be able to compare similar products, we created new and separate charts (you can still cross-compare results however since we are using the same test rig). So once again single (120/140mm) watercooling solutions are tested with the radiator mounted at the rear of our test rig while dual/triple/quad (240/260/280/360/420/480/560mm) solutions with the radiator mounted at the top. For the dBA tests complete water cooling kits or radiators with bundled fans are measured both while on idle mode or with the fan controller in the minimum setting and while on extreme load or with the fan controller all the way to the highest possible setting (PWM fans do that on their own without our intervention). Every single test takes place in a temperature controlled room of 23 degrees Celsius Ambient Temp with the help of two AC units placed diagonally inside the room and as for thermal paste I’m using the NT-H2 by Noctua. Finally, much like when testing CPU Coolers, it's very important to point out that just because a water cooling kit (or a AIO) outperforms another when tested with our test rig (when we test complete water cooling kits) that does not necessarily mean that the same performance differences will apply 100% for other CPU models and in other situations (such as different ambient temps and system configurations).
To successfully record the load temperatures, we use the latest OCCT application for around 6-10 minutes to push the processor to its limits and after that is done and the temperatures are recorded, we wait for about 10-20 minutes for the CPU to cool down and record idle temperatures. This is done to allow time for the thermal conductive material to achieve the optimal performance level. Same procedure is then repeated with the Passmark BurnIn Test as a failsafe just in case the OCCT results are wrong. This procedure takes a lot more time than the usual peltier/thermometer tests, but this way not only can we deliver real world results to our readers based on real CPUs, but we can also triple check the results using a variety of programs. Last but not least the temperatures were recorded using the latest version of AIDA64 while noise level tests (when fans exist in the bundle) are performed using a high precision ExTech HD600 Decibel Meter placed about 10-15cm above the radiator. Still although the same testing procedure applies to all units do take into consideration that unlike the official numbers which are measured in special noise isolated labs with just the fans here, we also have both the rest of the cooler and the rest of the system (although all system fans are turned off when recording noise levels).
* Since some manufacturers have ceased support for the Intel LGA 2011-3 platform, for such coolers, I’ll be using the Ryzen 7900X / ASRock X670E test rig.
** After high demand since September 2024 I’ll be including average temperatures in my AMD Ryzen 9 7900Χ/Χ670Ε charts (under light load such as Internet browsing and Office use).
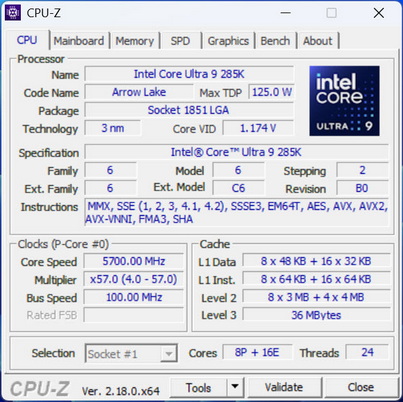
*** Since November 2024 I swapped test systems with the Intel Core Ultra 285K (same methodology as with the AMD Ryzen 9 7900X).
TEST RESULTS
 ...........
CONCLUSION
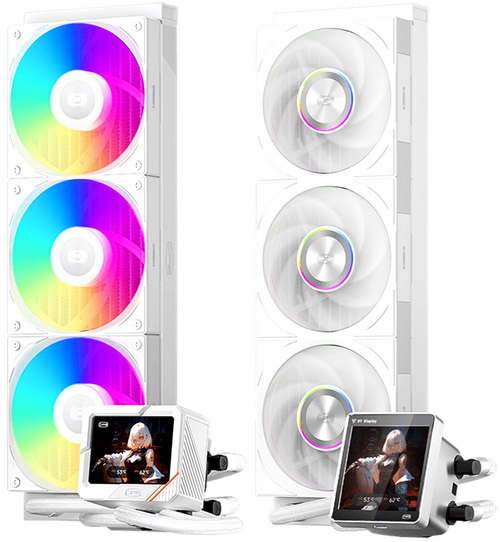
In the end, both the GT360 ARGB and DT360 ARGB by CPS PcCooler prove themselves as highly capable 360 mm coolers, combining strong thermal performance with refined LCD implementations. Their IPS displays add real functional value rather than gimmick flair, with the GT360 ARGB offering the slightly larger, sharper panel and the DT360 ARGB introducing a clever magnetic detachable LCD that makes customization and repositioning effortless. The DT360’s ARGB 14 channel high‑density radiator and quieter ball‑bearing fan profile give it a slight edge in sustained thermal performance, while the GT360’s ARGB full ARGB fan illumination appeals to builders who want a more expressive visual footprint. The only real drawbacks are external, CPS PcCooler’s global availability remains limited, and the software, while functional, could benefit from an easier to navigate UI and smoother integration. But taken as a whole, both coolers deliver a compelling mix of performance, ARGB lighting, and display‑driven personalization that stands out in the 360mm category.
Right now, the CPS PcCooler GT360 ARGB retails for USD62.99 (Amazon.com – 30% in page discount coupon) while the DT360 ARGB retails for USD90.99 inside the USA (Amazon.com – 30% in page discount coupon) so they are priced extremely well for what they offer (EU availability however is not so great). At the end of the day unless you’re looking for an larger LCD screen both the GT360 ARGB and DT360 ARGB deliver when it counts and that’s why both deserve the Golden Award.

PROS
- Build Quality
- Very Good Cooling Efficiency
- 3.5/3.4” IPS Display (640x480/480x480p)
- ARGB Lighting
- Motherboard Compatibility
- Large Coldplates
- Display Software
- Available In Black & White Colors
- Price (USA)
CONS
- Noise Levels
- Availability (EU)
- Display Software (Not Very Easy To Navigate)