


K1 MAX MENUS
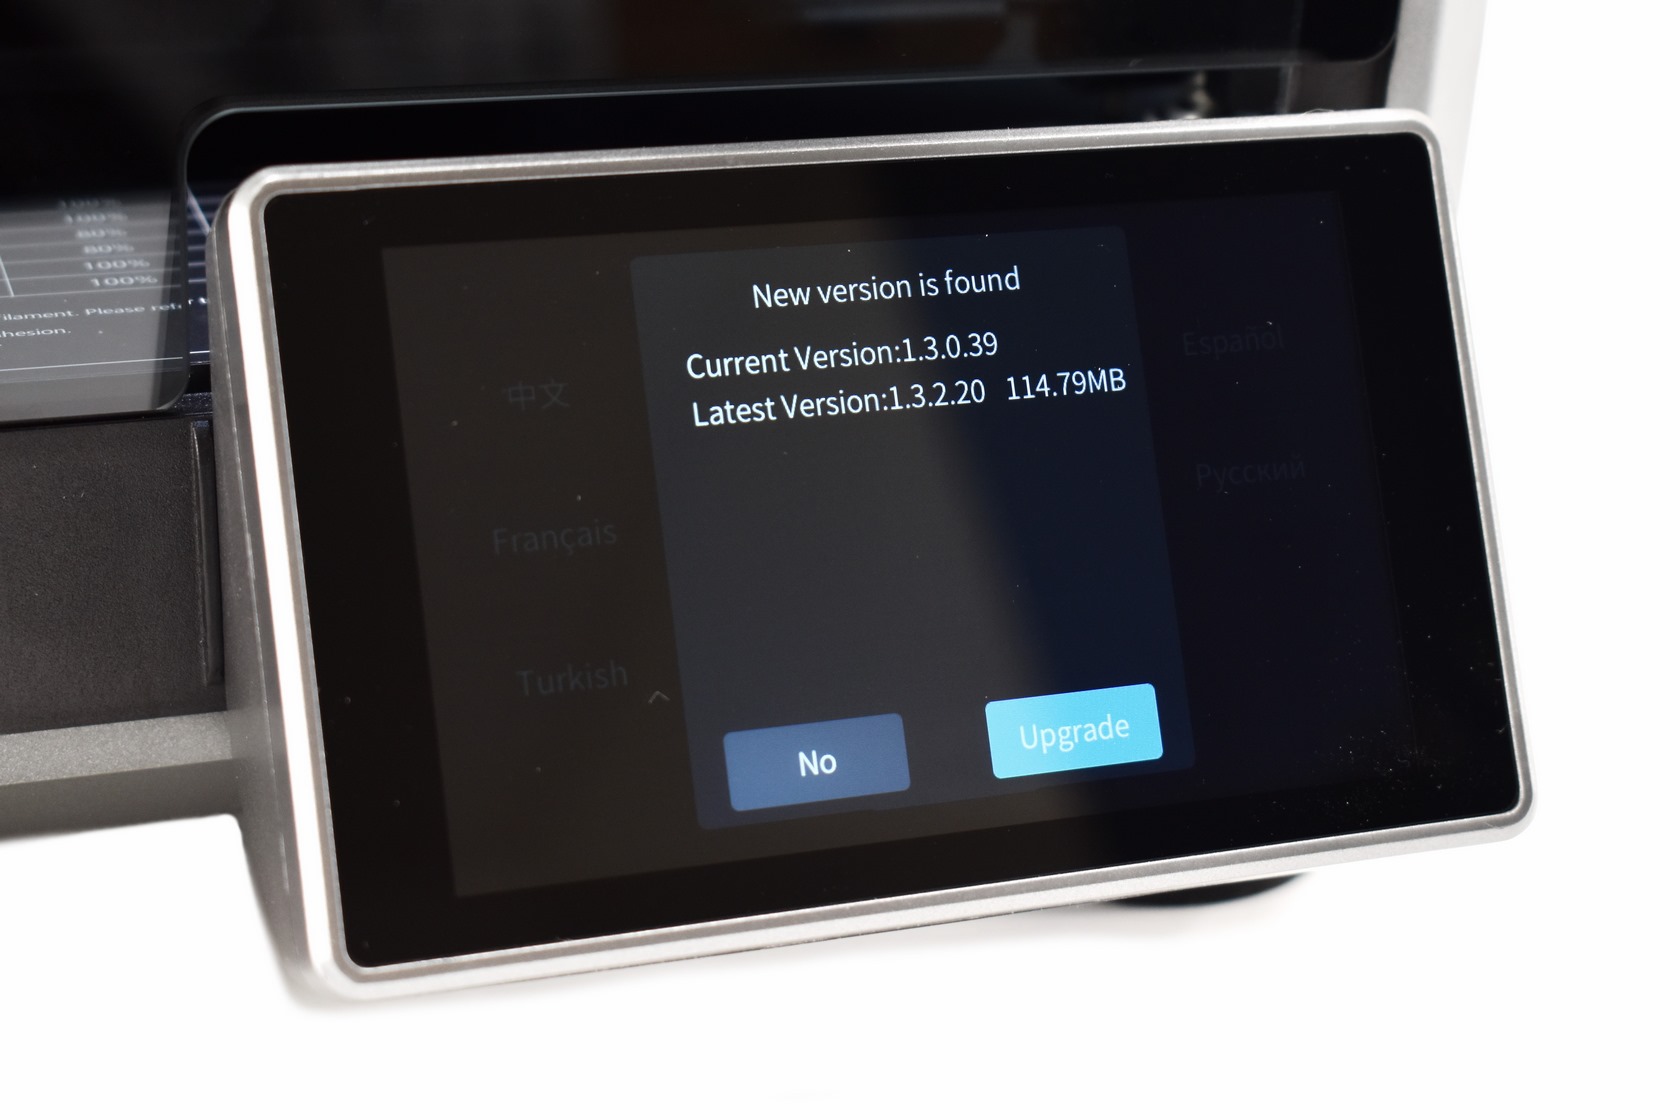
You can load the latest firmware update in the bundled USB drive and that's the first thing the K1 Max will look for at boot.
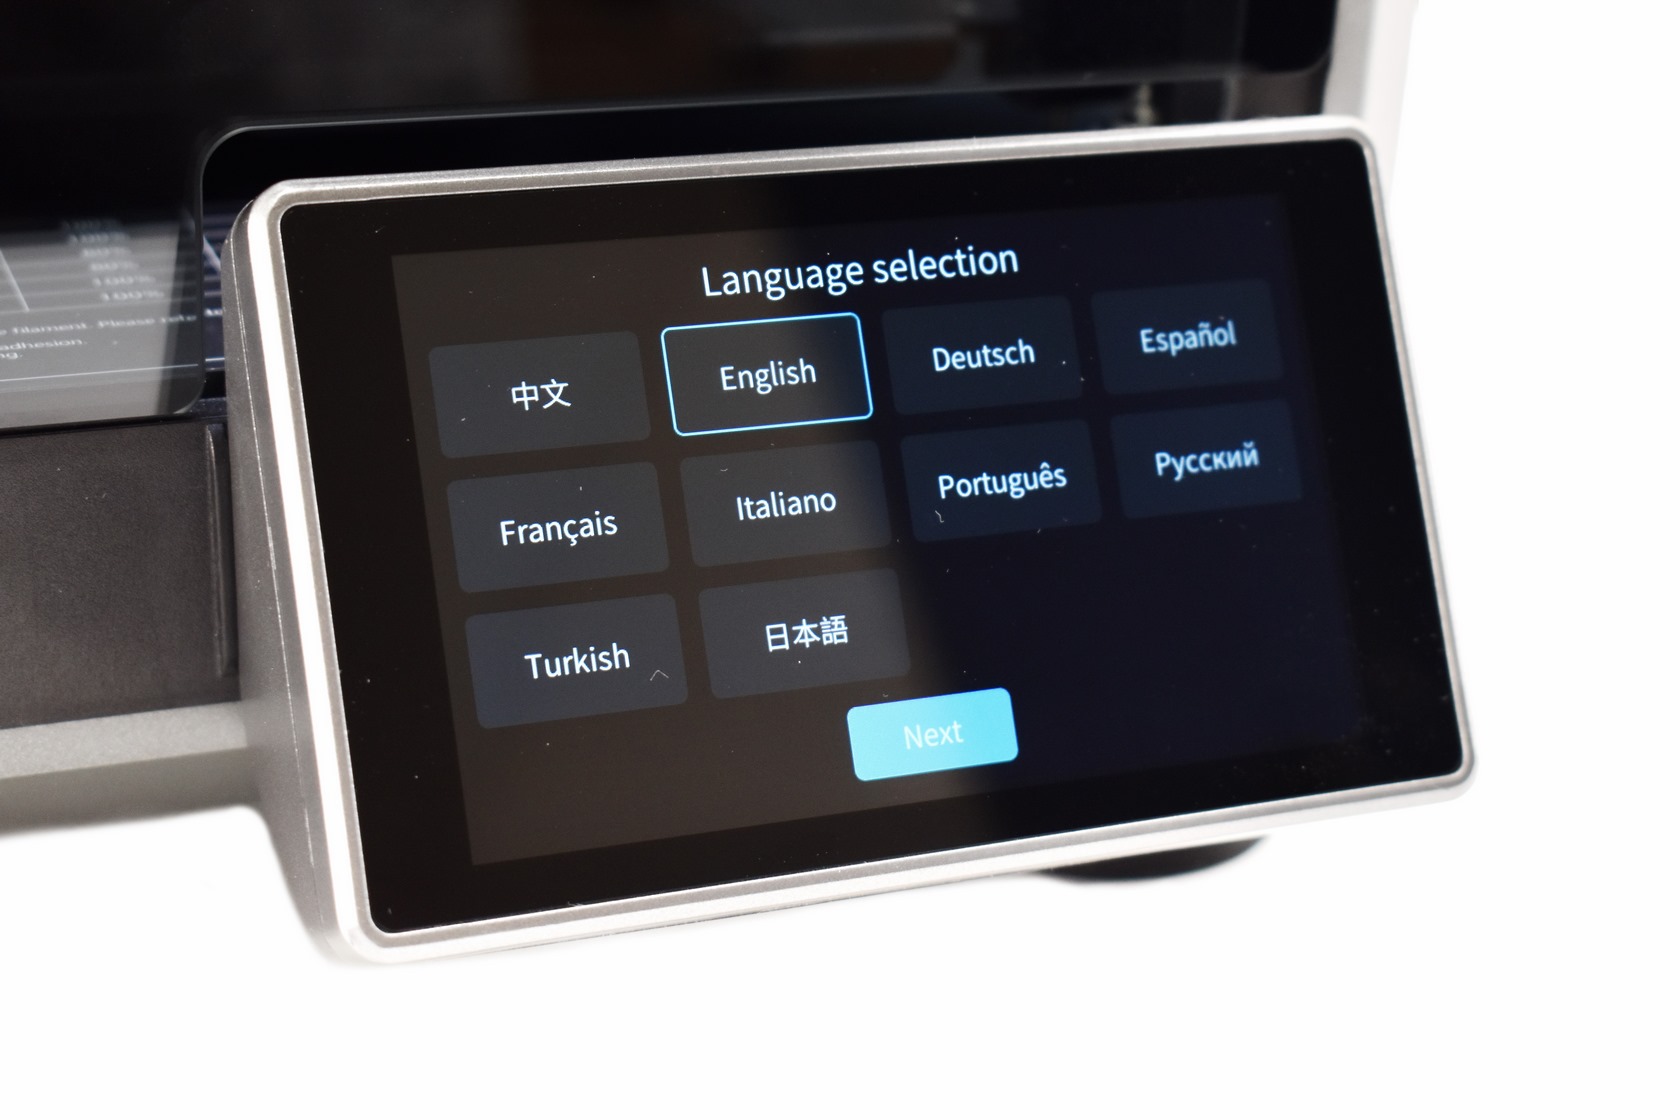
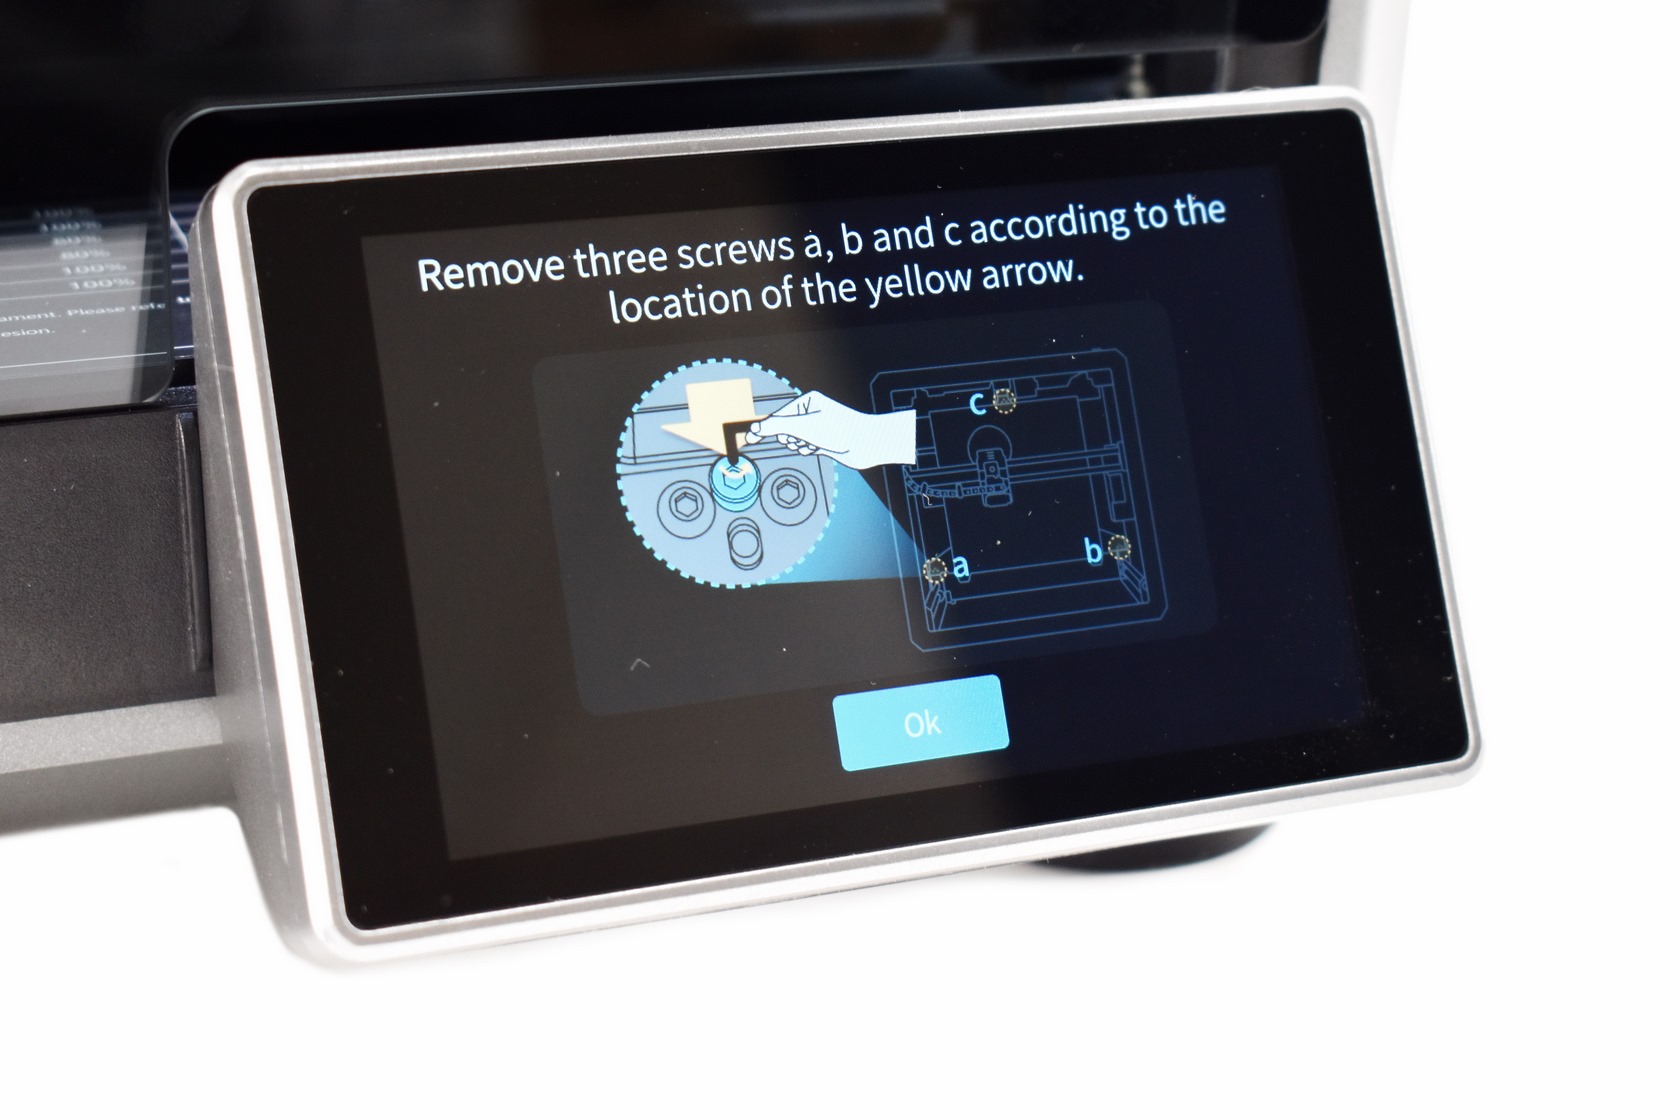
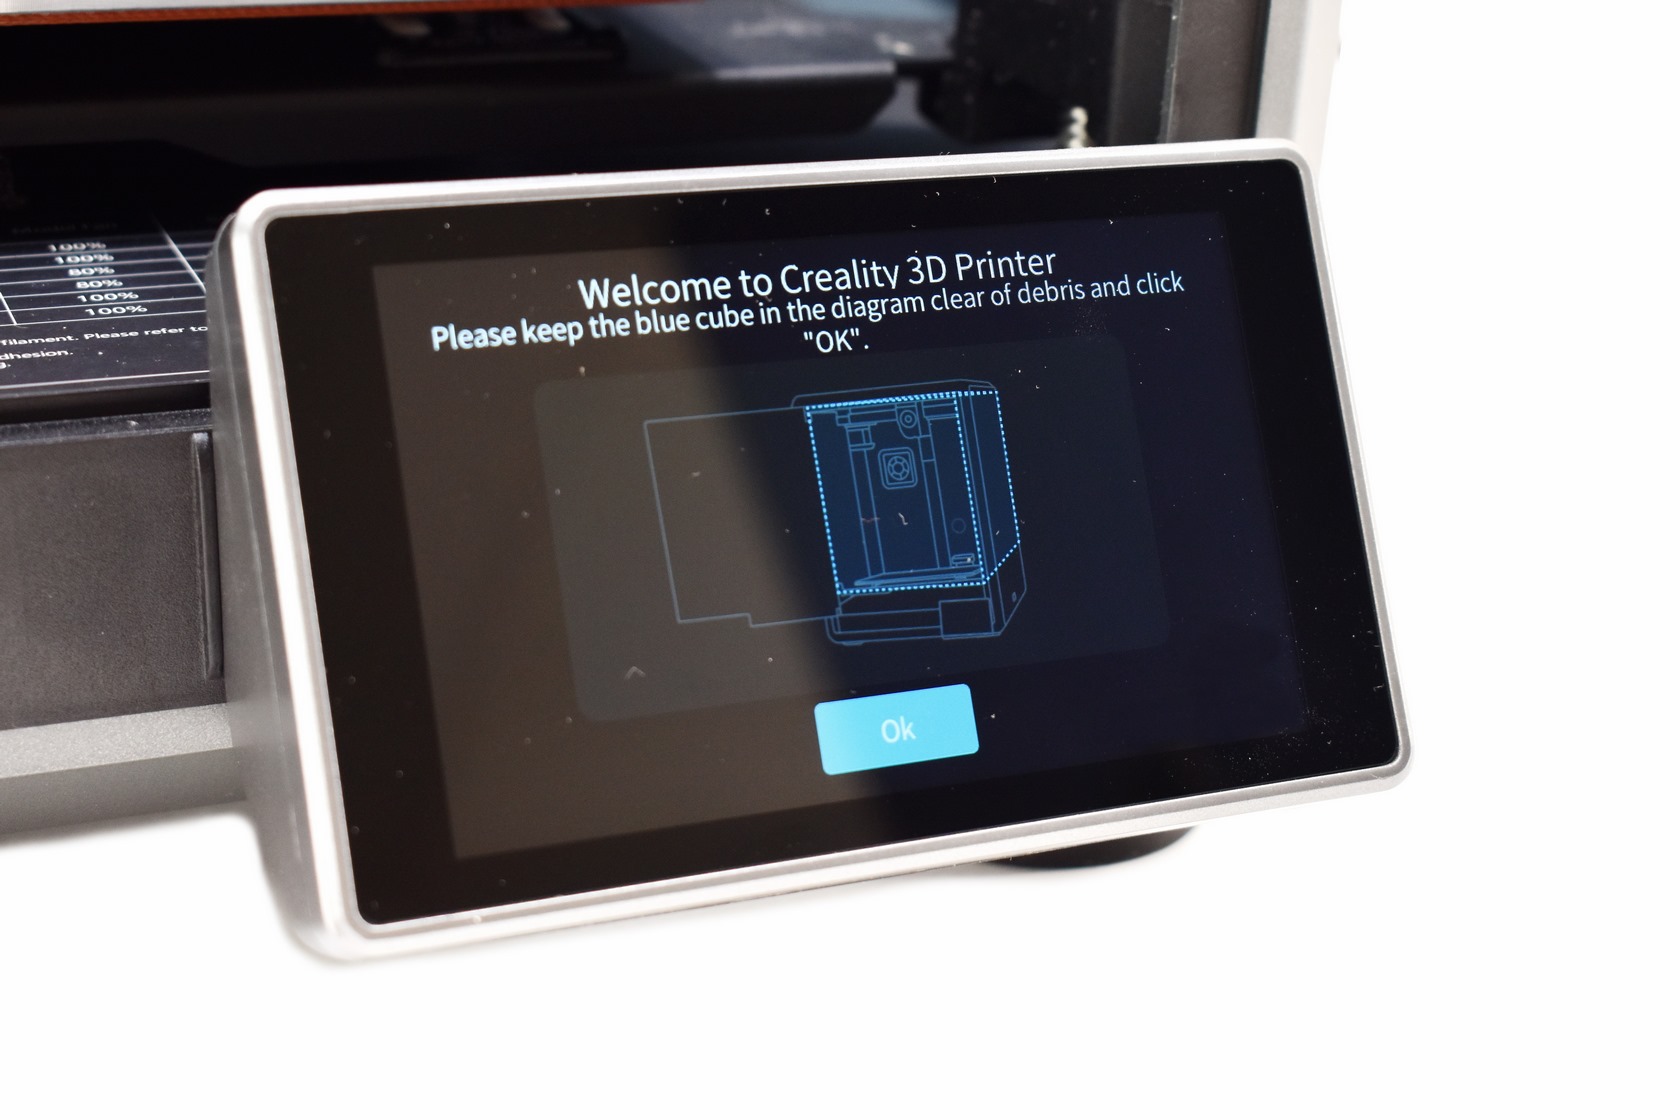
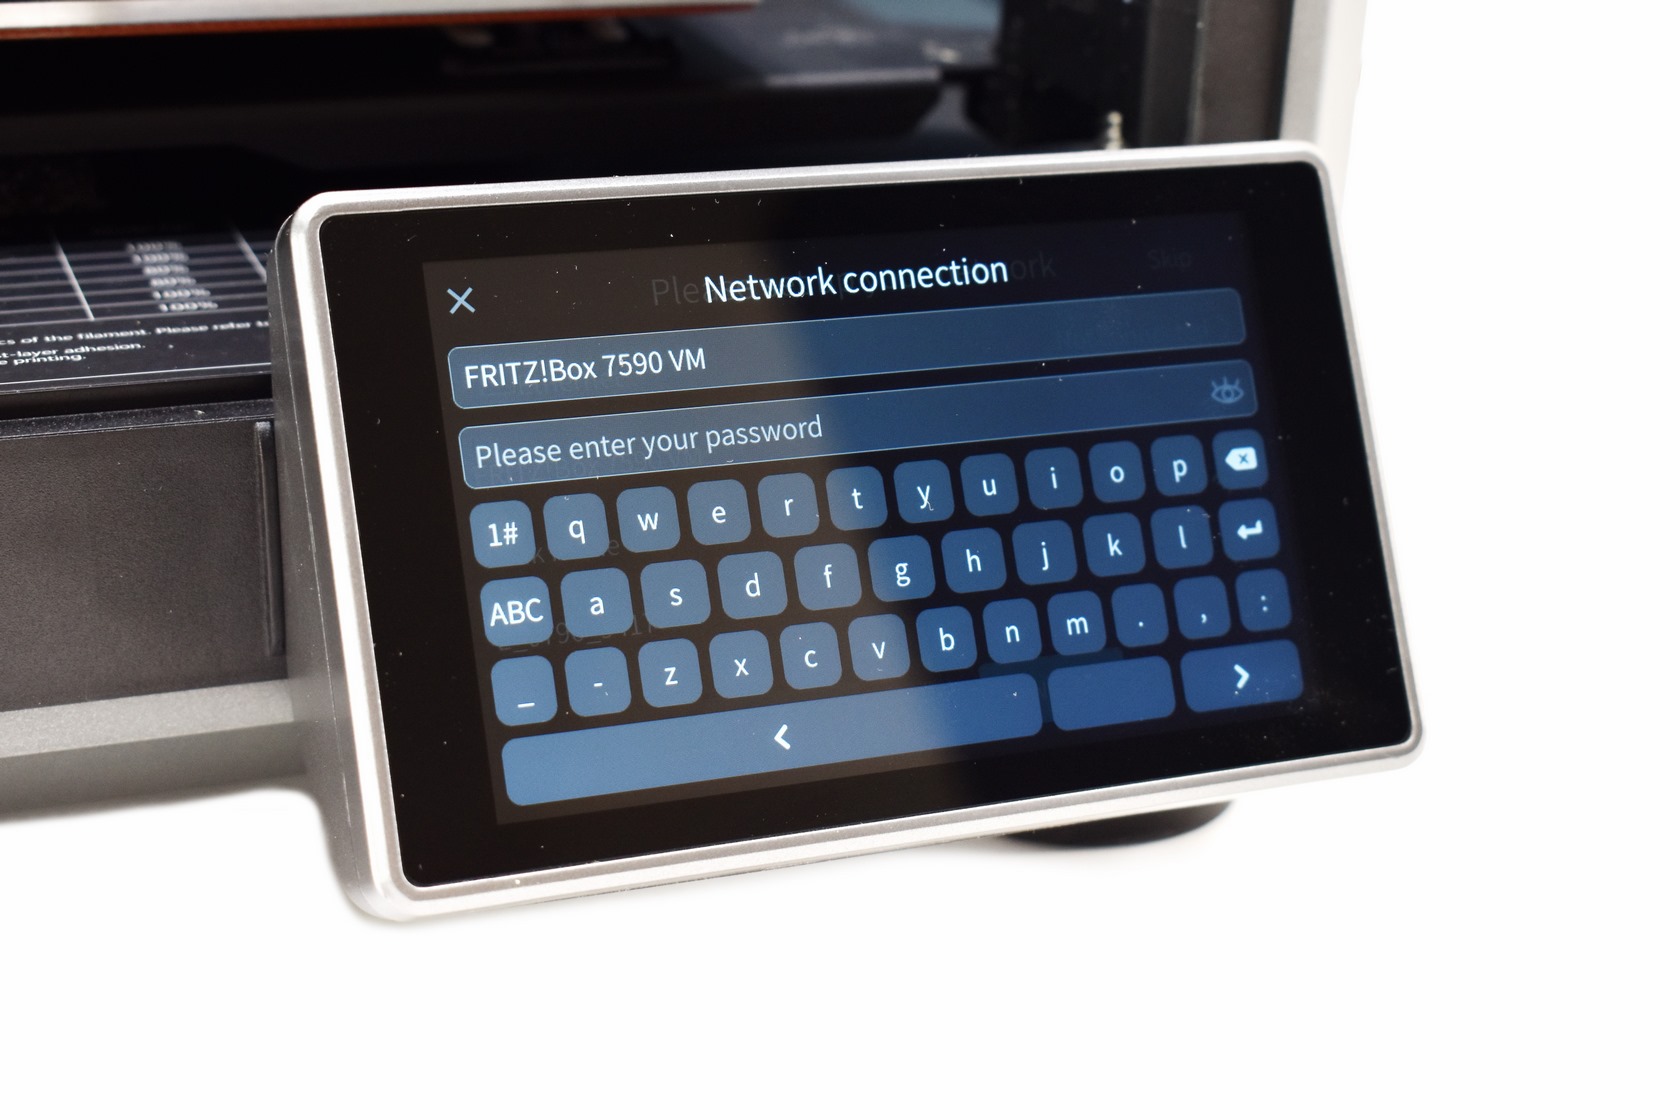
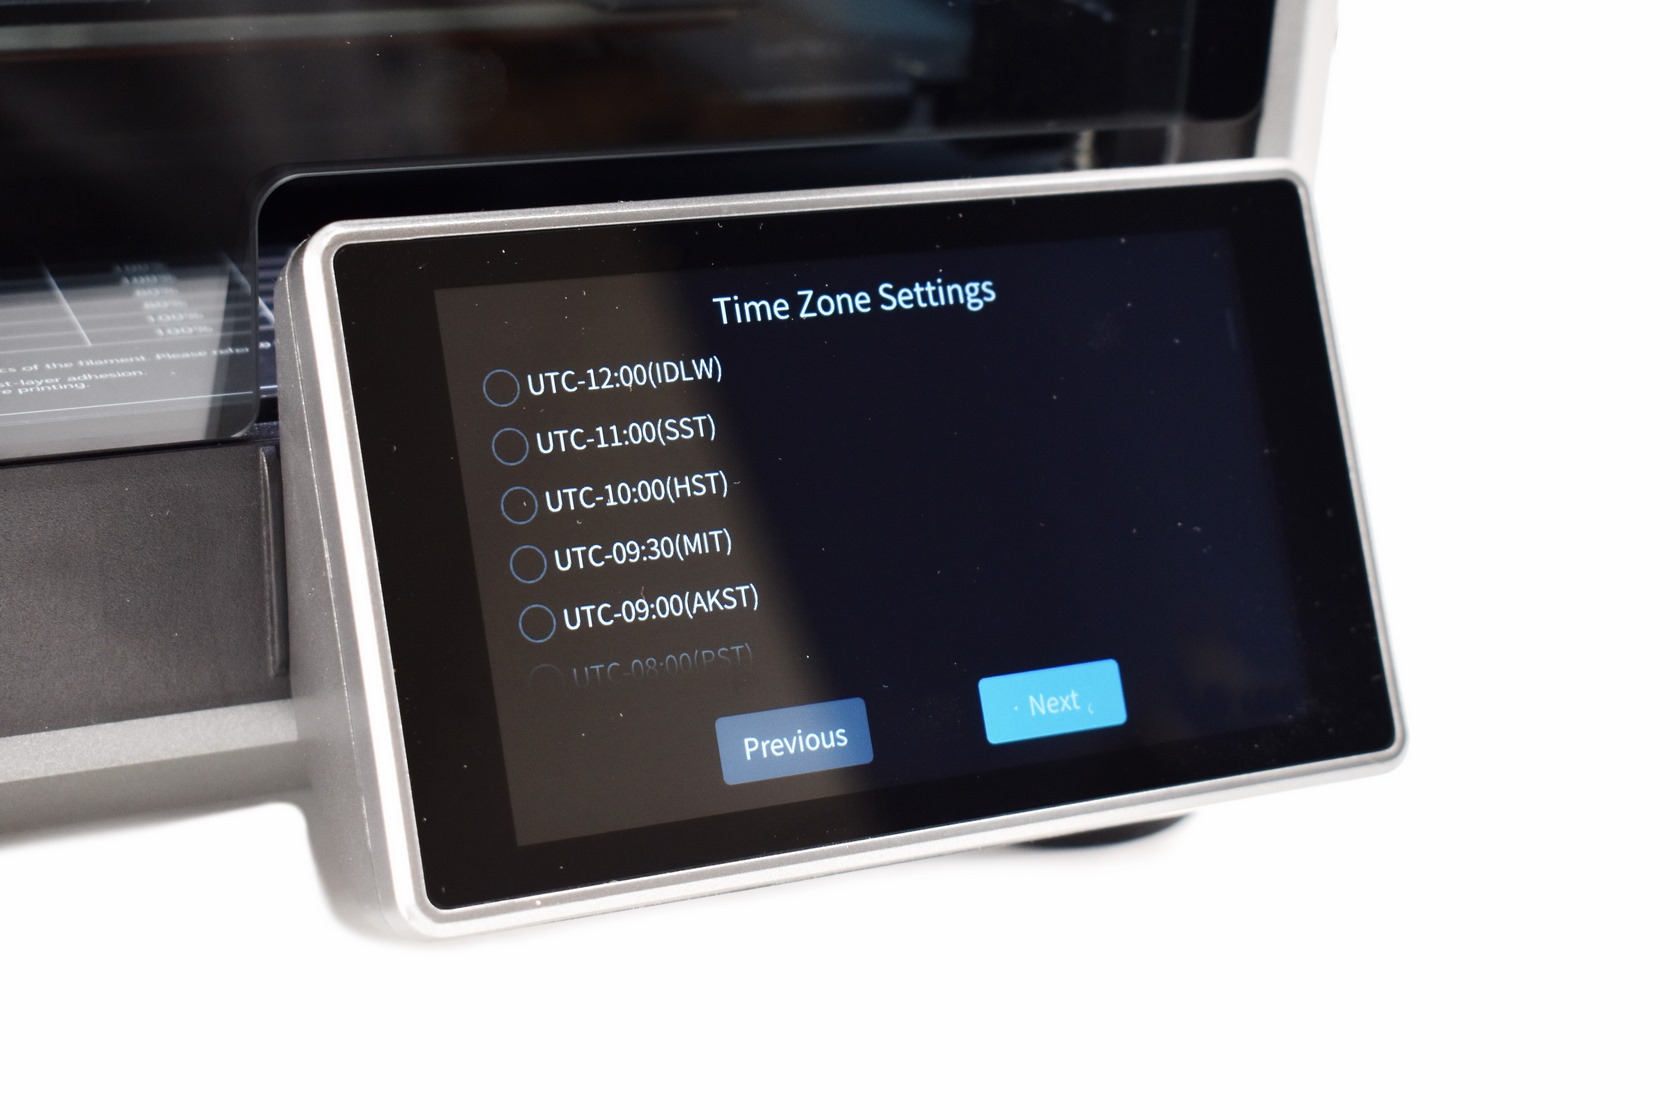
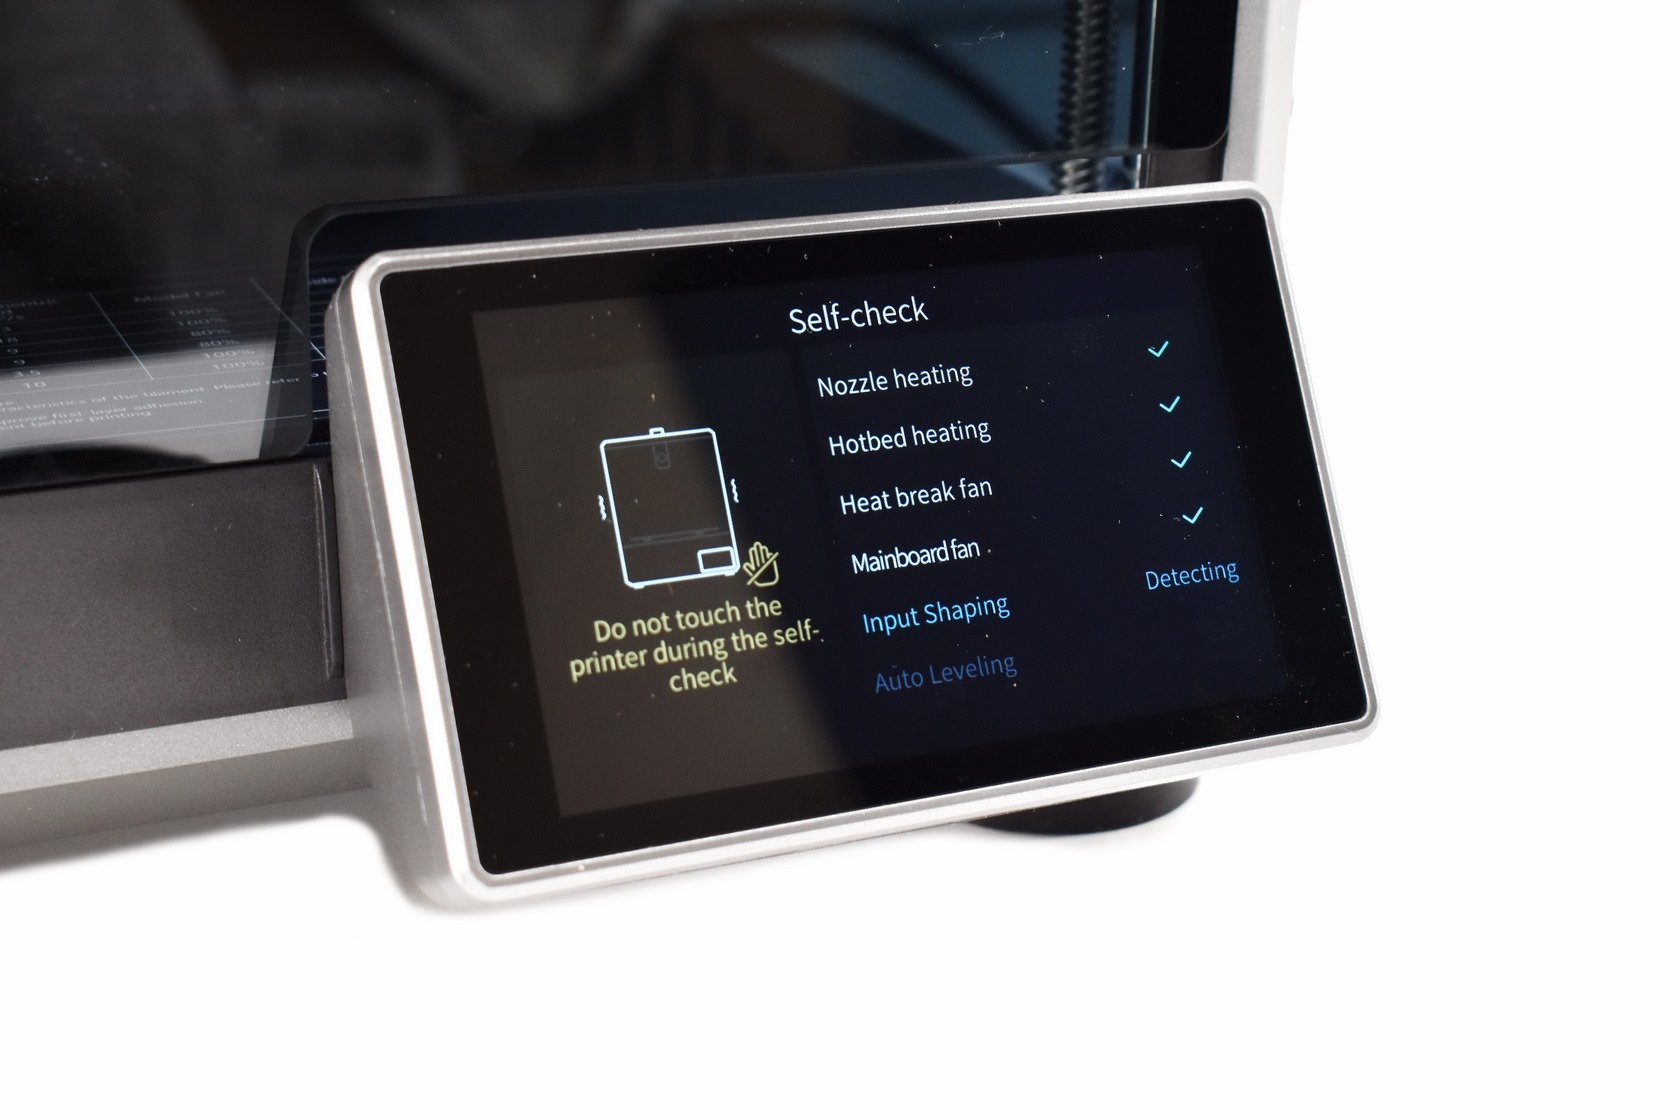 After the update procedure is complete you will need to select the language, release the screws holding the bed in place, allow the printer to do a complete check-up of its CoreXY components, setup wireless connectivity, set the time zone and finally let the printer do a quick self-check.
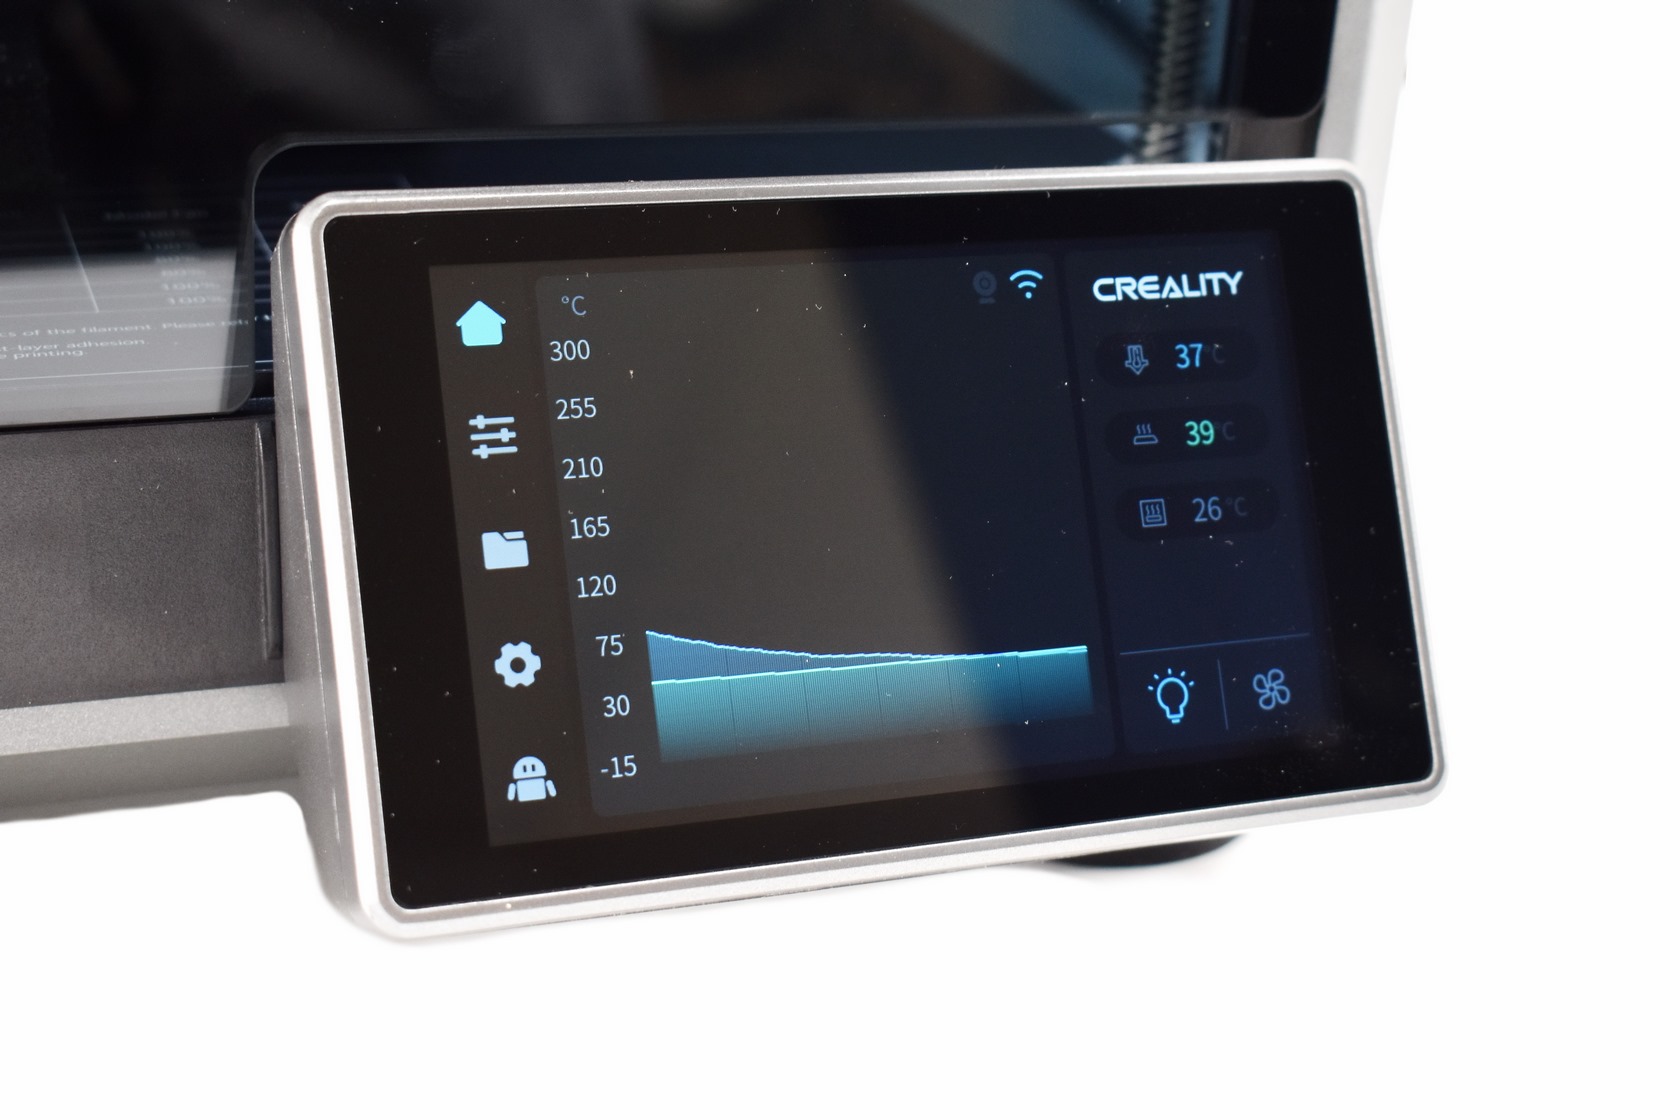
As expected, the home screen shows the temperature of each component and also allows you to turn the interior LEDs on/off and adjust the speed of the fans.
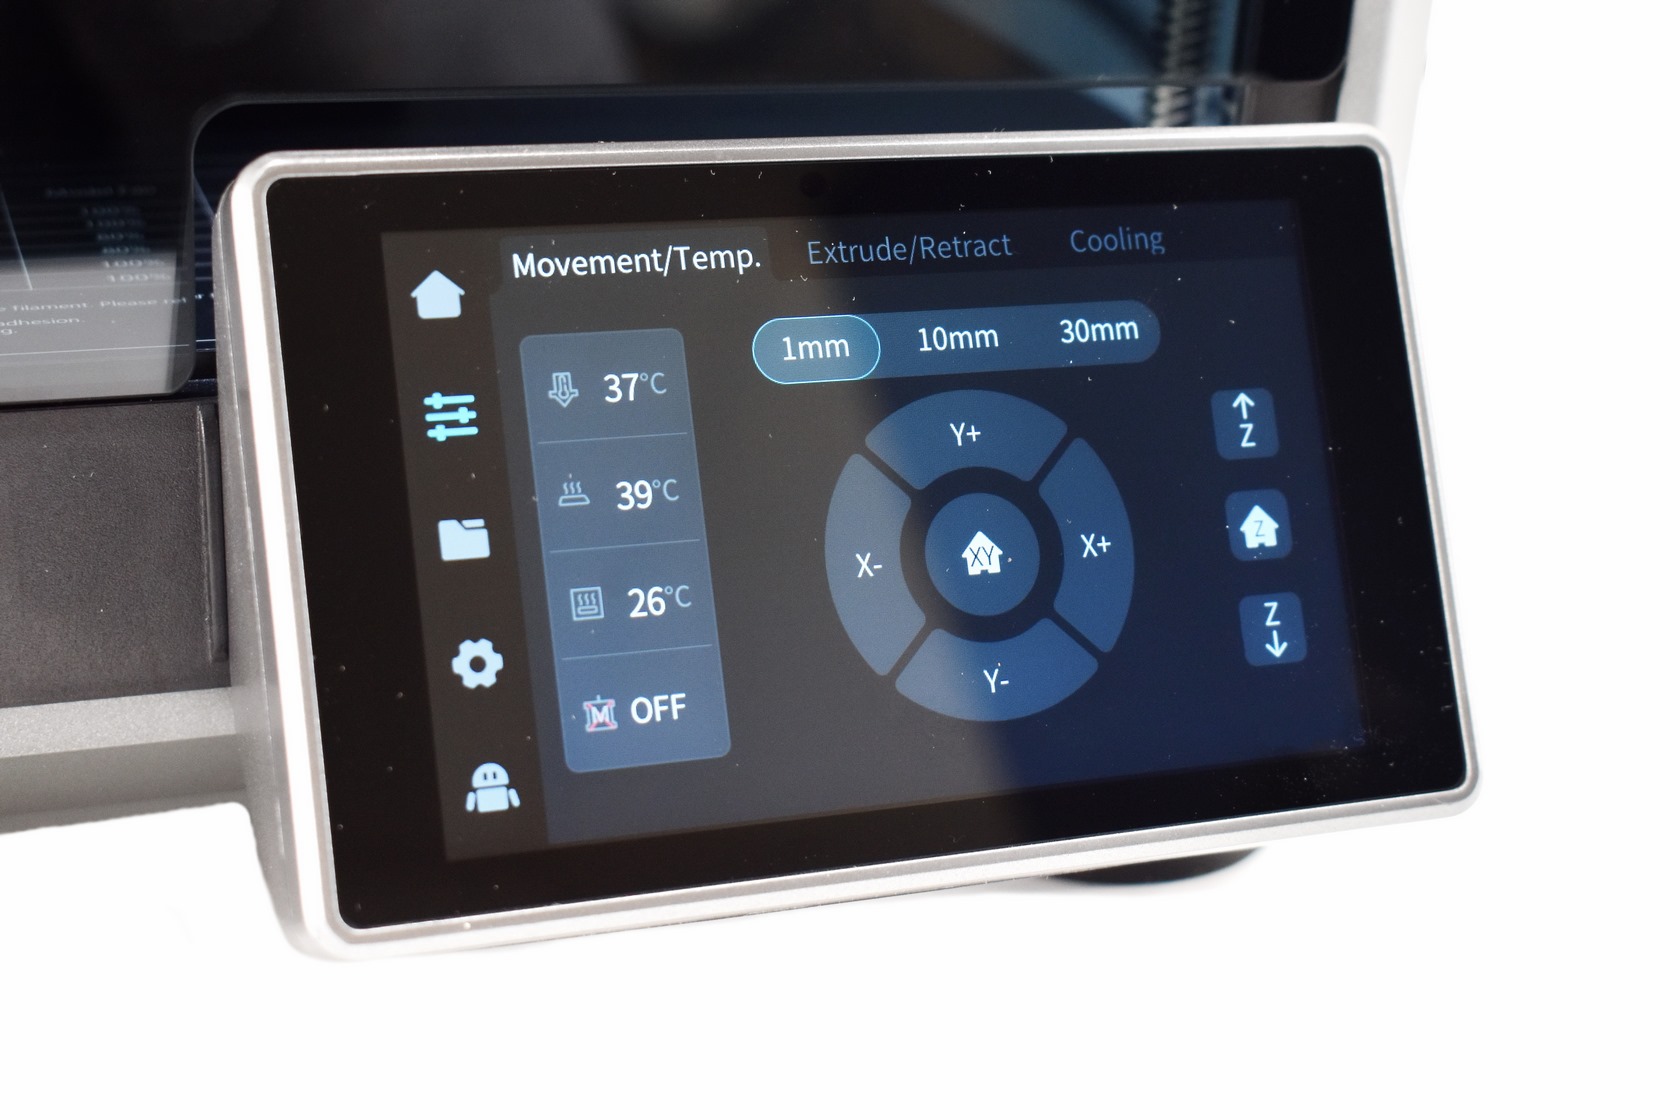
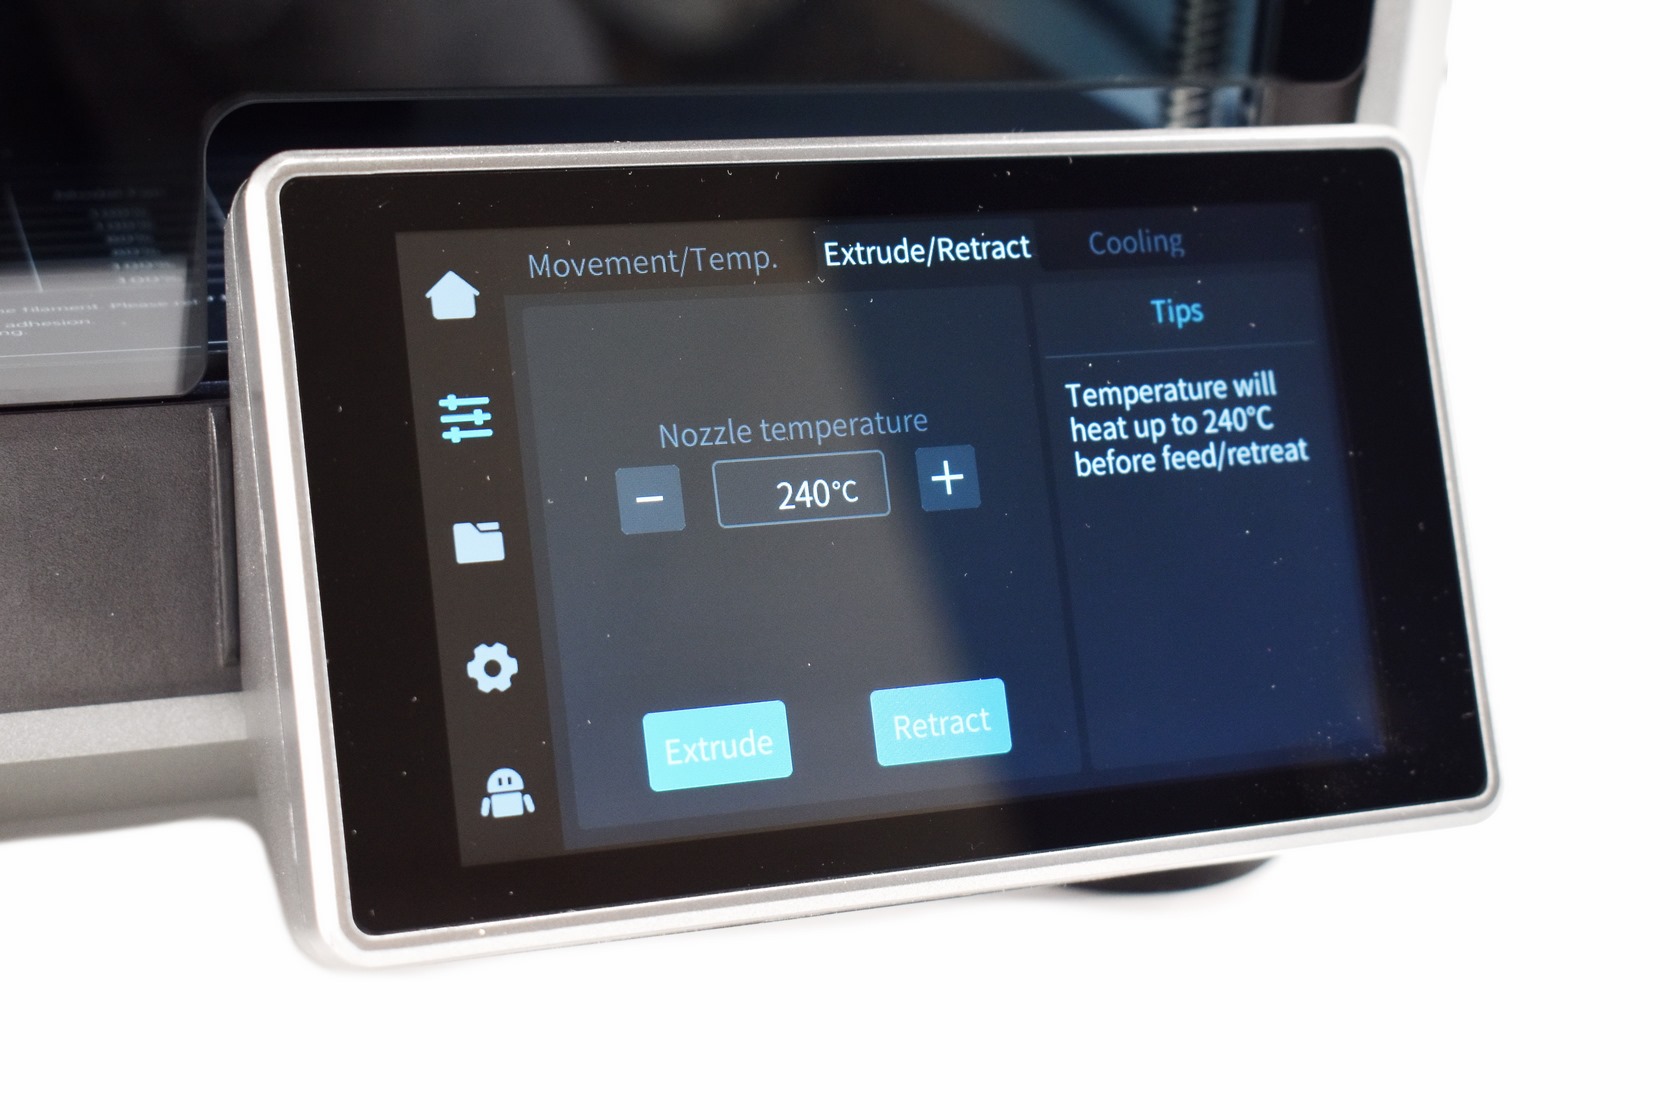
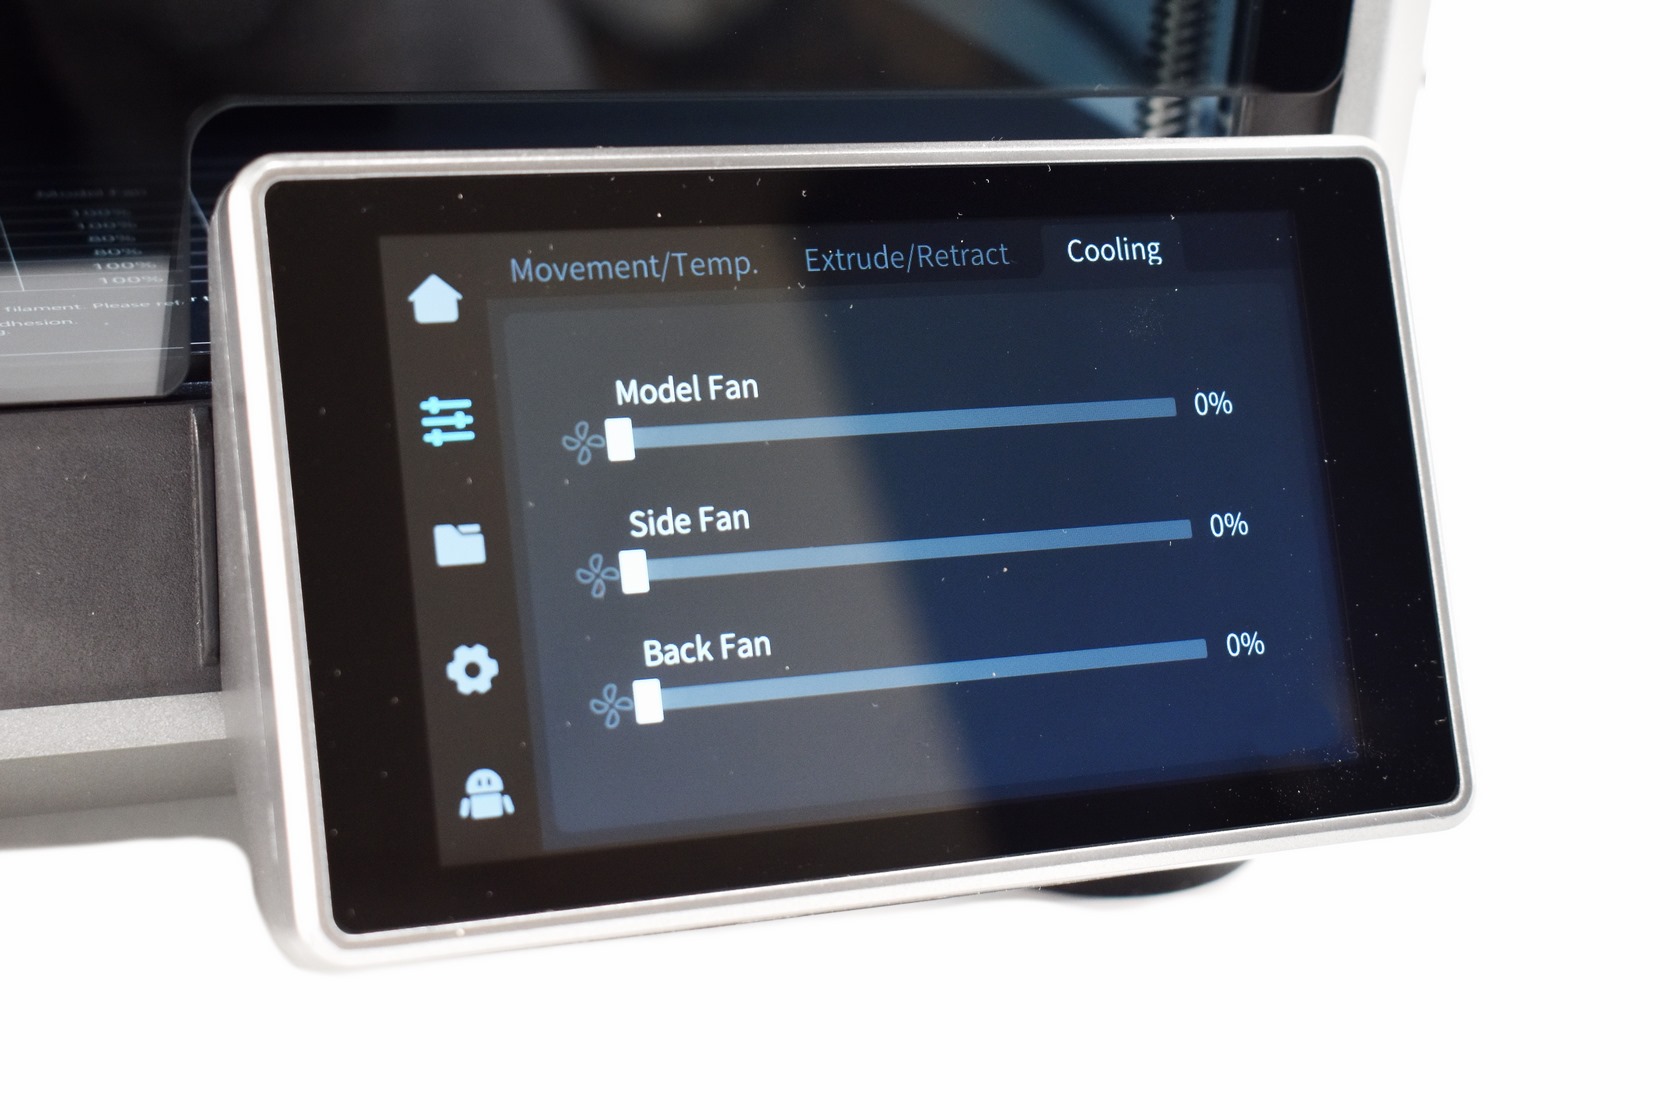 The second tab allows you to move the bed and the extruder, check temperatures, turn the extruder on/off, extrude/retract filament and again adjust the speed of the fans.
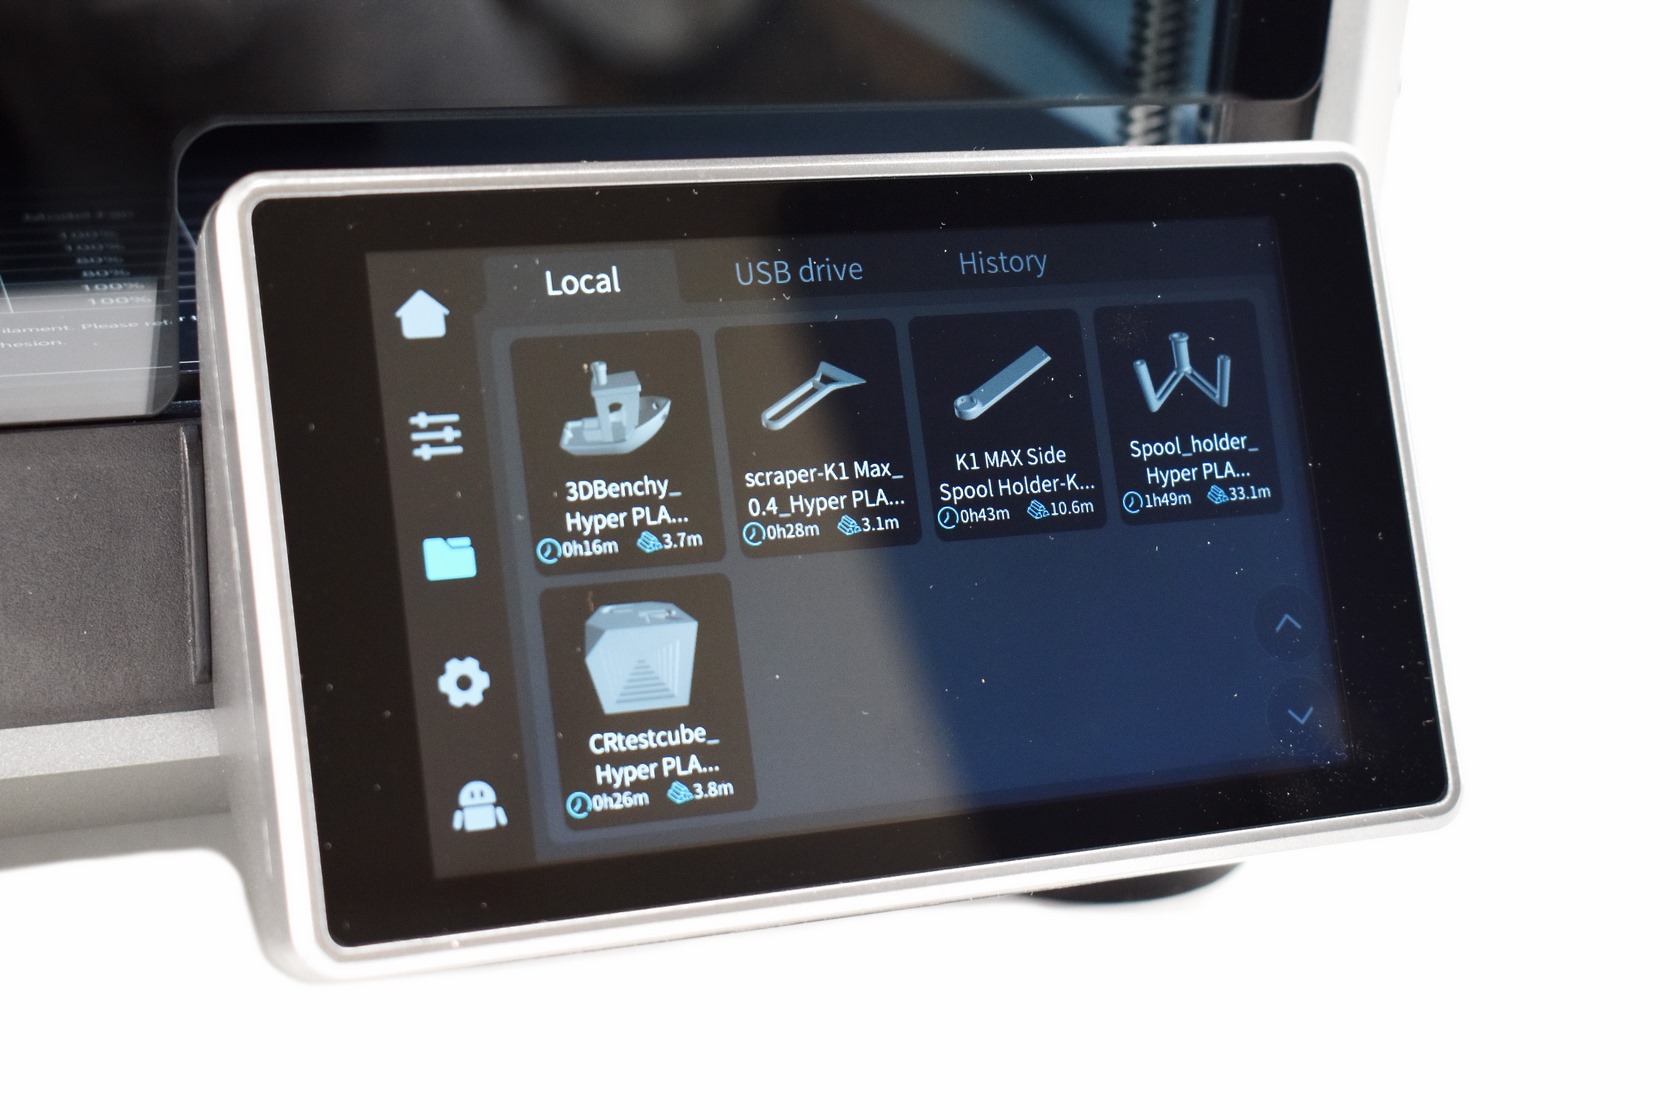
From the third tab you can load models either from the onboard flash, the USB or the network.
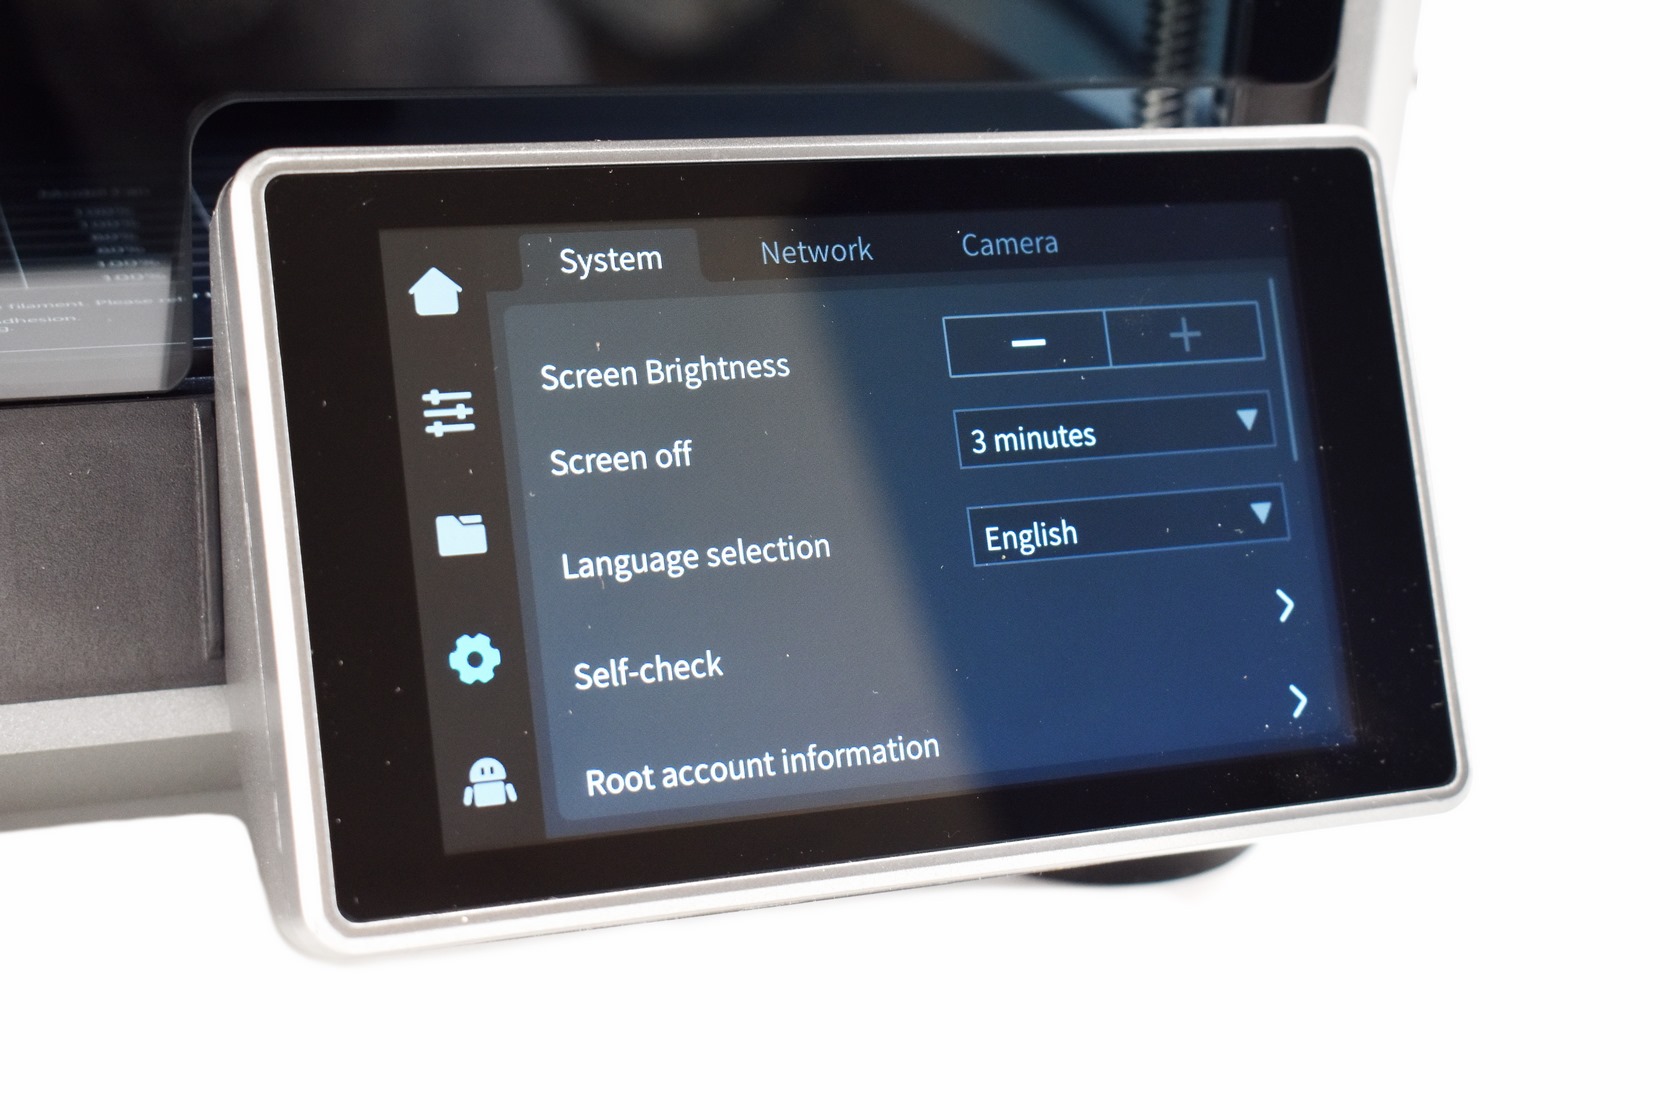
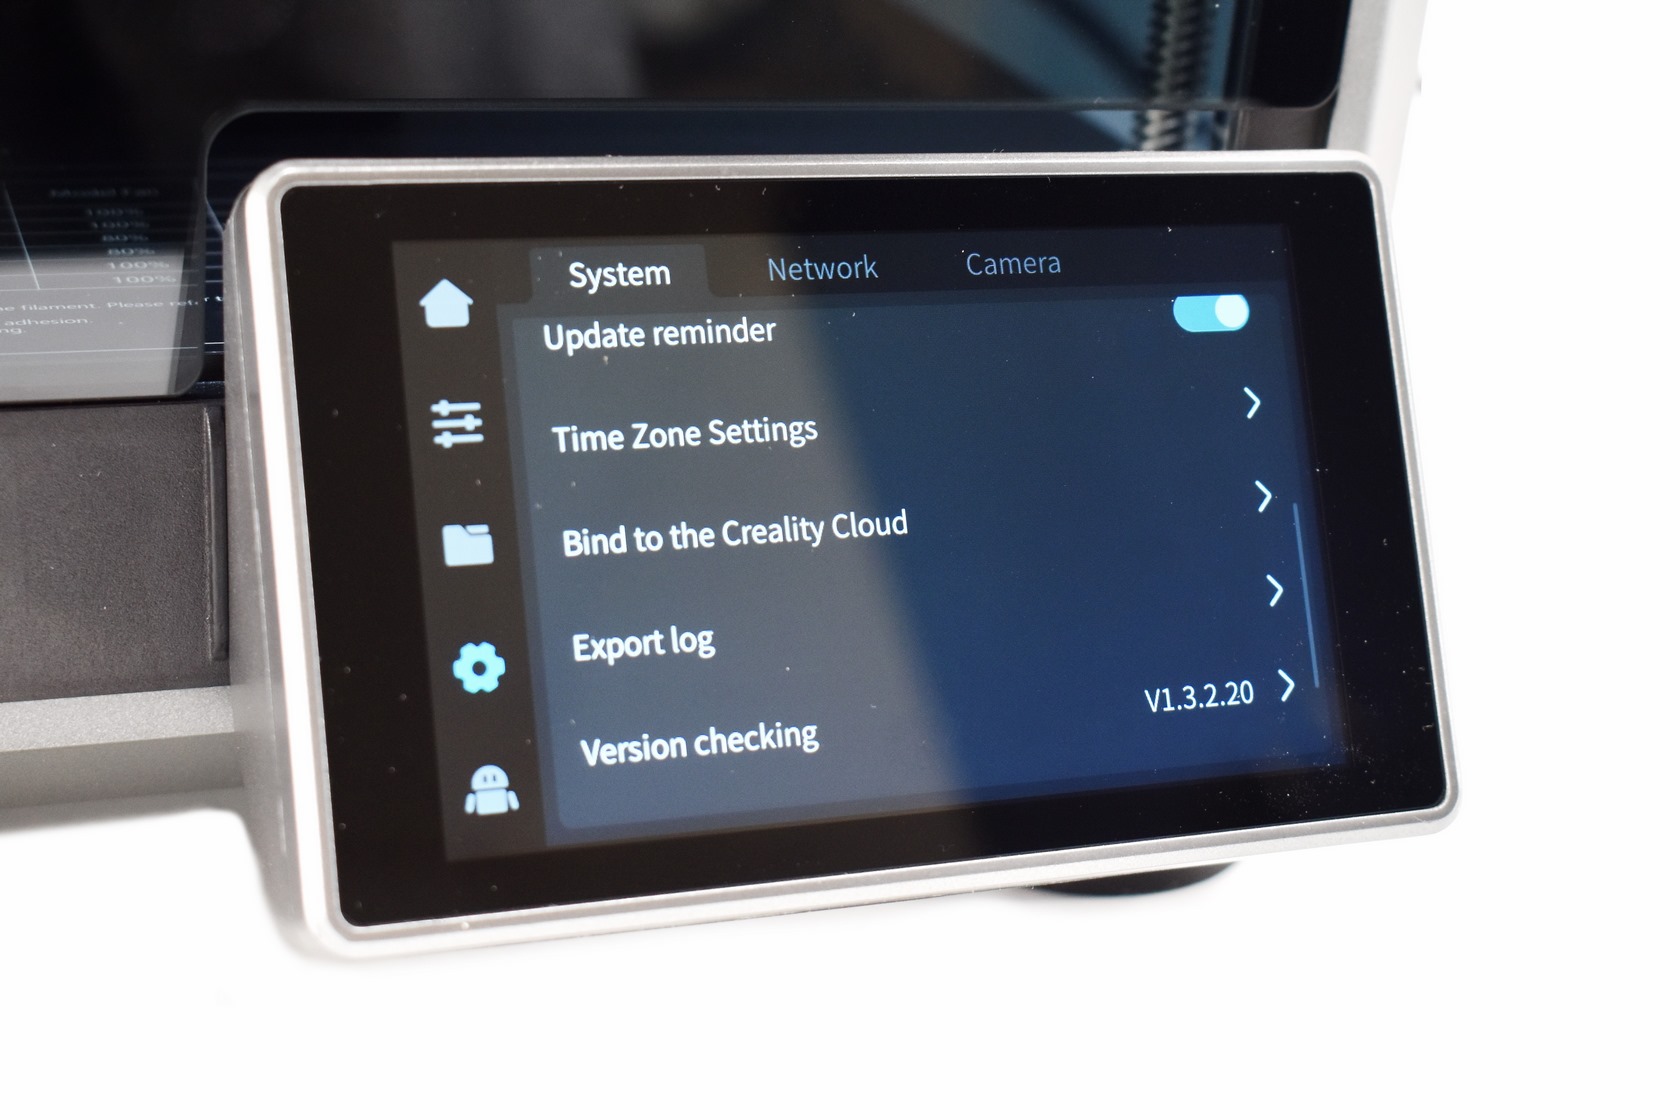

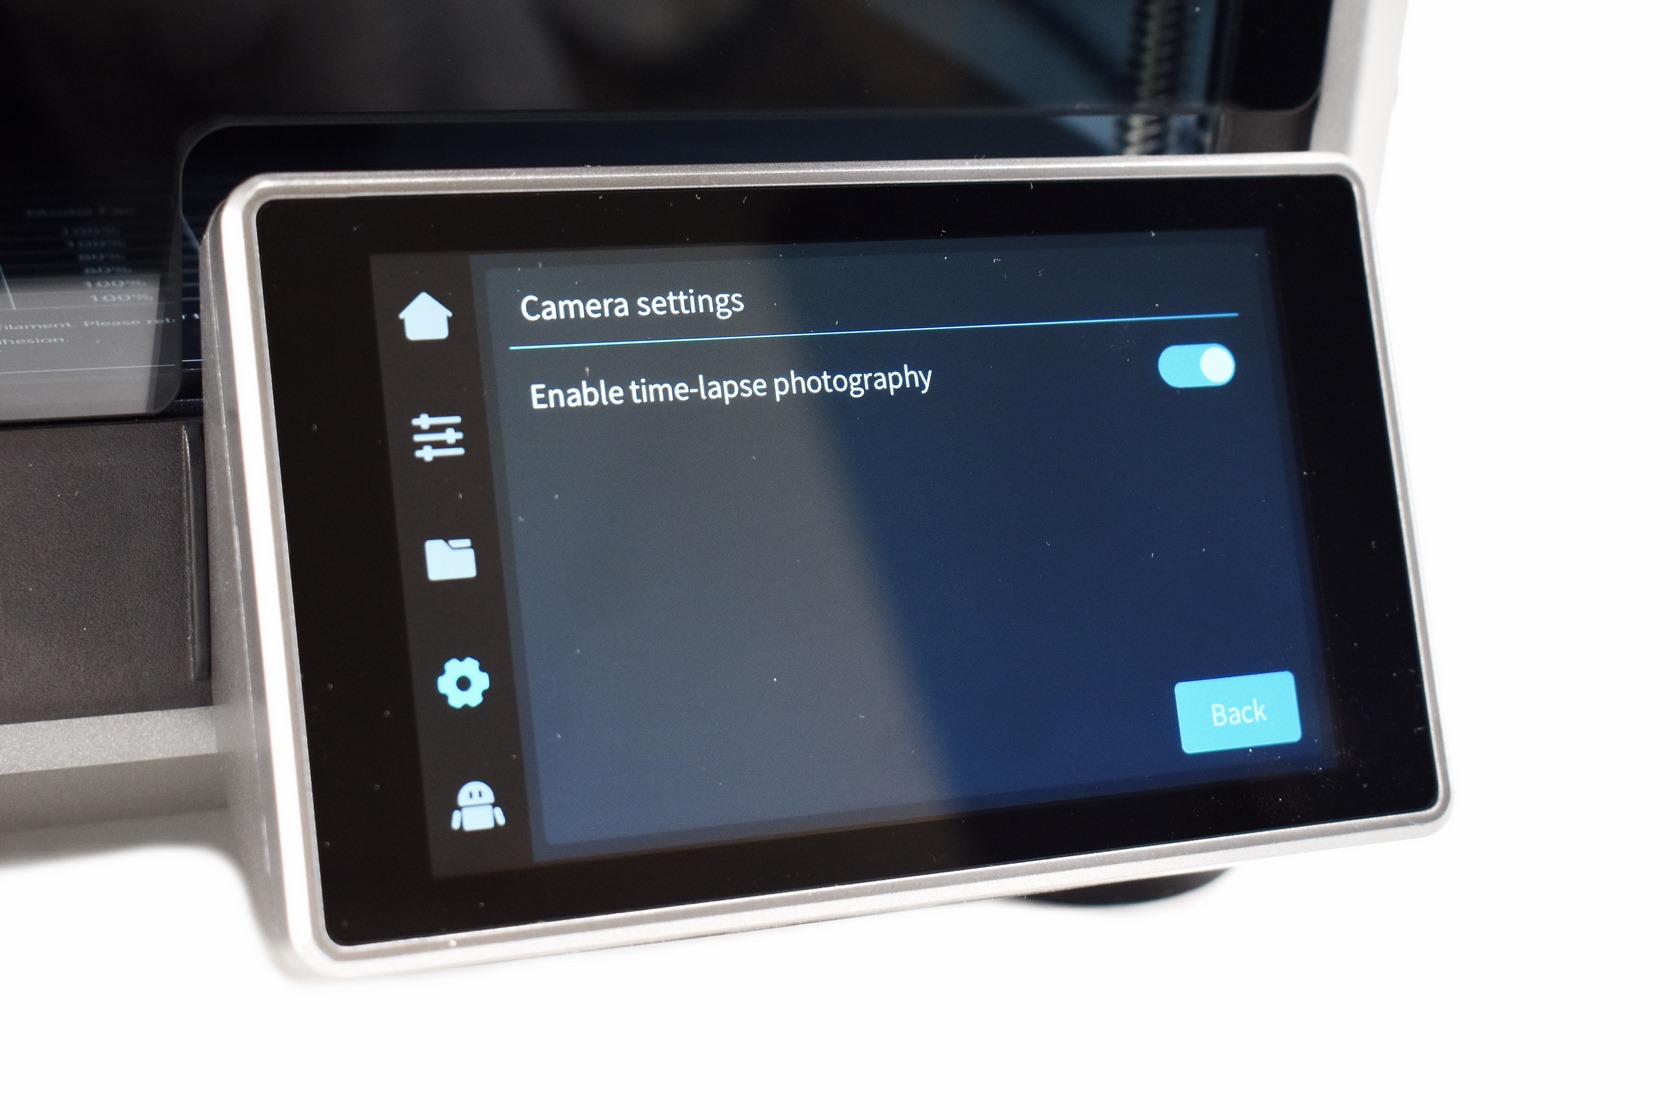
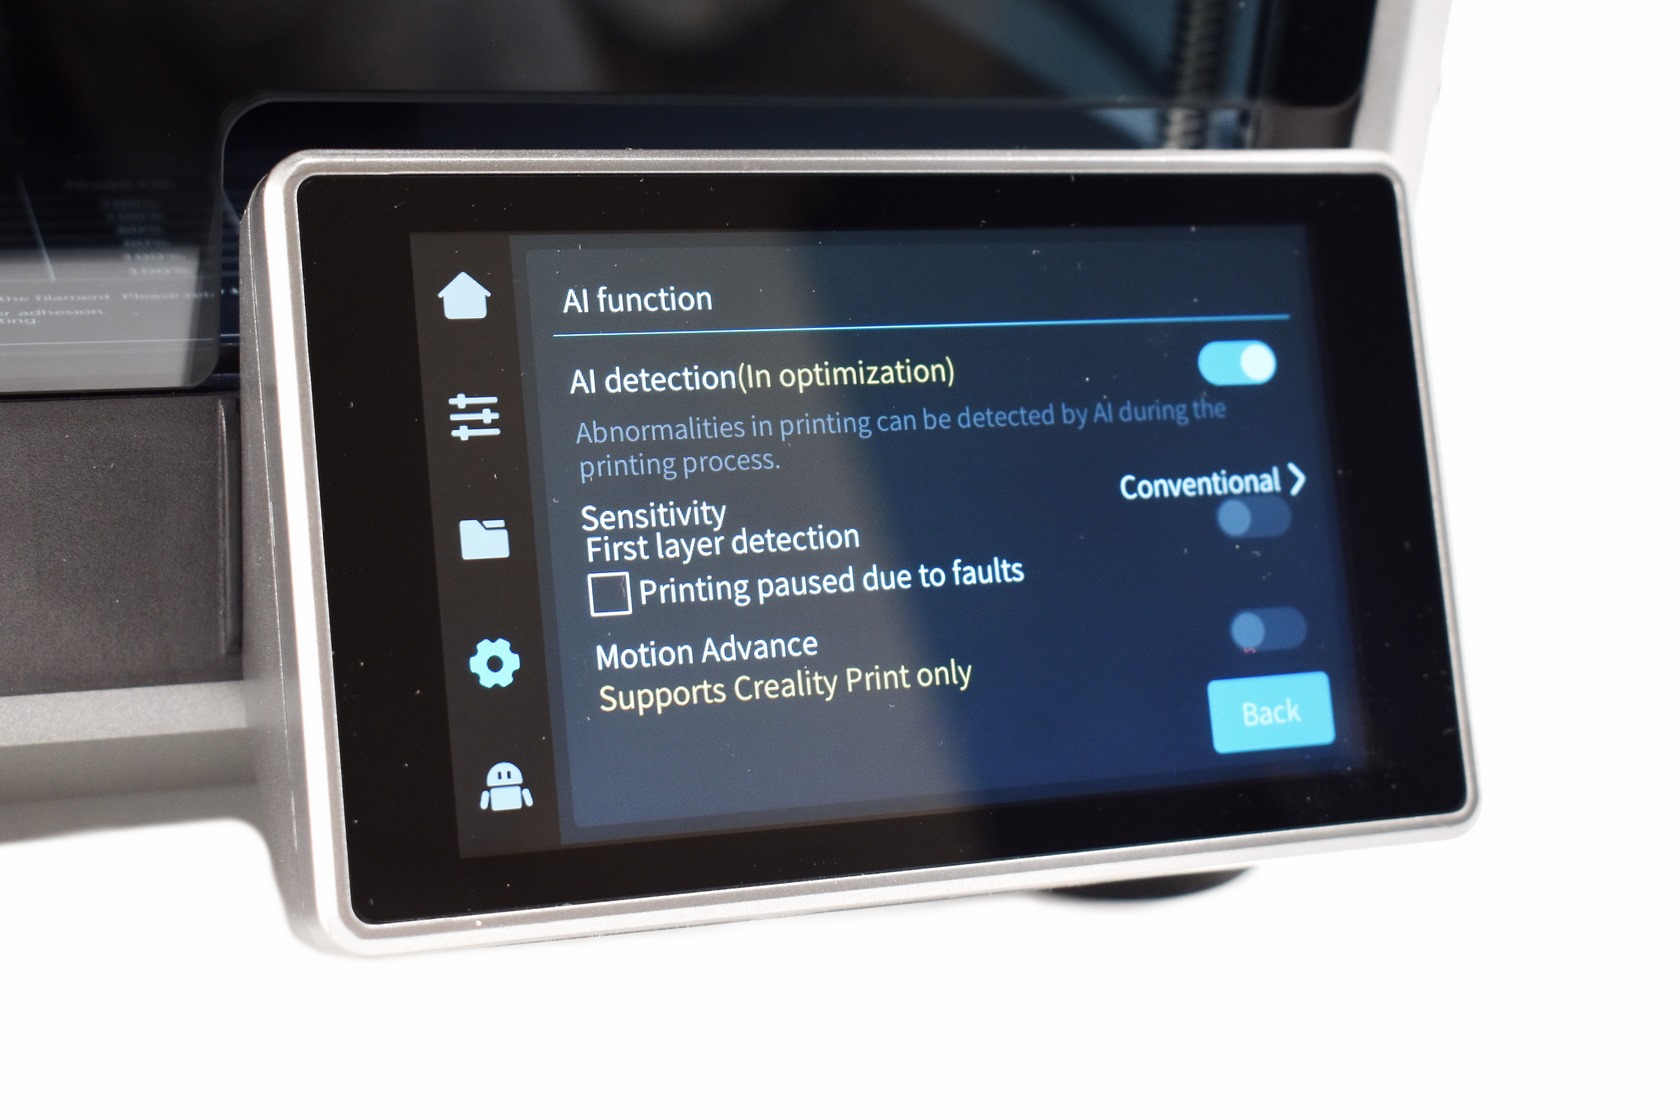 Moving to the fourth tab from here you can adjust screen brightness, setup screen timeout, select language, perform a printer self-check, display root information, set the time zone, bind the printer to your Creality cloud account, export logs, check the current firmware version and finally you can also access all of the AI cameras settings (time-lapse is what really stands out).
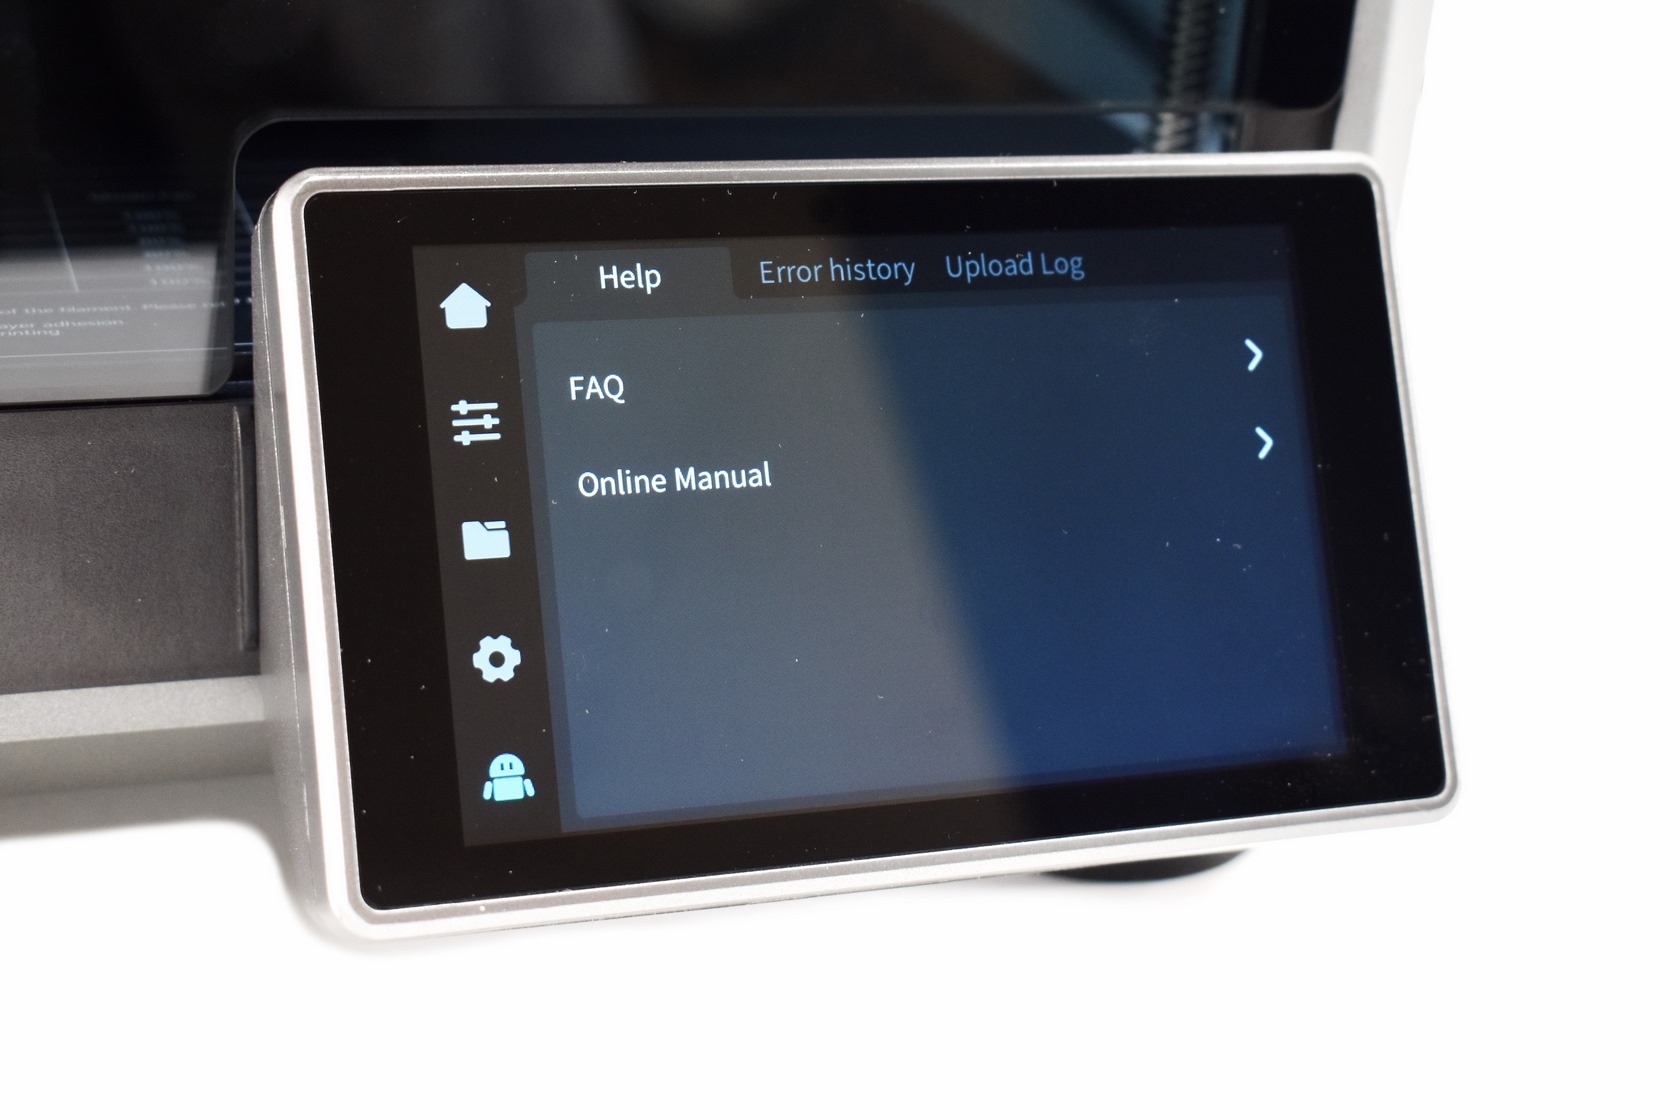
Finally, from the last tab you can access the FAQ and the online manual, check error history and upload logs.
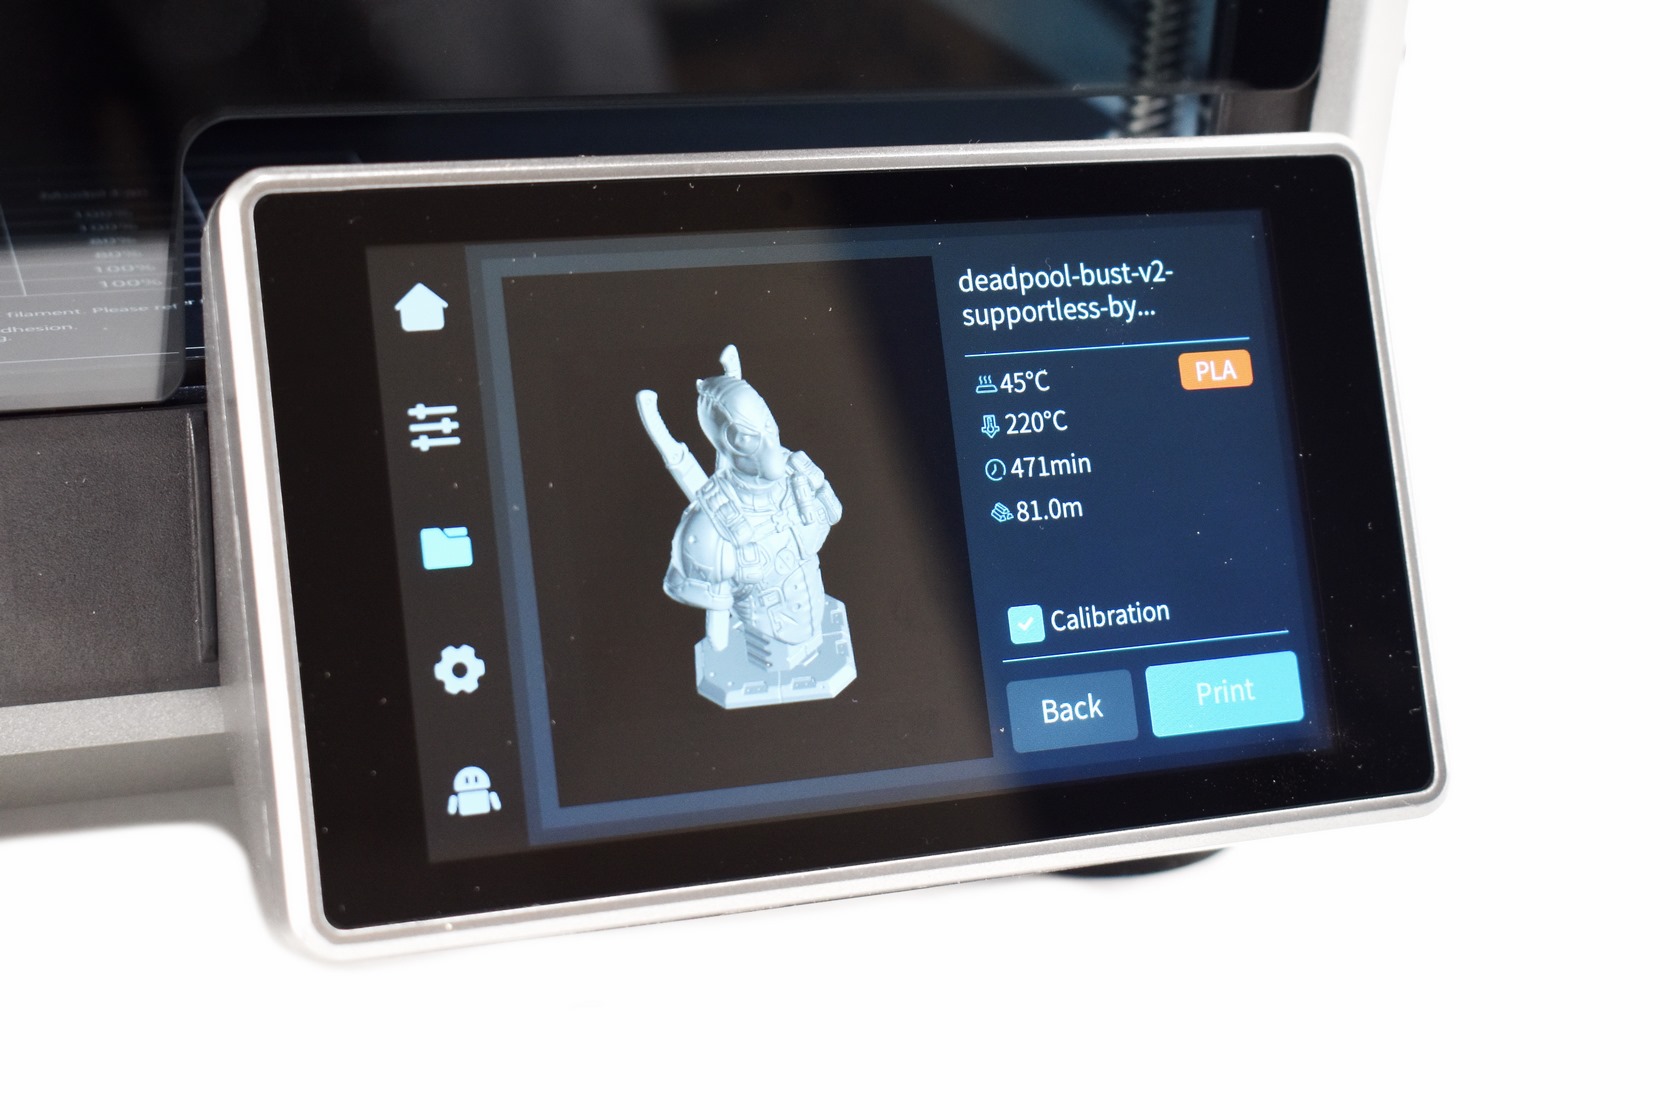
When you load a model you'll get the completion time, filament type, temperature and even a picture of the model which starts to fill according to print percentage (calibration is not really needed every time you do a print job - take note that this is not included in the completion time).