


INTRODUCTION
3D printing is clearly one of the most interesting technologies in the electronics industry today and with all the latest developments (some even announced in this year's CES) things will only improve significantly as time goes by. Yes, 3D printing is by no means perfect (printing bugs and limitations in regards to total printing surface, material and speed) but we are currently at a much better place compared to even 3-4 years ago in just about everything. For example, rather large, high-speed 3D printers for the consumer market are now coming out in numbers and one of the best in the around $1000/1000Euros category is no other than the K1 Max by Creality which I’ve been using for almost 3 weeks now.
Shenzhen Creality 3D Technology Co., Ltd., known as Creality, is a world-leading brand of consumer 3D printers. Since our establishment in 2014, we have embraced our role as an "3D Printing Evangelist" committed to the innovation, application, and popularization of 3D printing technology worldwide. Our forward-looking business strategy, termed "One Core with Two Wings," has propelled our rapid growth. Specifically, 3D printer products are at the “Core” of our business, which is assisted by the first “Wing” of ecosystem products like 3D scanners, laser engravers, filaments, and accessories. A second “Wing” of our business is Creality Cloud, an all-in-one 3D printing platform that gathers 3D models and enables a cloud printing experience.
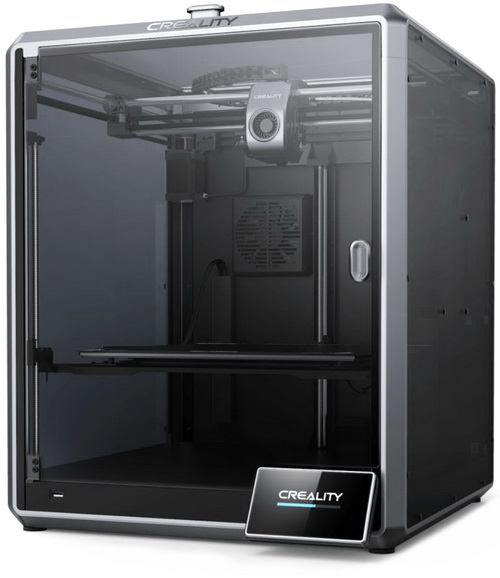
The K1 line currently includes the K1 and the K1 Max which is obviously the top-end model of the line. Both of these FDM (Fused Deposition Modelling) 3D printers share quite a few things including a die cast aluminum enclosure with tempered glass panels, flexible and heated print plate, 4.3″ color touchscreen display, WiFi connectivity, CoreXY design, dual-gear direct drive, ventilation fan, USB 2.0 port, printing accuracy of 100±0.1mm, filament diameter of 1.75mm, print speeds up to 600mm/s and acceleration of up to 20000mm/s². What does change is build volume (220x220x250mm for the K1 and 300x300x300mm for the K1 Max), nozzle material (copper alloy for the K1 and hardened steel for the K1 Max), bed leveling type (hands free for the K1 and dual hands free for the K1 Max), RJ45 ethernet connectivity, power supply output (350W for the K1 and 1000W for the K1 Max), carbon air filter (for the ventilation fan) and extra components like an AI Camera and an AI LiDAR sensor (optional for the K1, standard for the K1 Max). So even though both models aren't light years apart the K1 Max does seem to deliver more and so let's see if that's really the case.
SPECIFICATIONS AND FEATURES

PACKAGING AND CONTENTS

As expected Creality is using a plain cardboard box to ship the K1 Max the front and rear of which are taken by a product drawing.

Contact information for Creality is located on both sides.

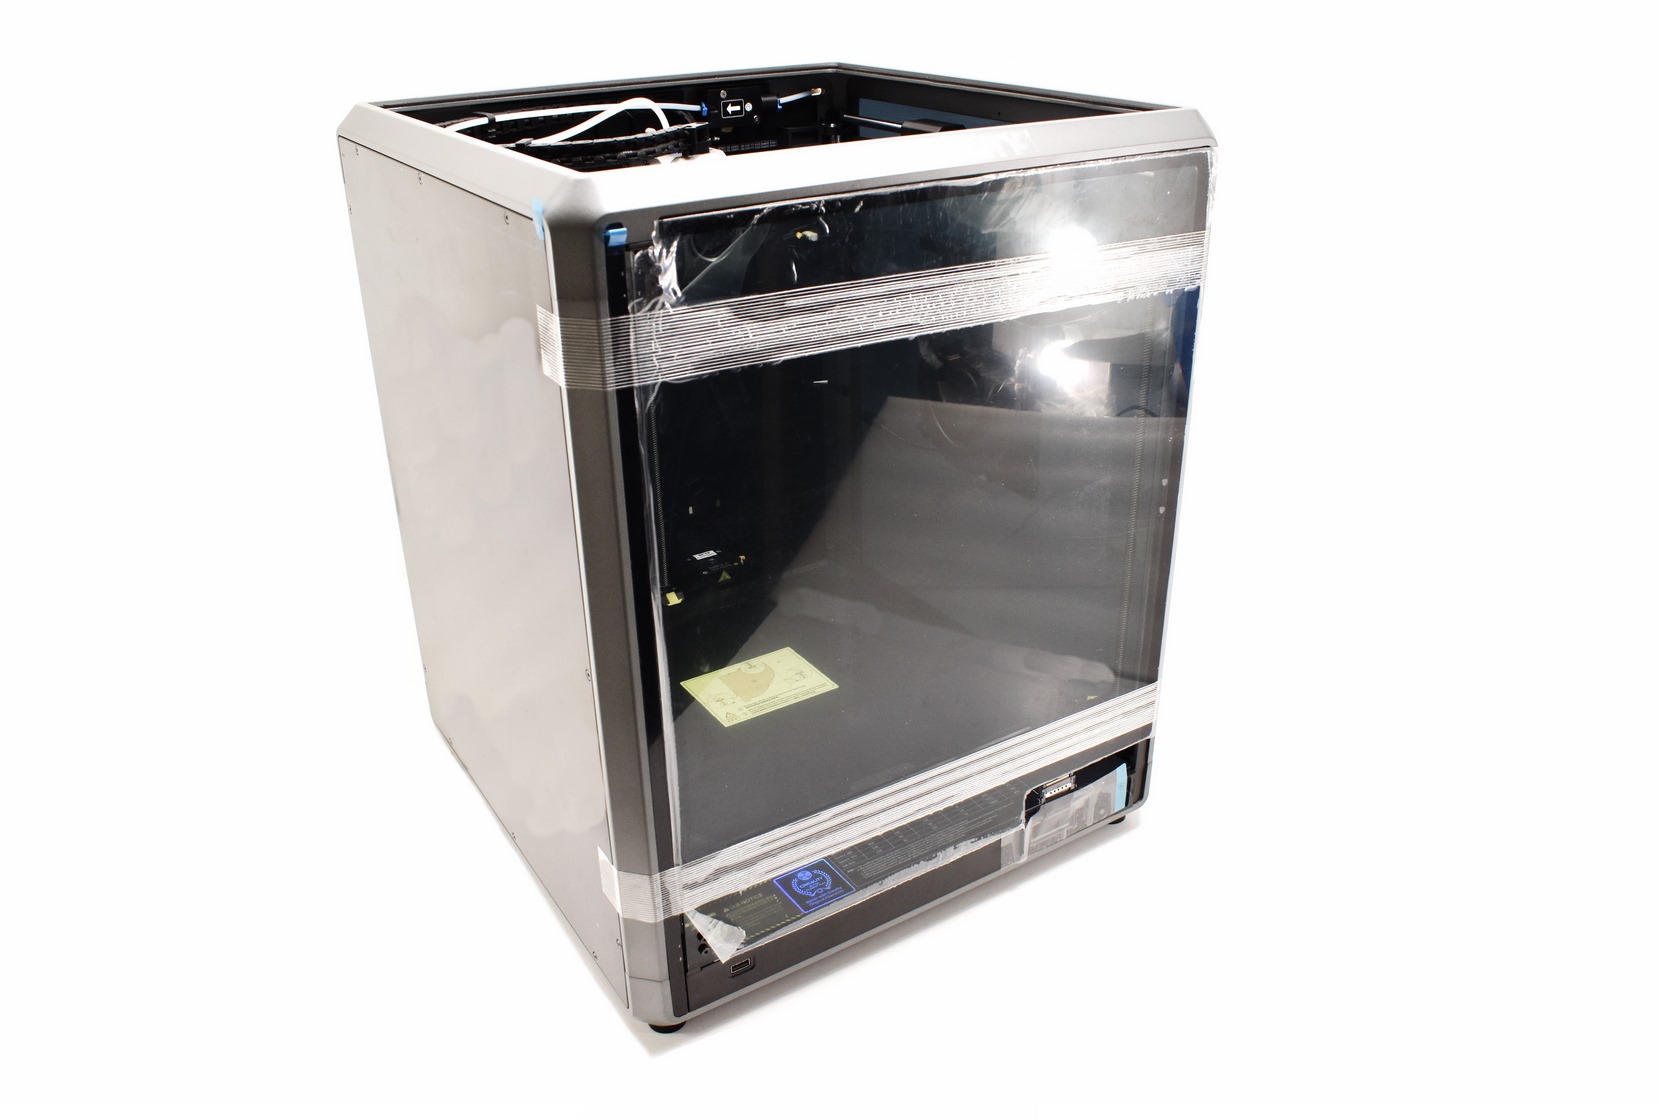
Creality has secured the printer with the help of several pieces of foam.
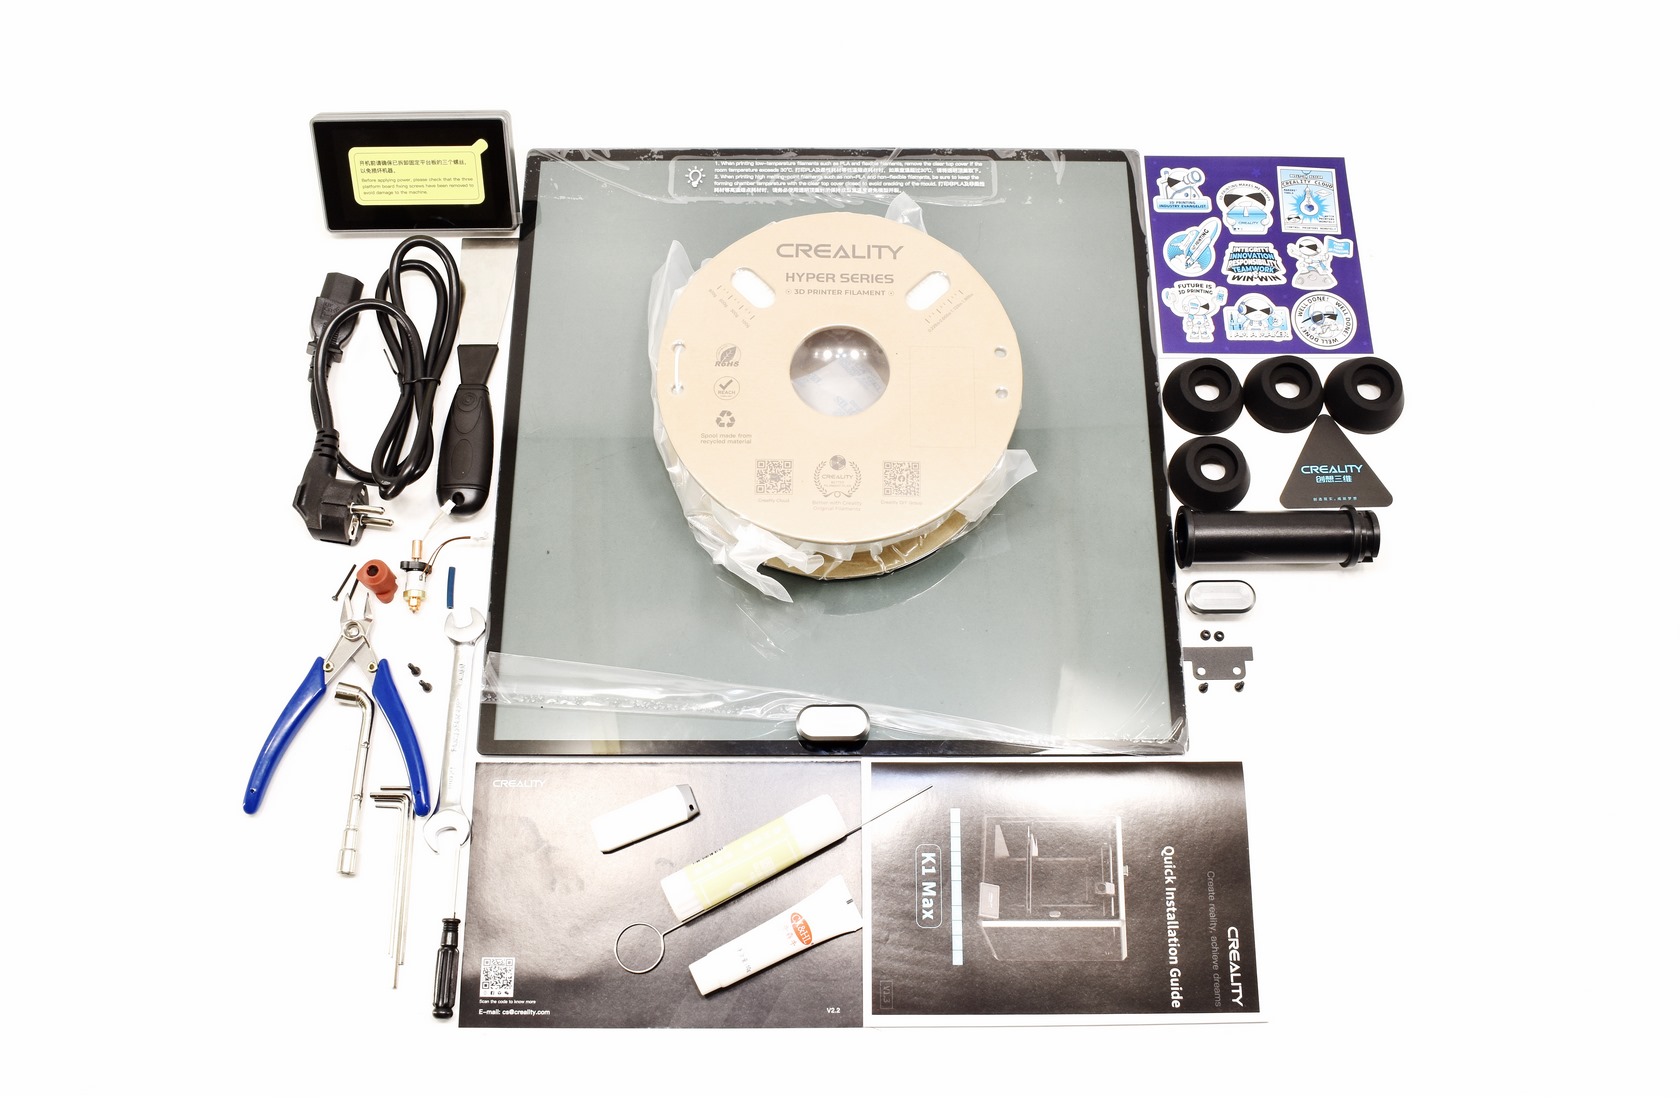
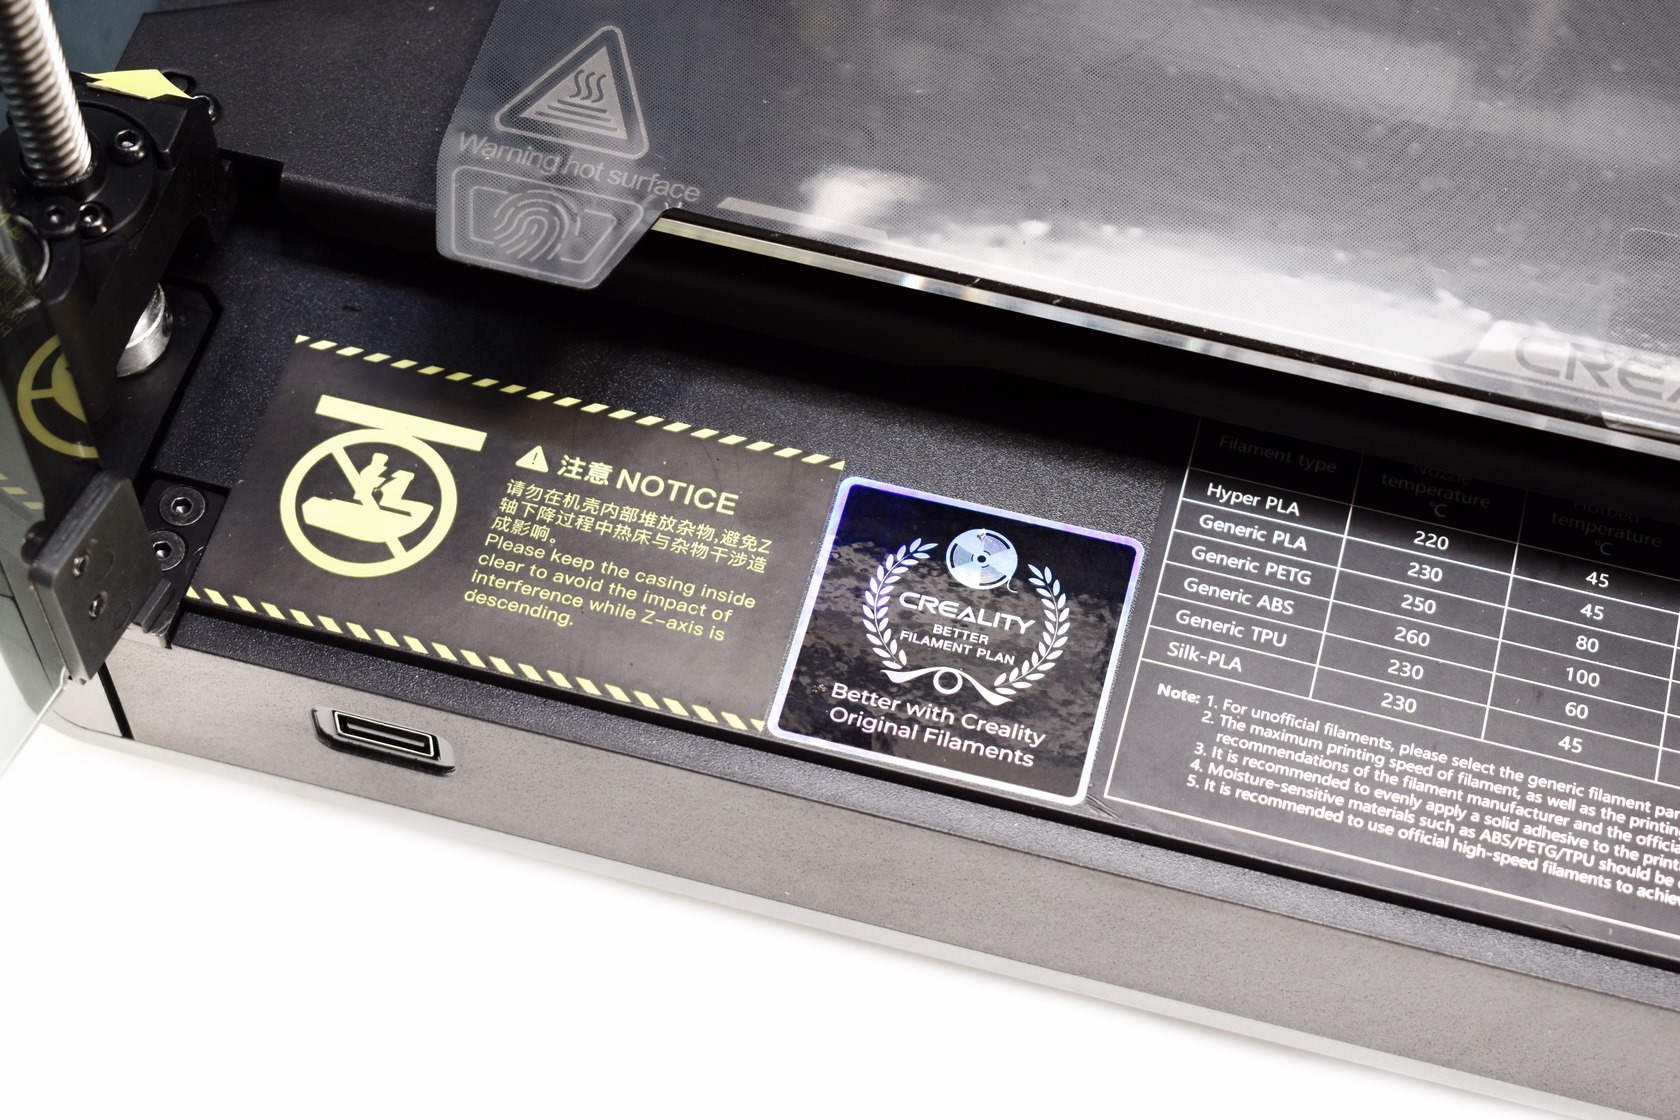
Along with the main body of the K1 Max inside the package you'll also find the 4.3" touchscreen display, power cable, hyper series filament, filament cutter, tempered glass top cover, filament spool holder, front door handle, spare nozzle, nozzle cleaning tool, 4 rubber feet, scraper, glue stick, USB 2.0 stick, spare parts kit, several stickers, Creality paper logo, quick installation guide and a thank you paper.
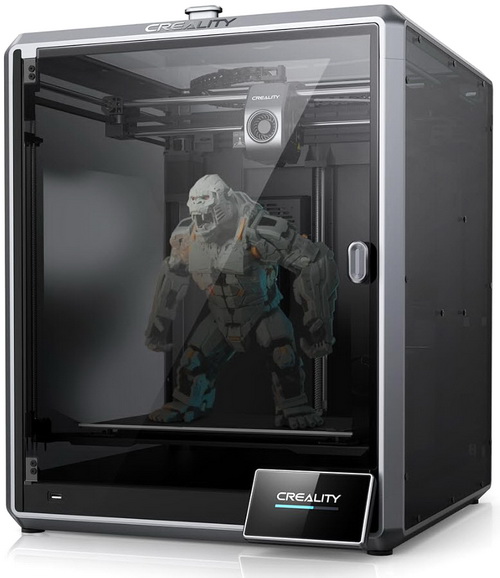
THE K1 MAX
The K1 Max enclosure features tempered glass side and front panels (top also) and unlike the X-Plus 3 by Qidi the structure is almost entirely made out of due cast aluminum.
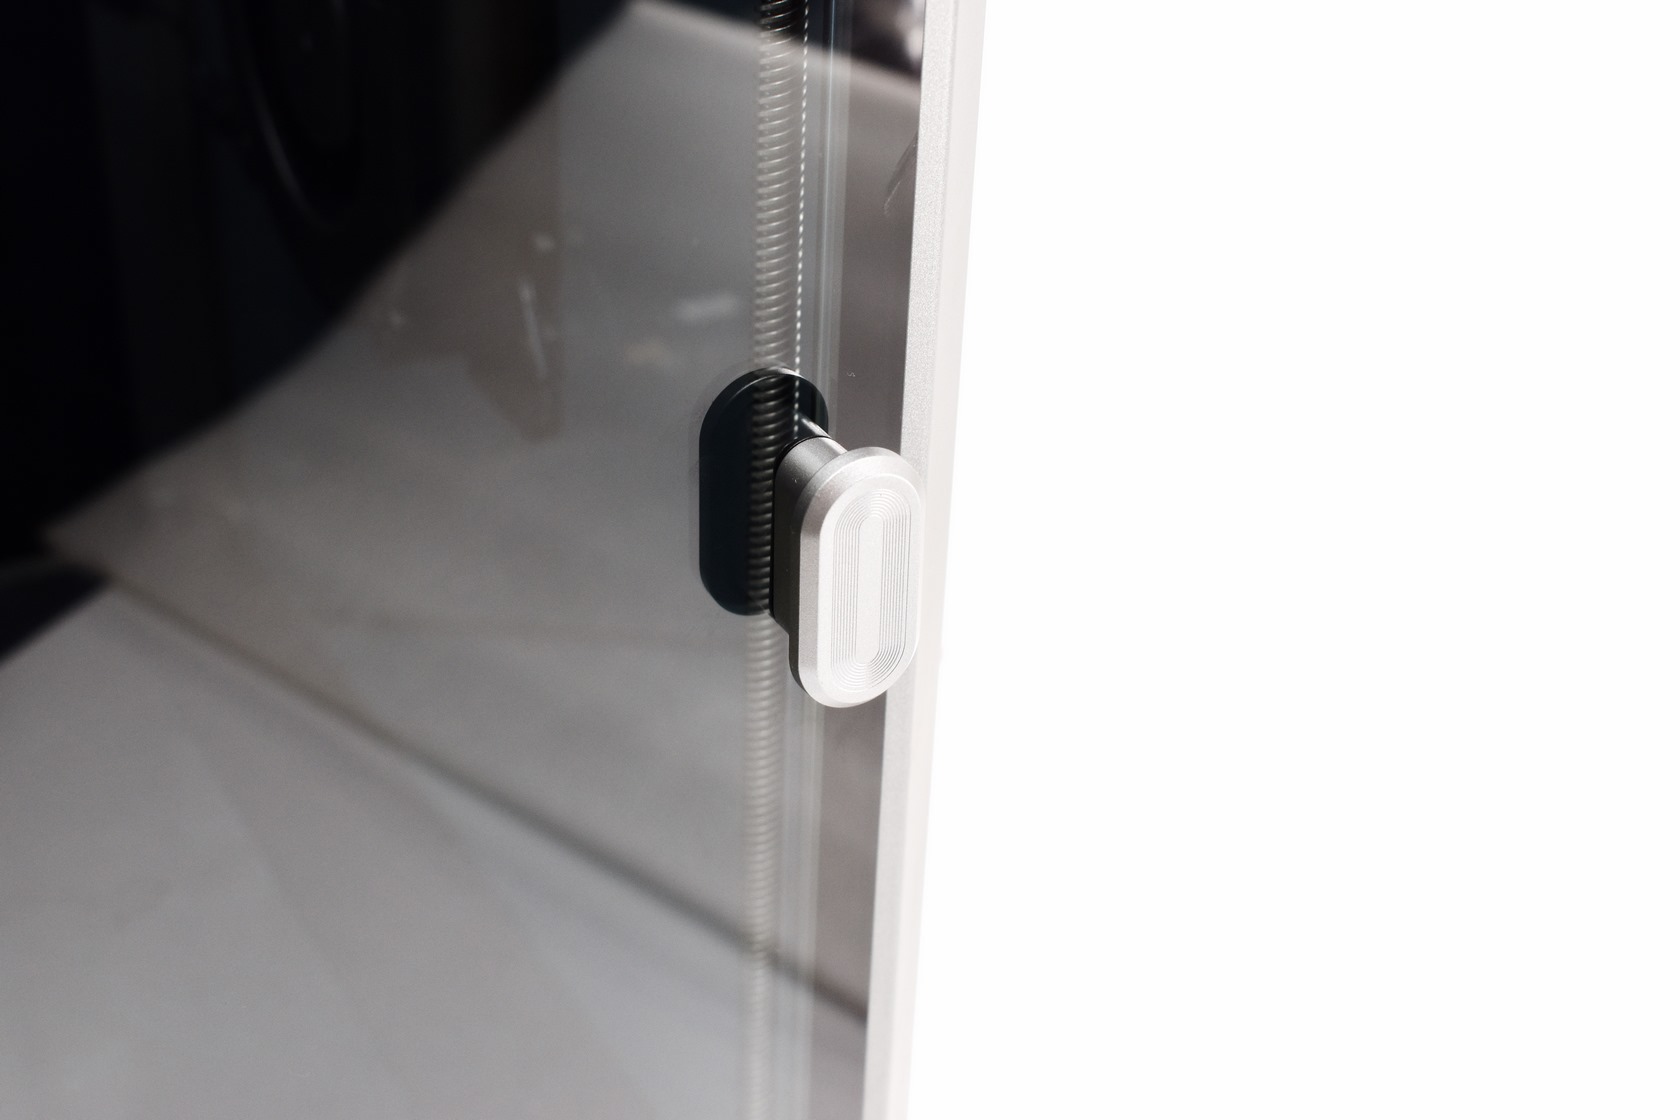
Right from the box the front door handle is not mounted so you will to mount it yourself.
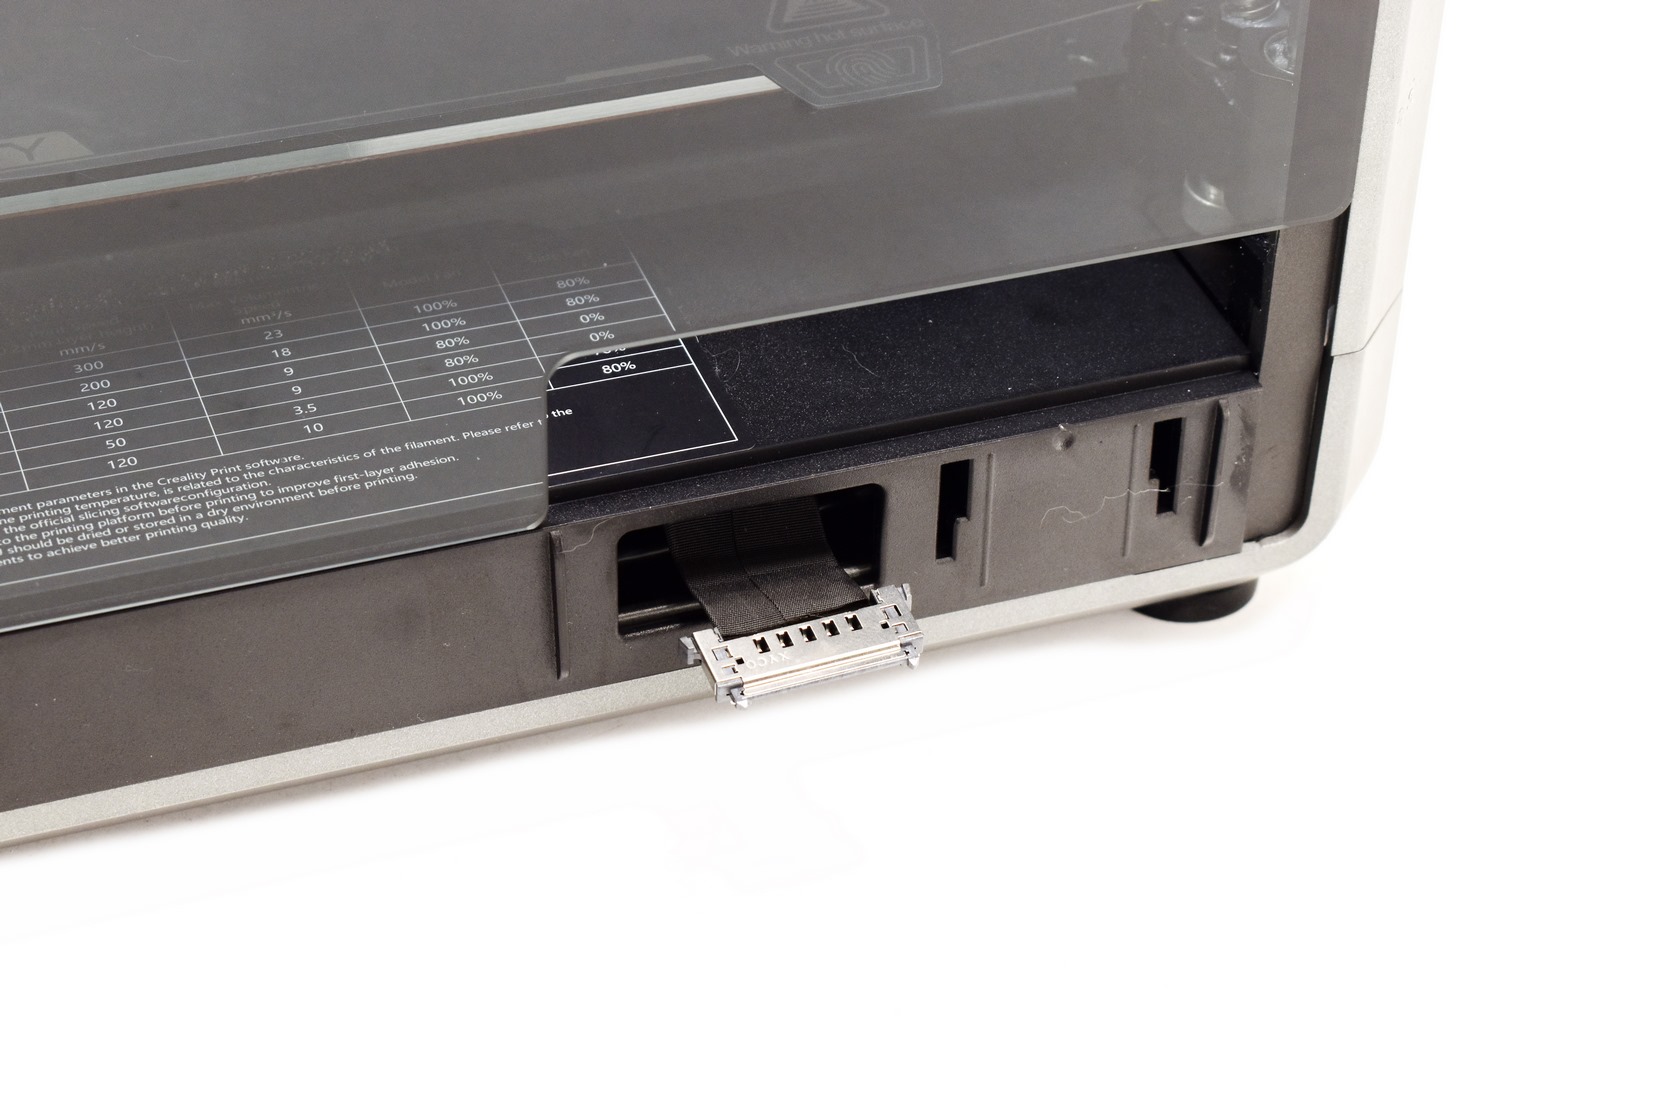
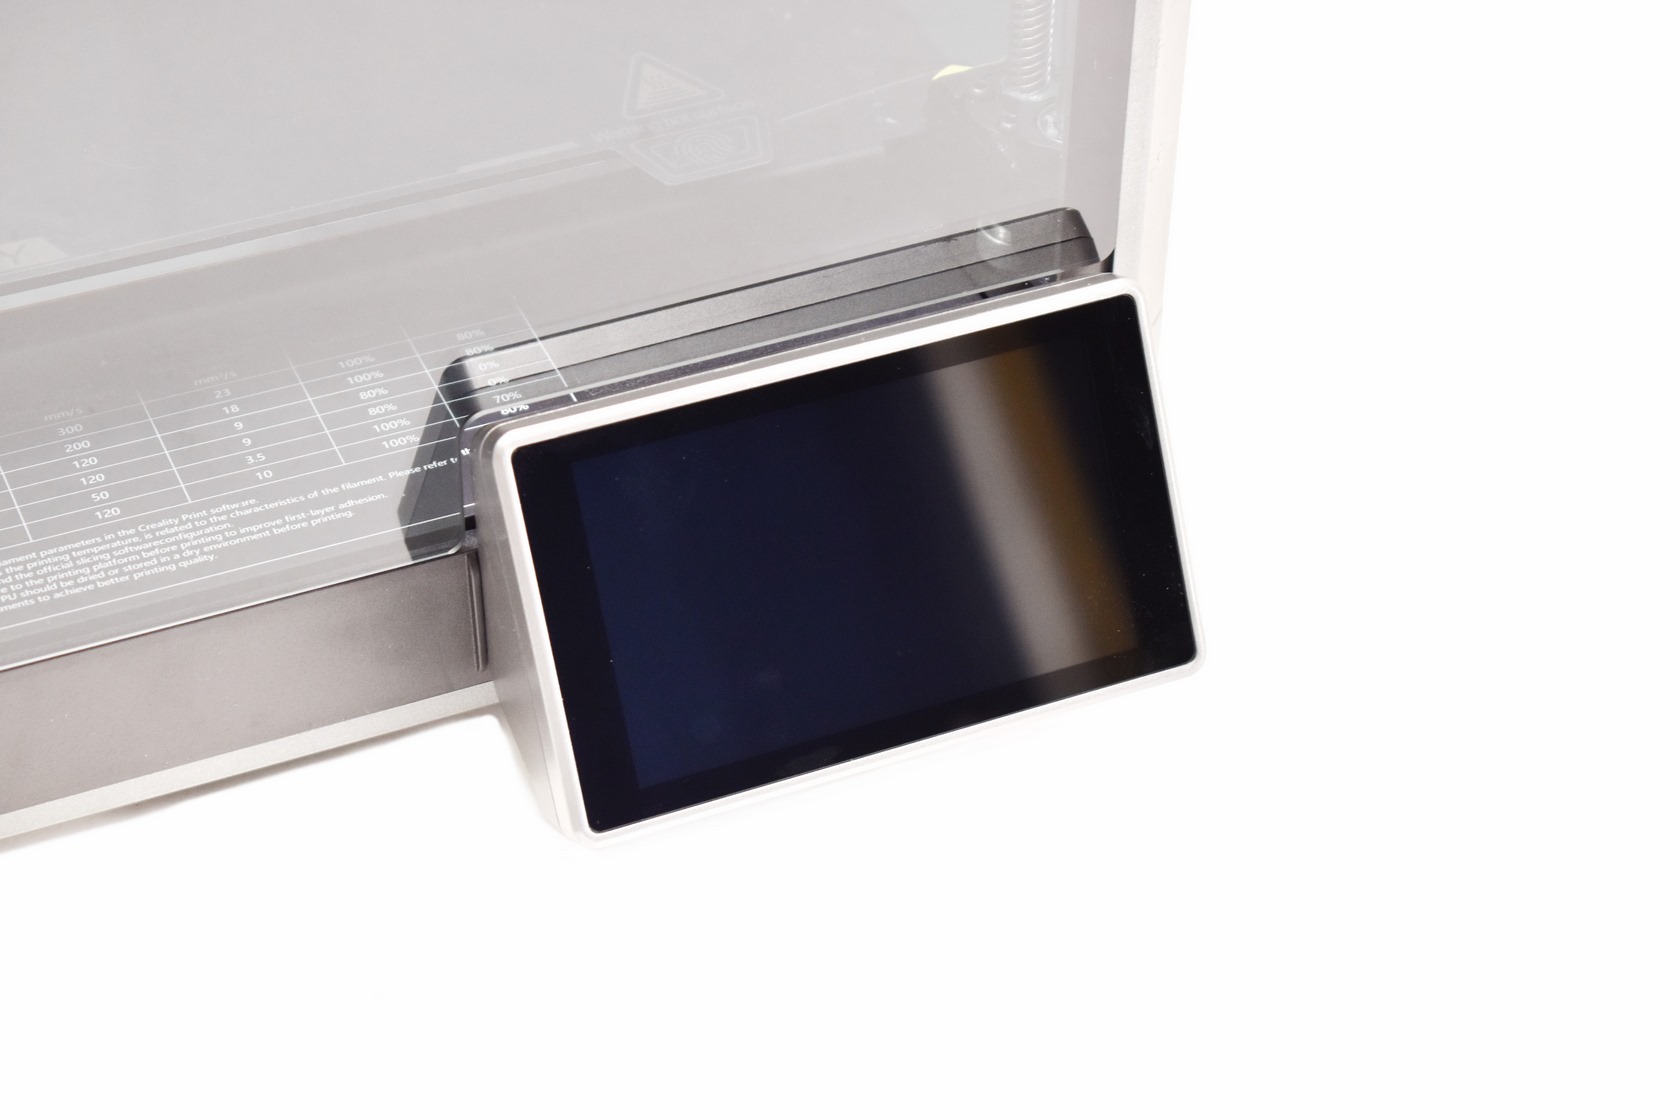 Same goes for the 4.3" touchscreen display which you will need to attach to the cable seen above.
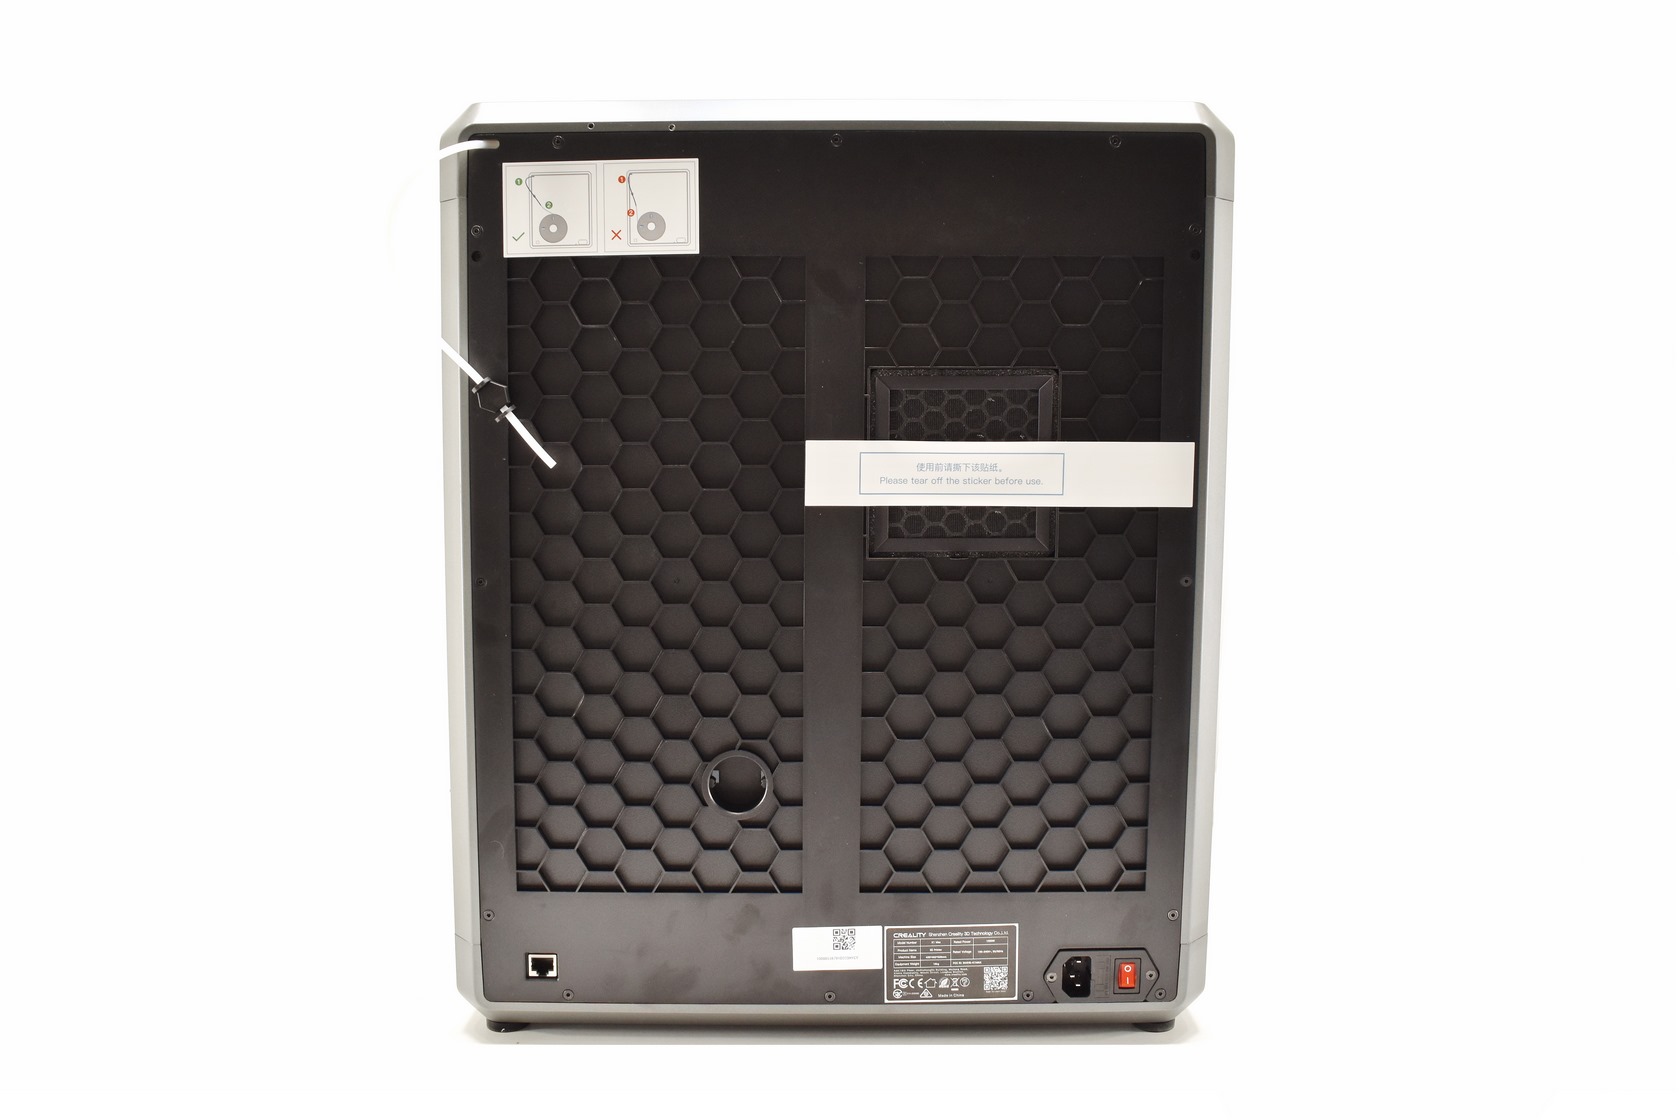
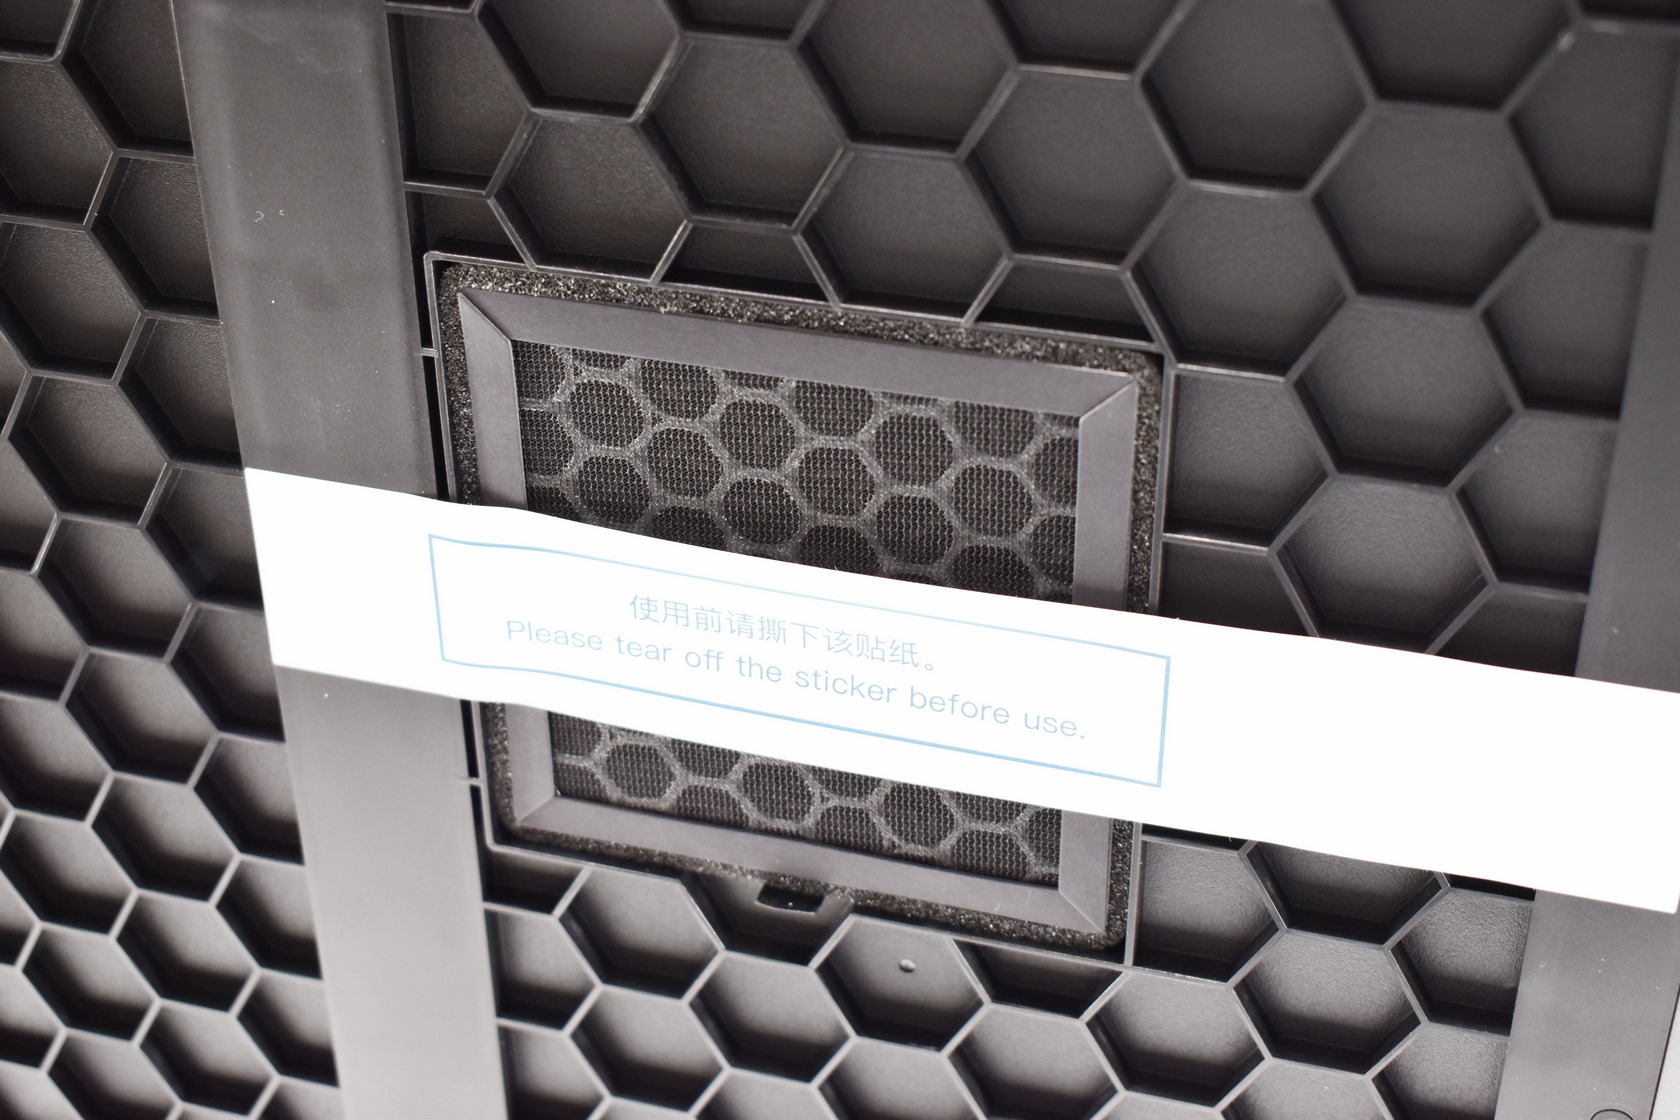
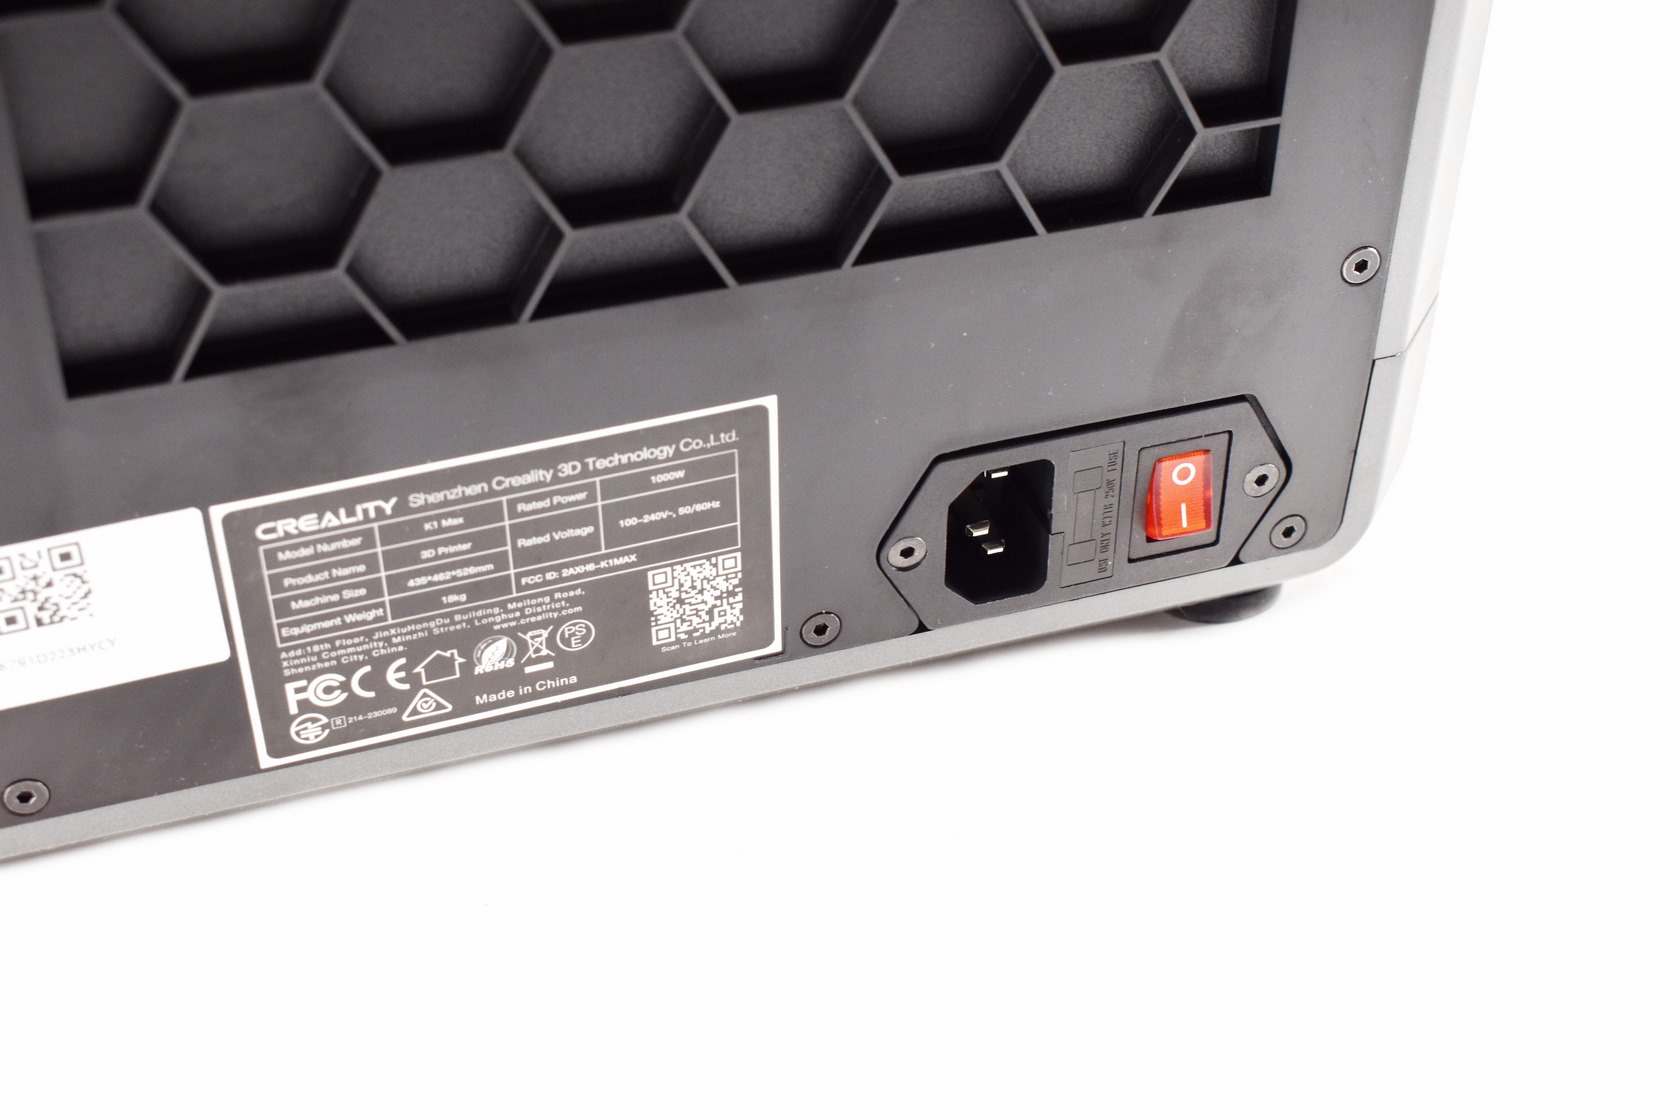 Turning the enclosure around we find the carbon air filter, RJ45 ethernet port, filament spool holder mount, on/off power switch and the power port with a replaceable fuse.
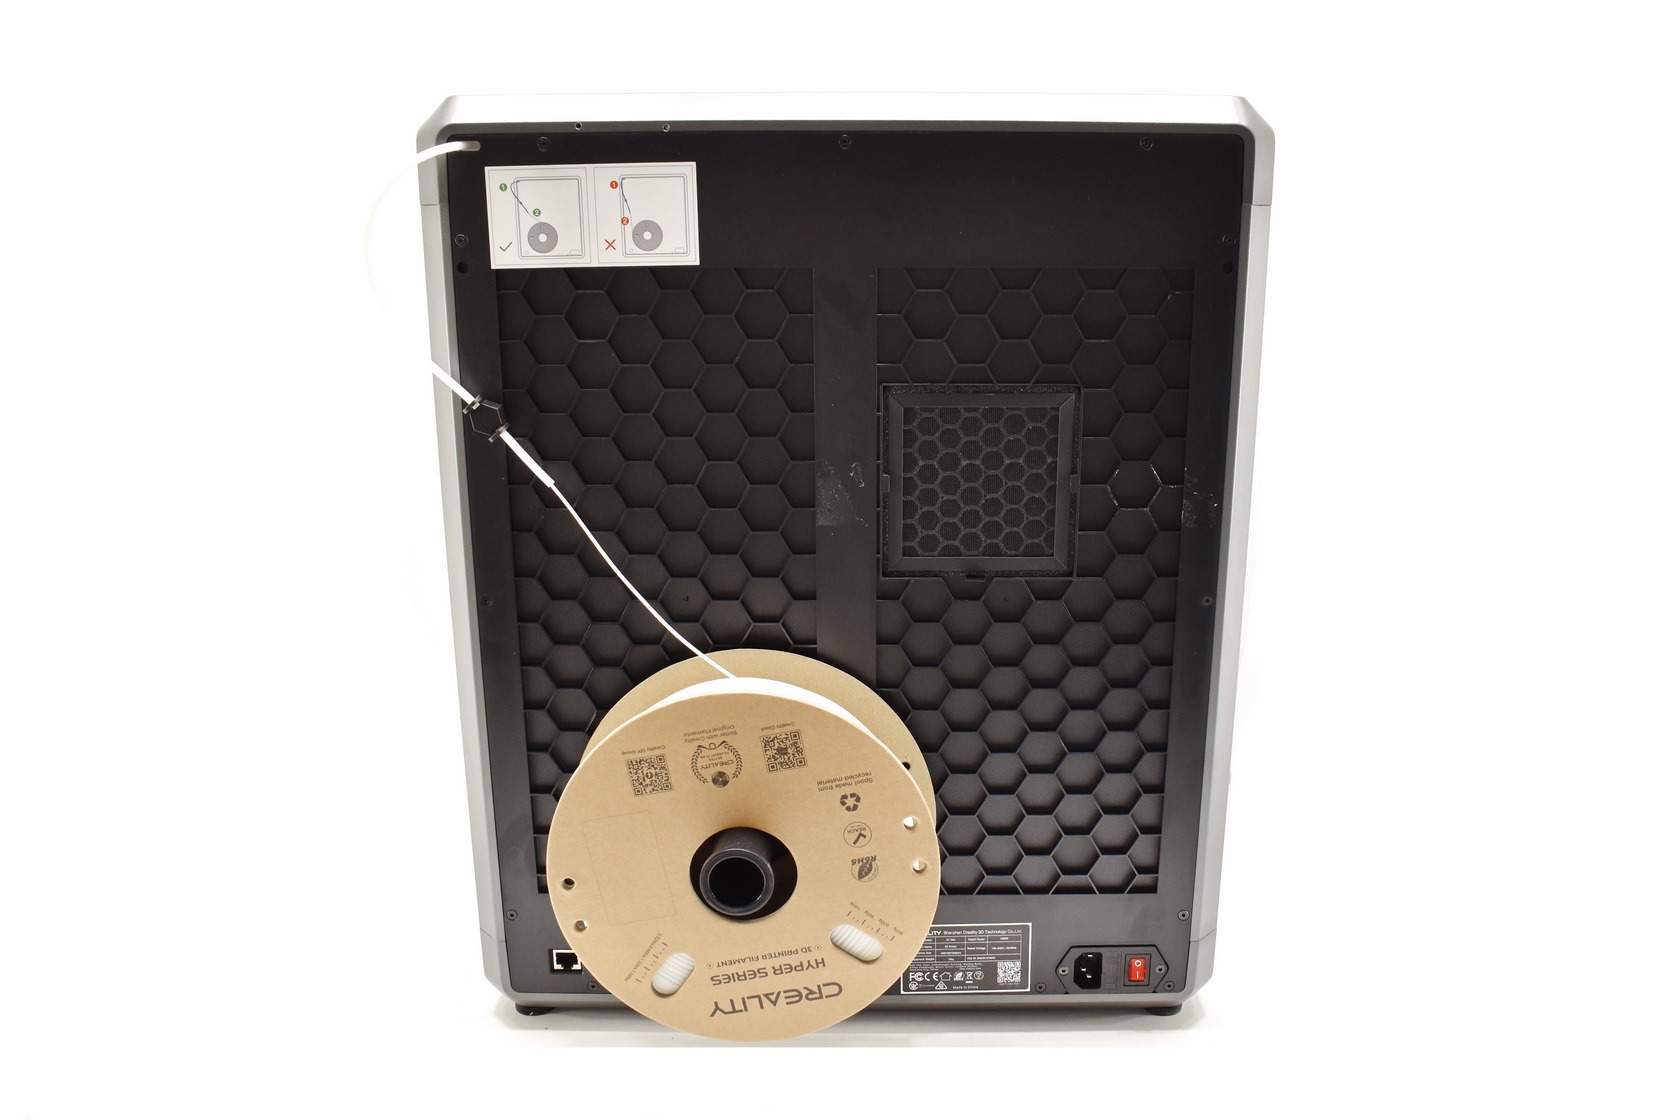 Attaching the filament spool holder and the filament comes next obviously.
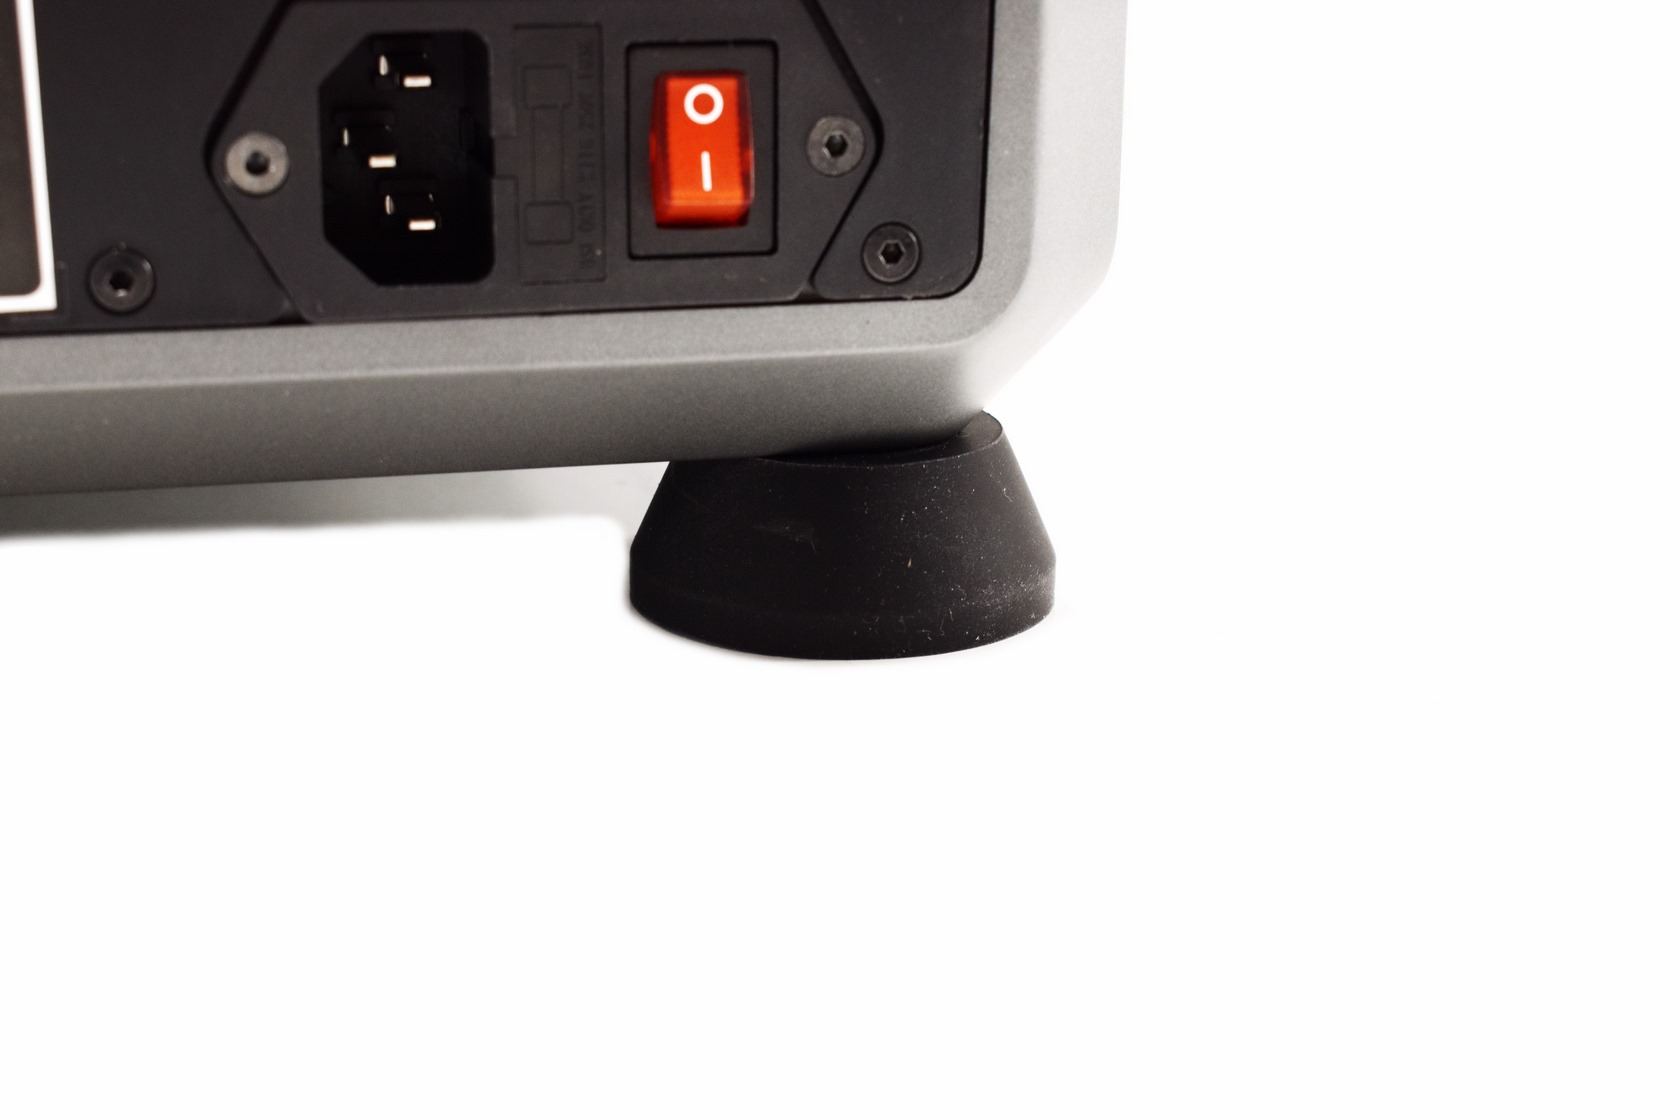
Since almost like the X-Plus 3 by Qidi vibrations is an issue with the K1 Max don't forget to attach the rubber feet as seen above.
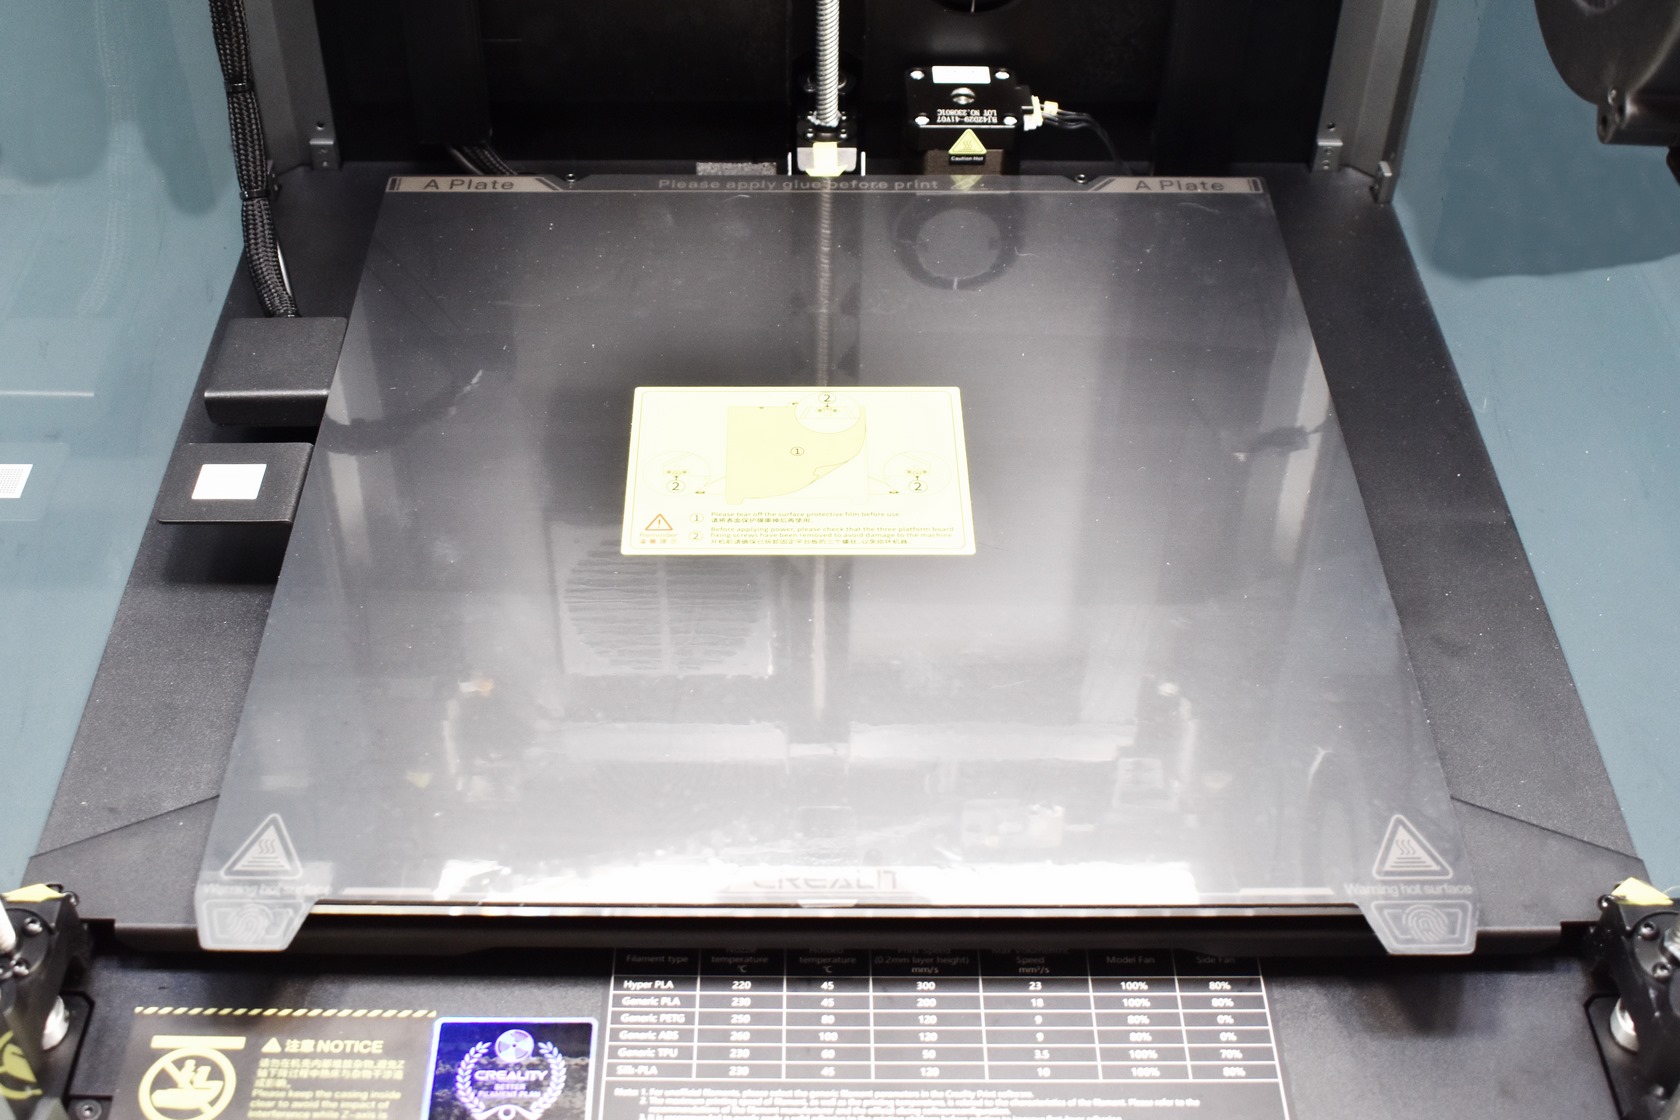
The flexible heated plate allows for print jobs up to 300x300x300mm in size.
At the front Creality lists the time and temperatures required for each type of filament (also that their filaments work best with their printers which is not surprising to be honest).

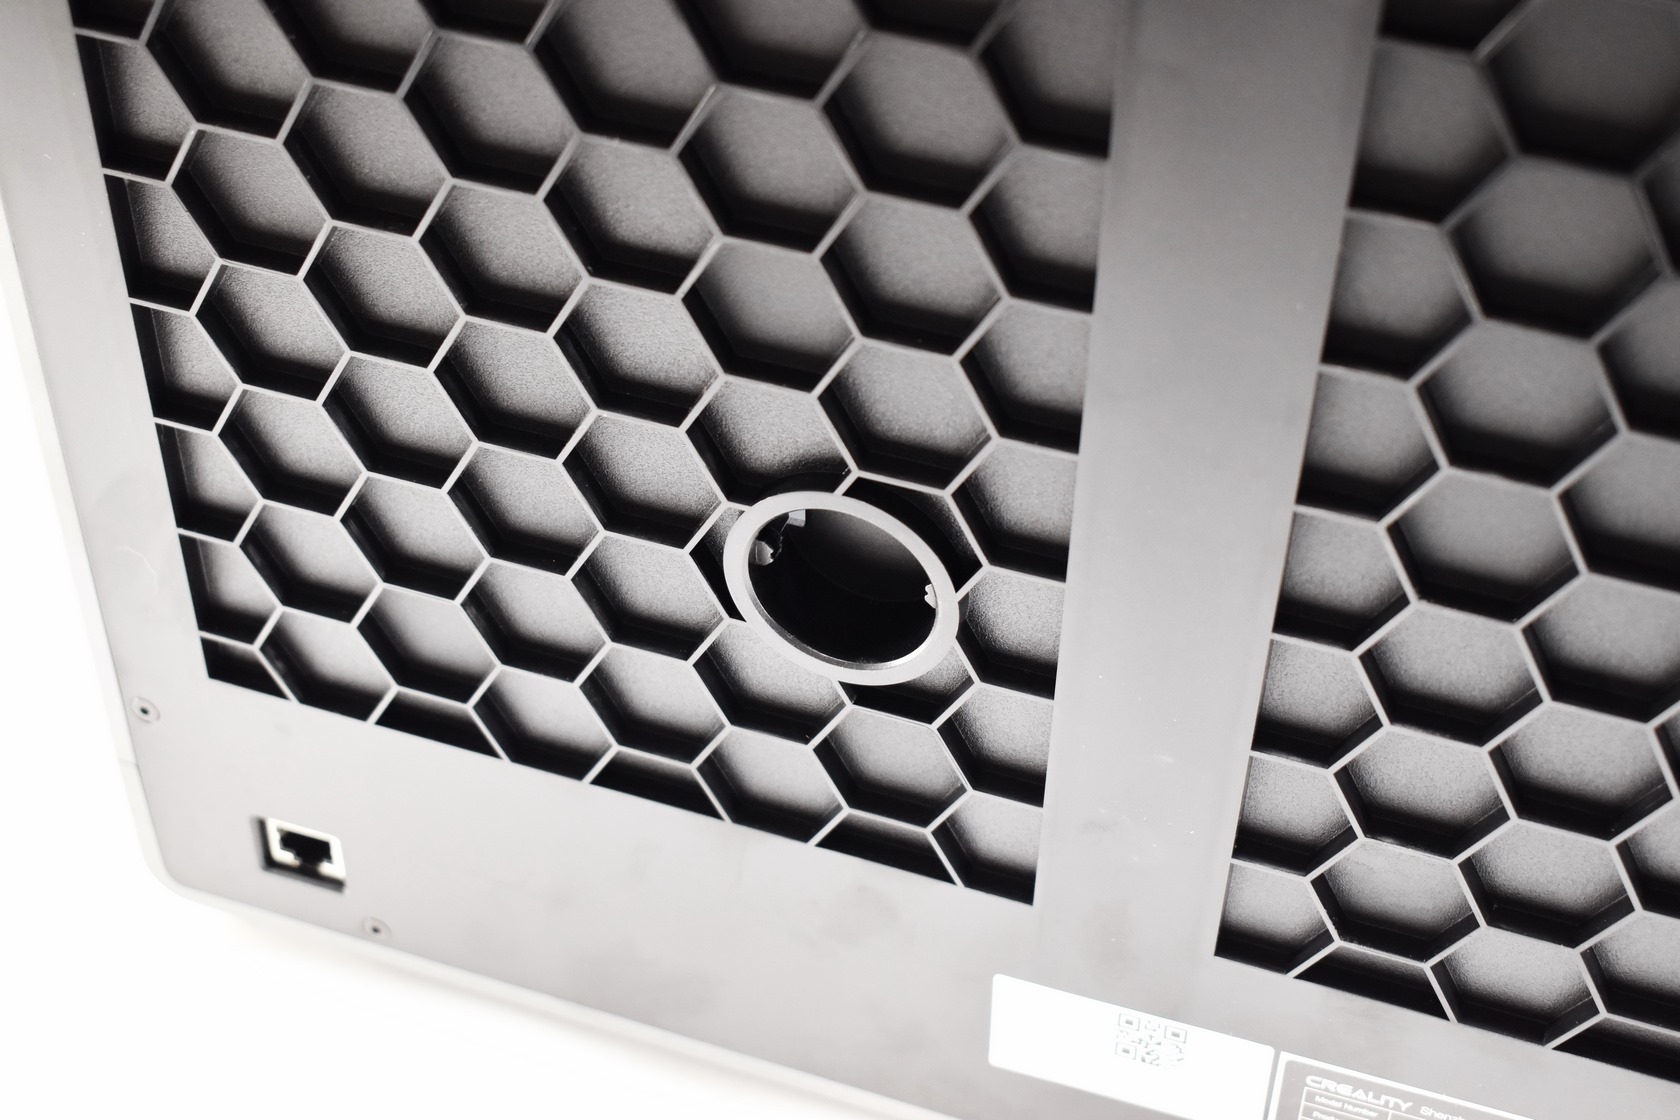
There's also a blower type fan attached on the right side panel which is obviously there to circulate air inside the case.
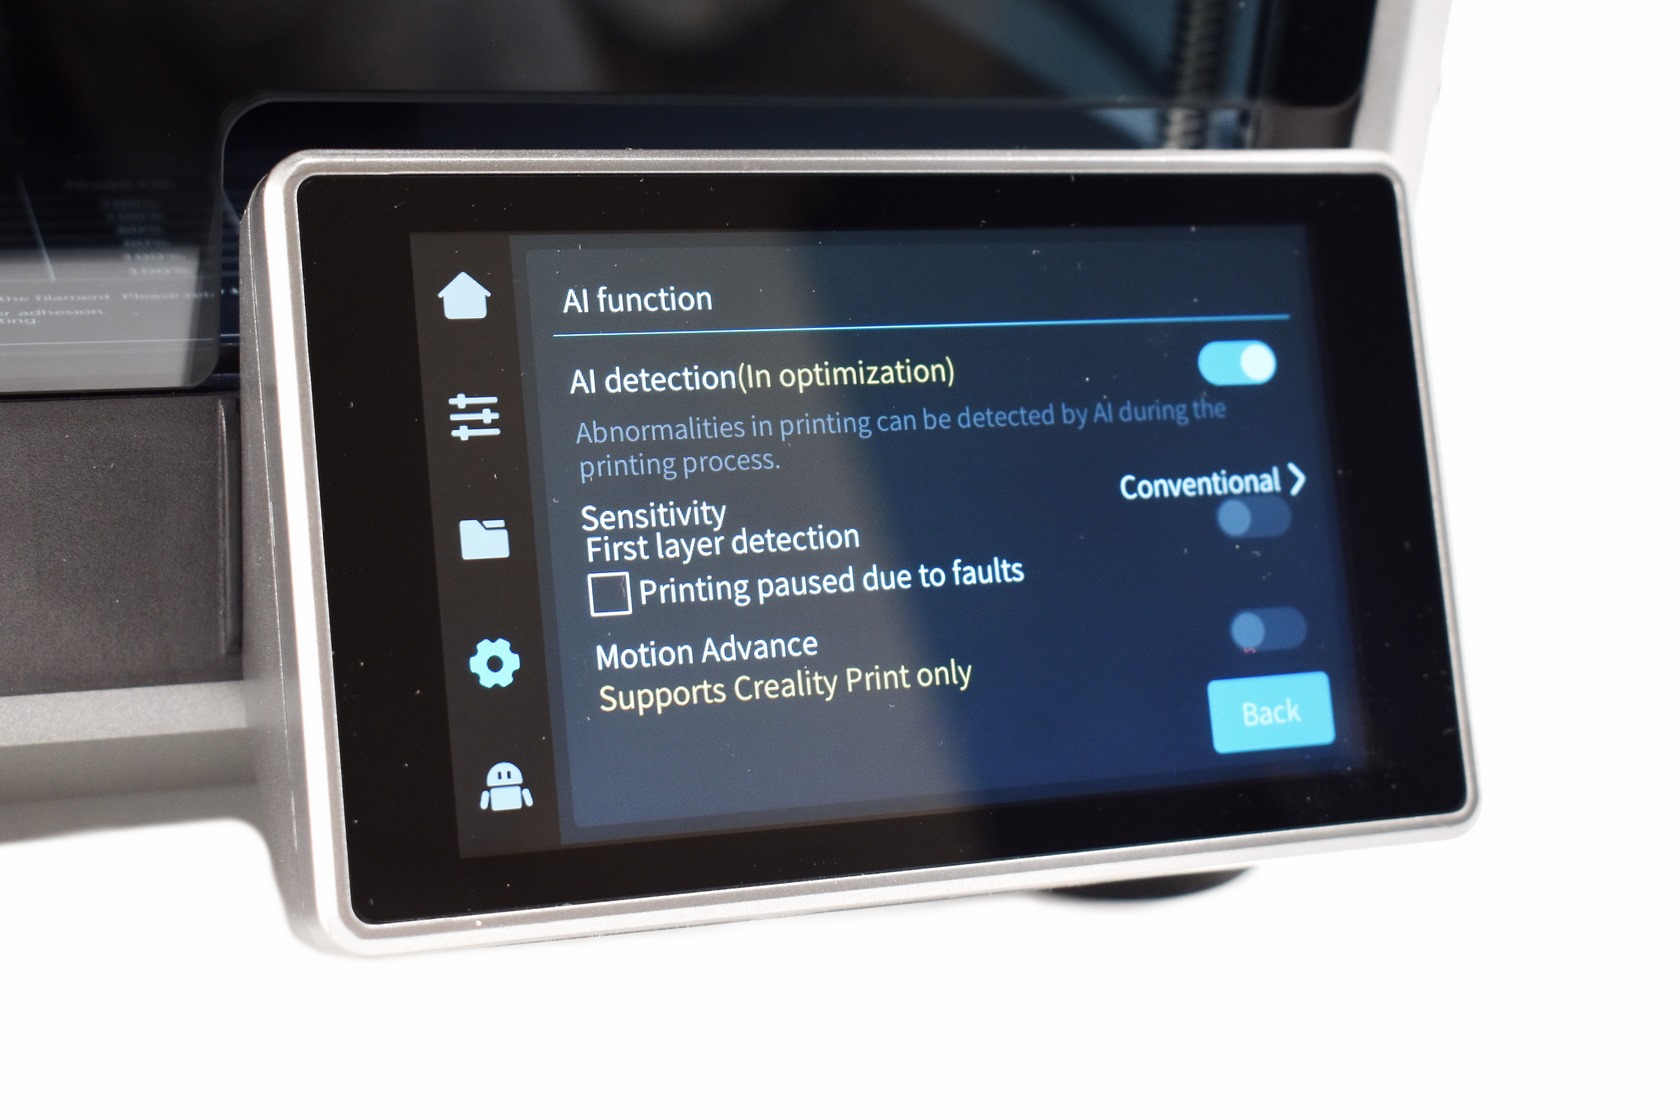
A somewhat interesting device is the AI camera which comes with the K1 Max (this camera allows for both timelapse recordings and print monitoring - timelapse video available on TikTok and YouTube).
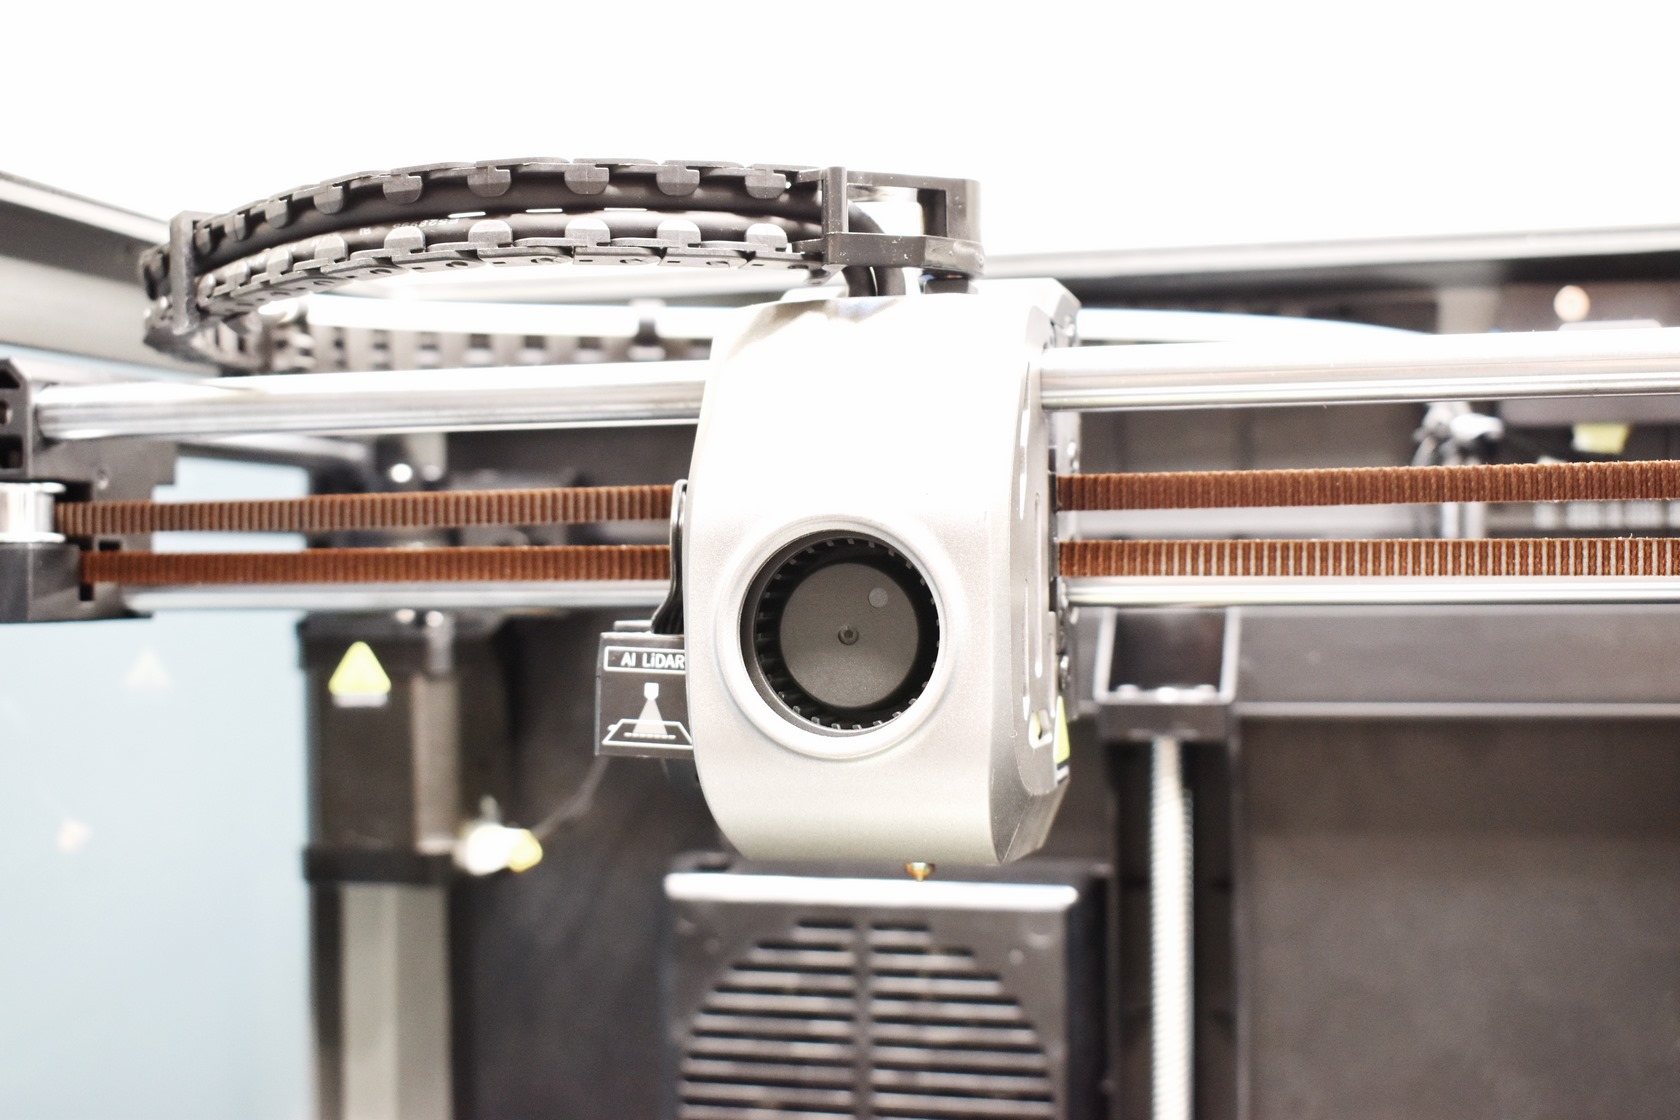
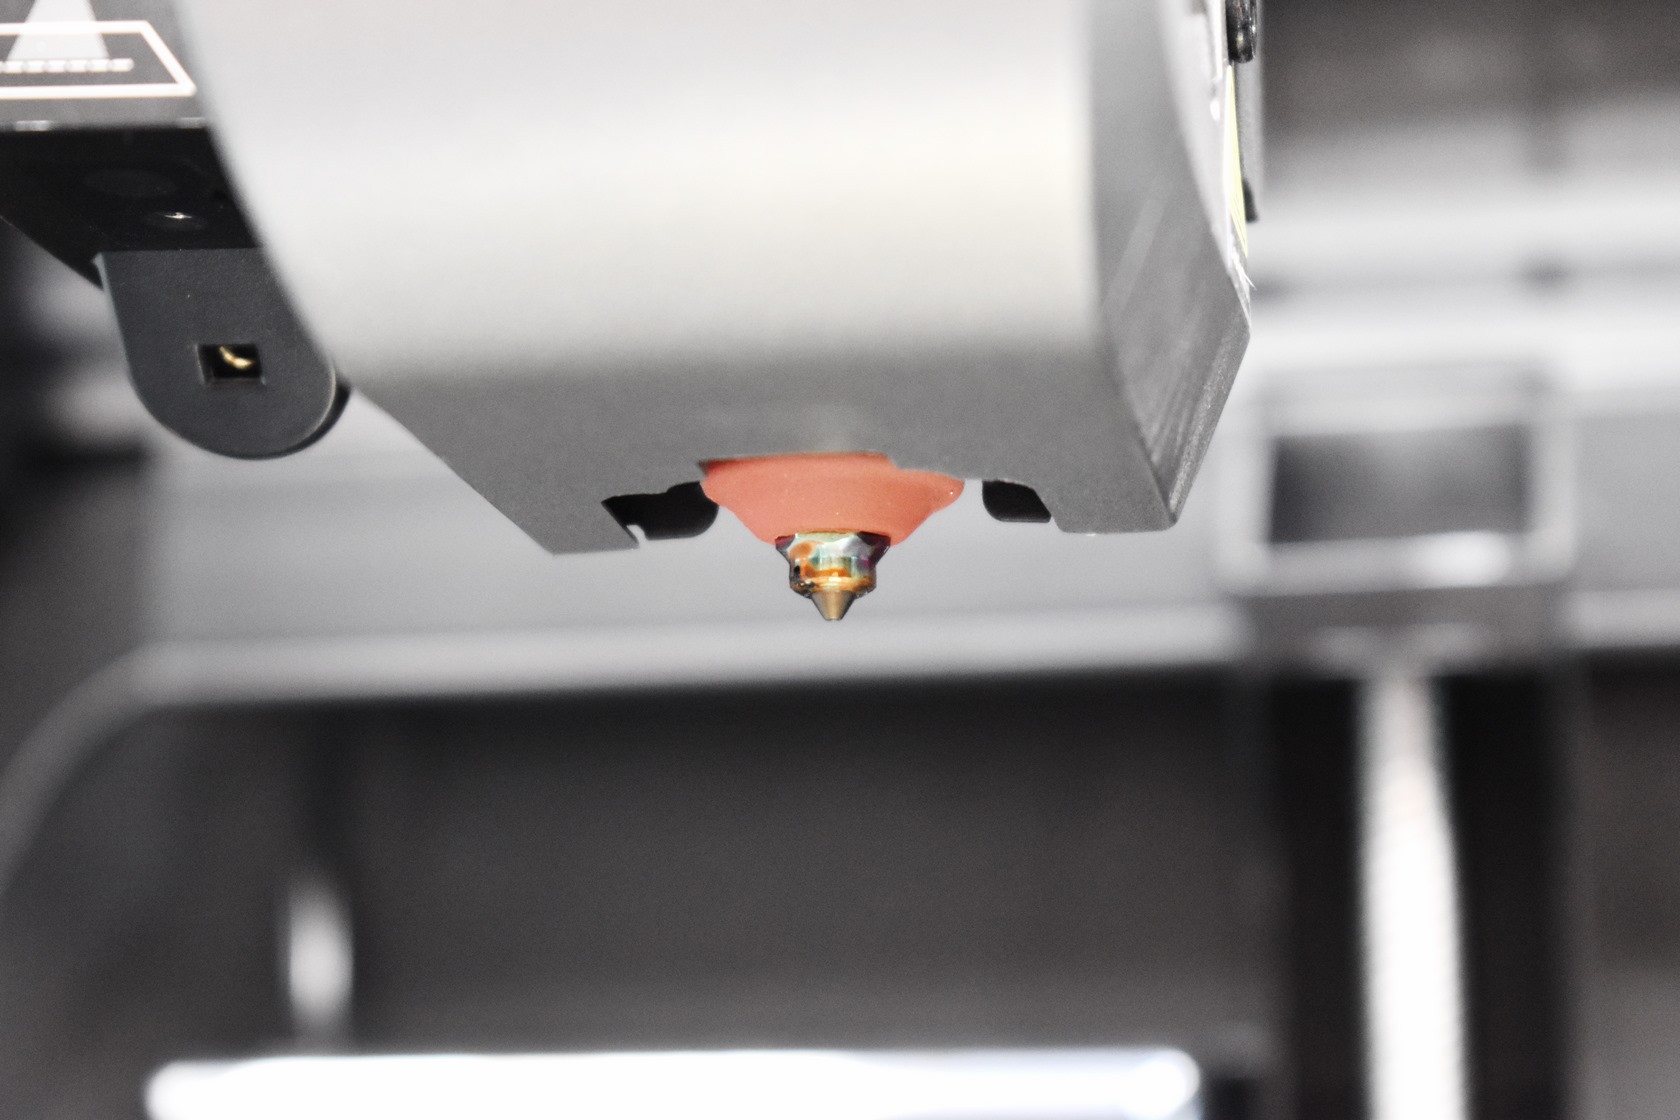
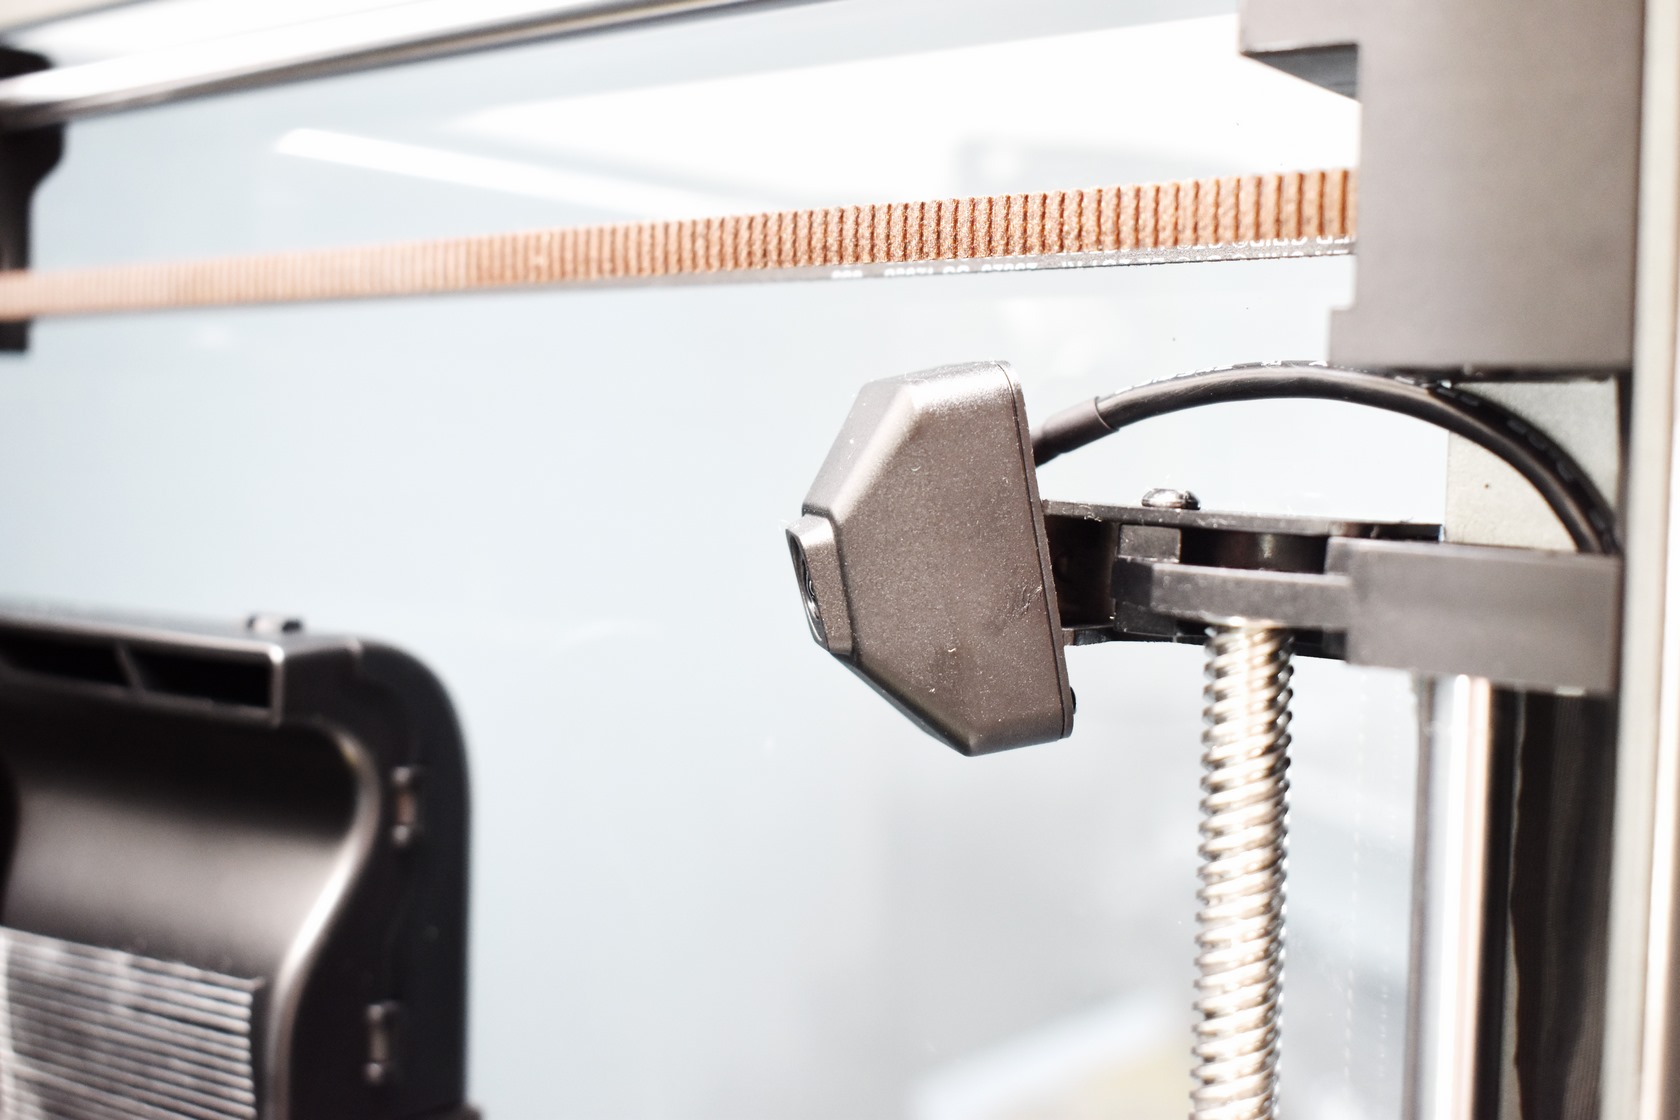
The dual-gear direct drive extruder features a cooling fan at the front (used to cool the printed model) and an AI LiDAR sensor on the left (used primarily for bed leveling).
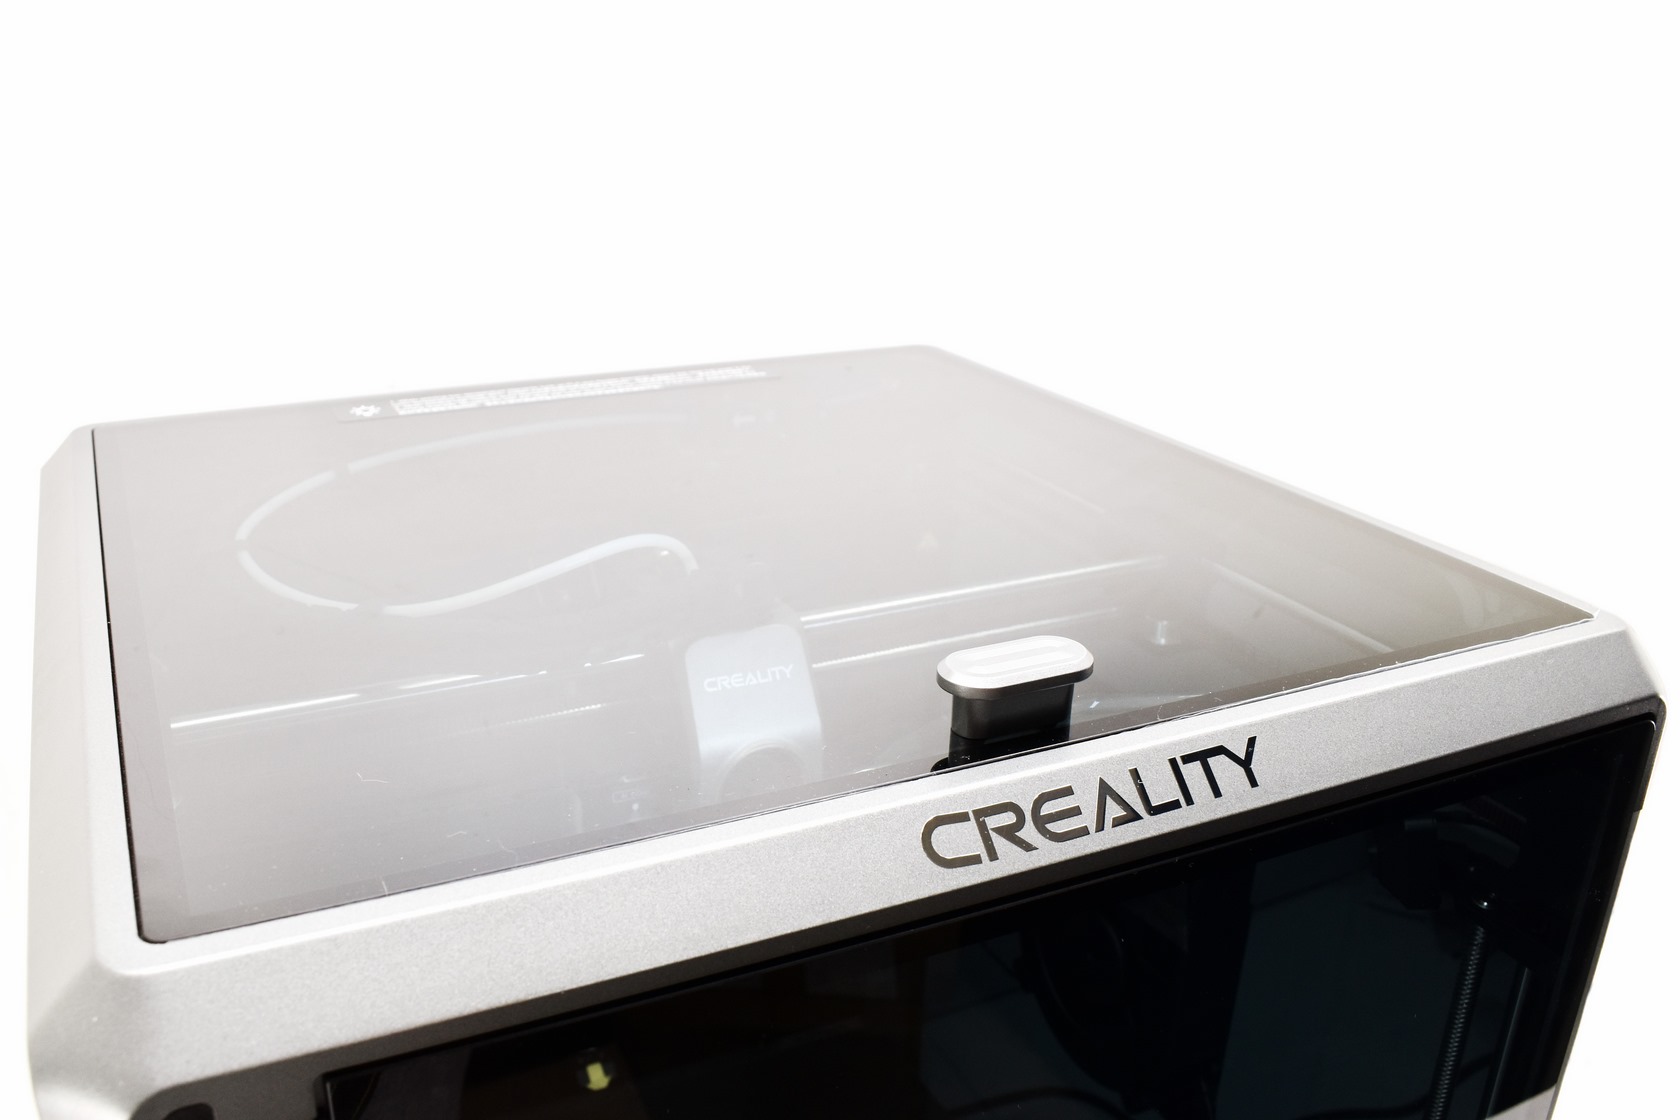
The top tempered glass panel is a nice touch (as long as you're careful).
K1 MAX MENUS
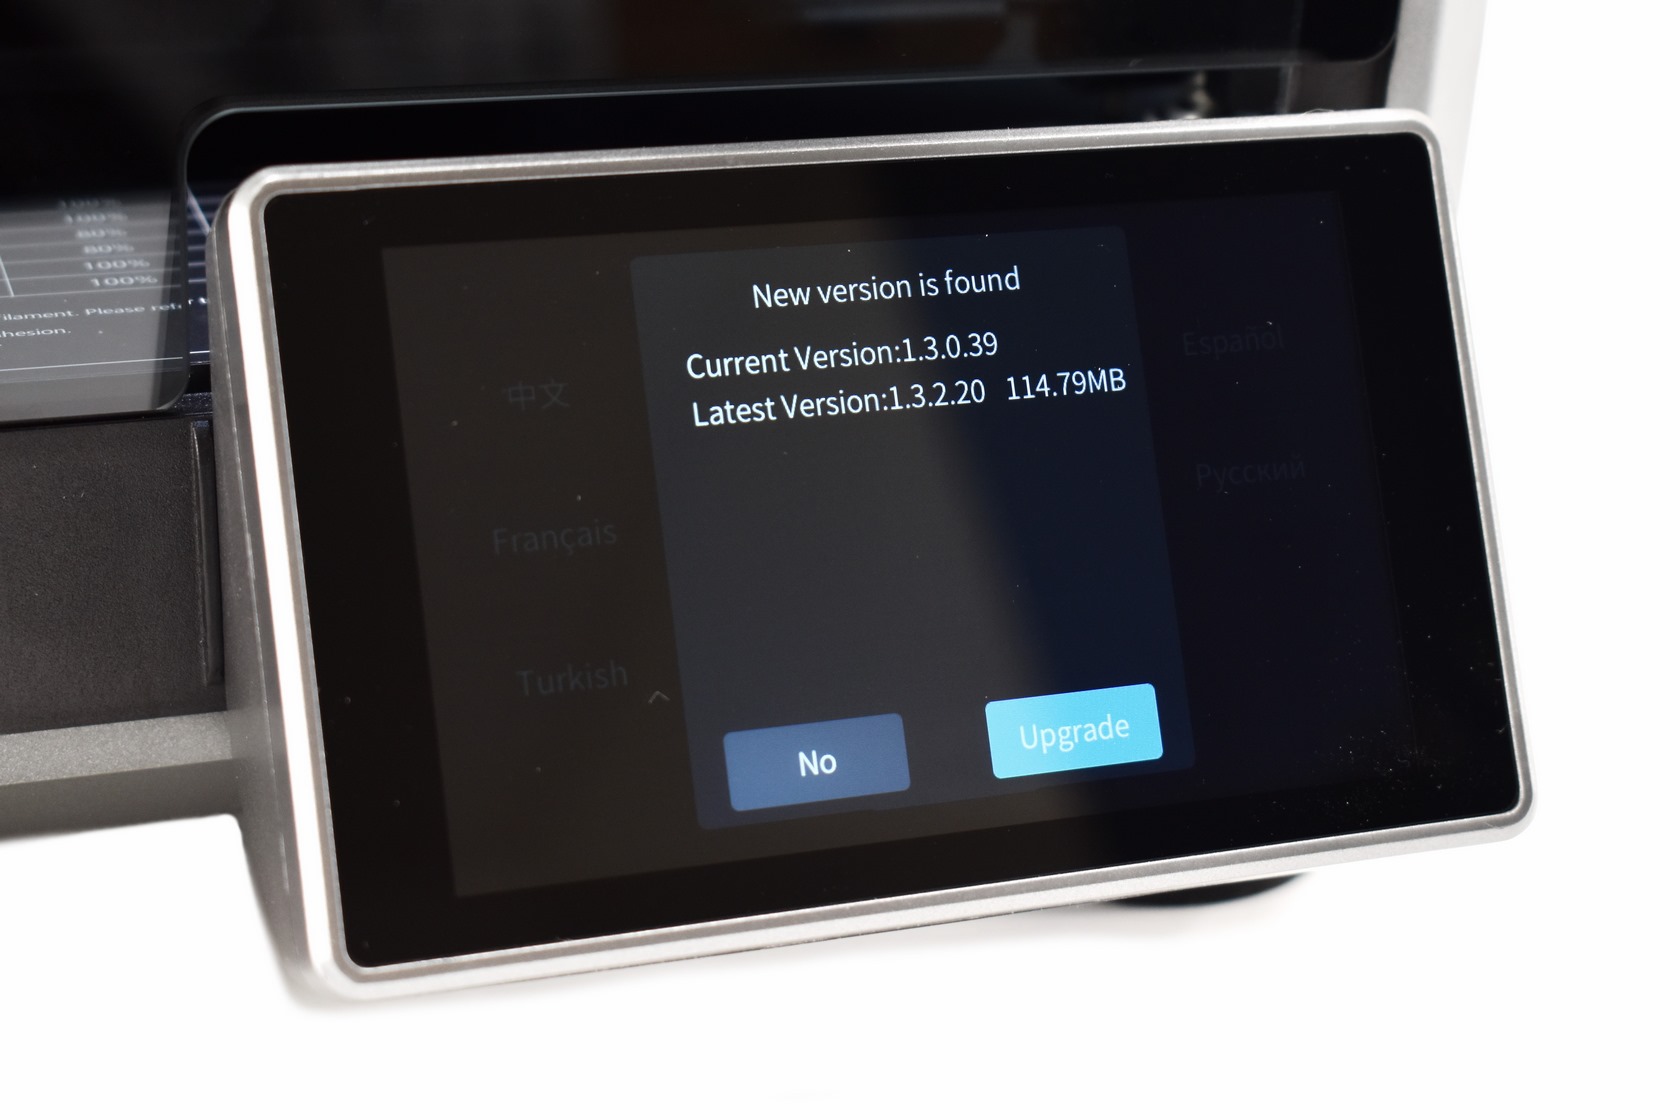
You can load the latest firmware update in the bundled USB drive and that's the first thing the K1 Max will look for at boot.
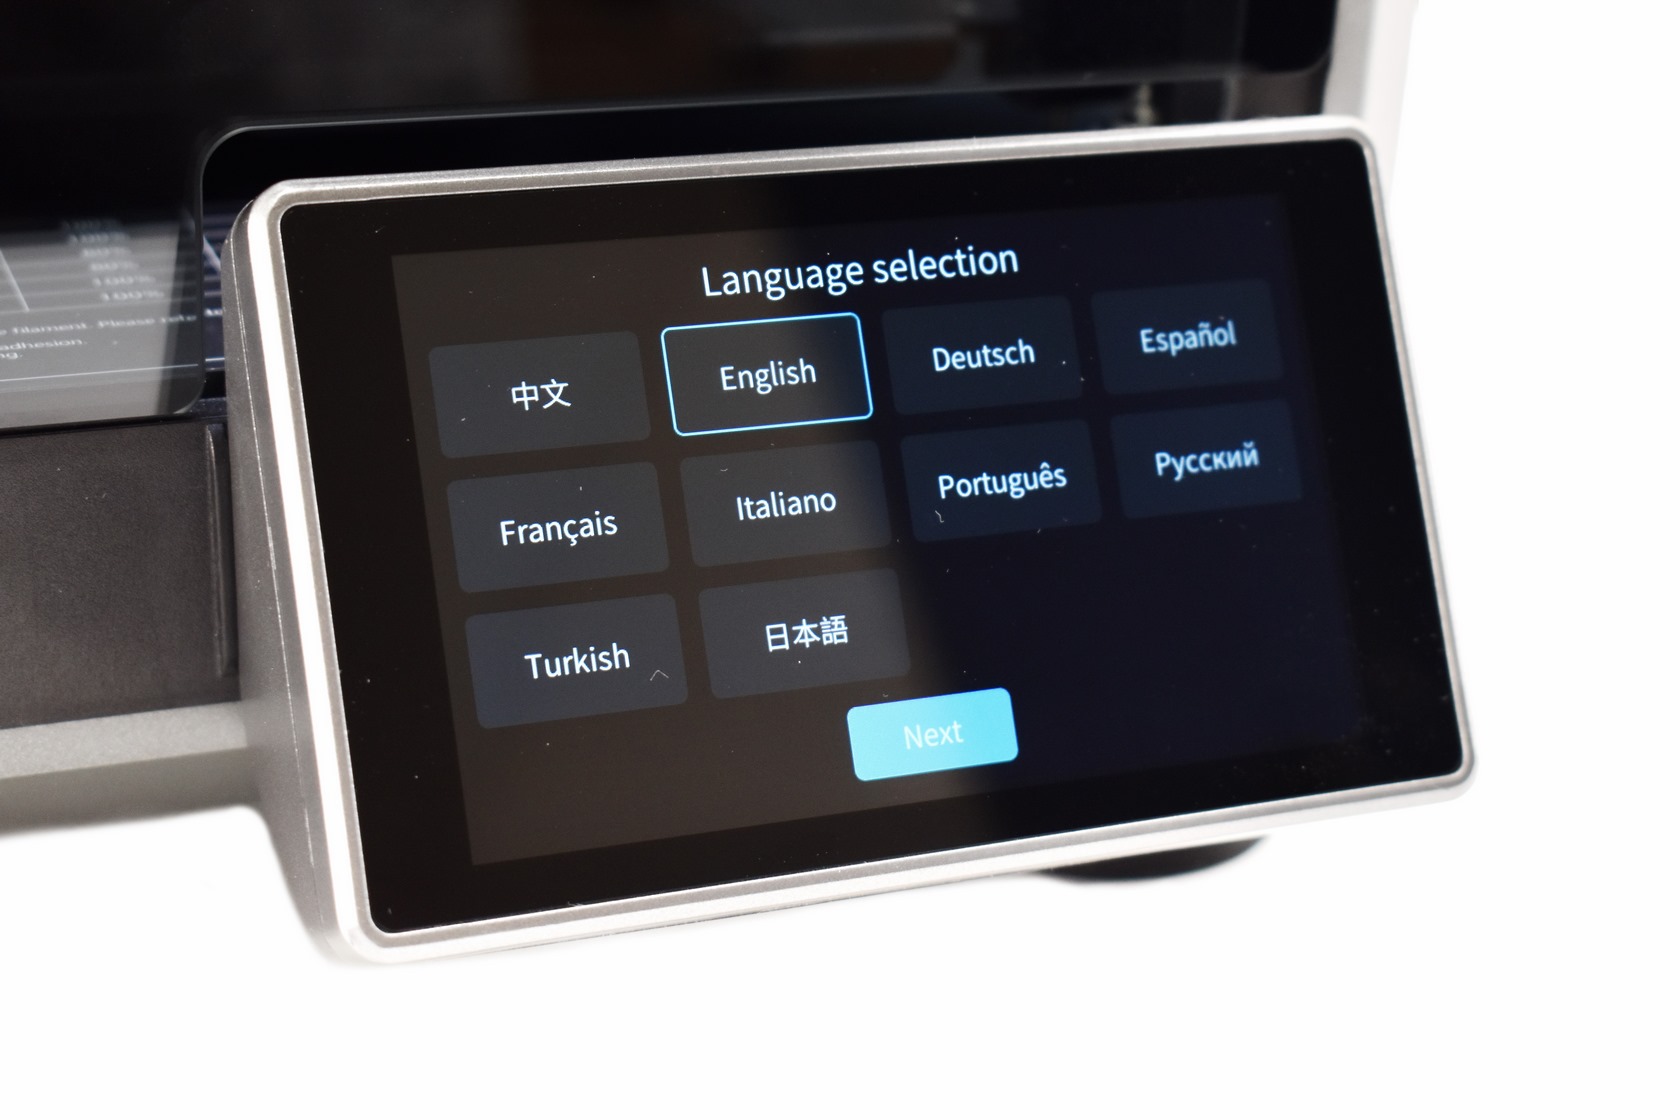
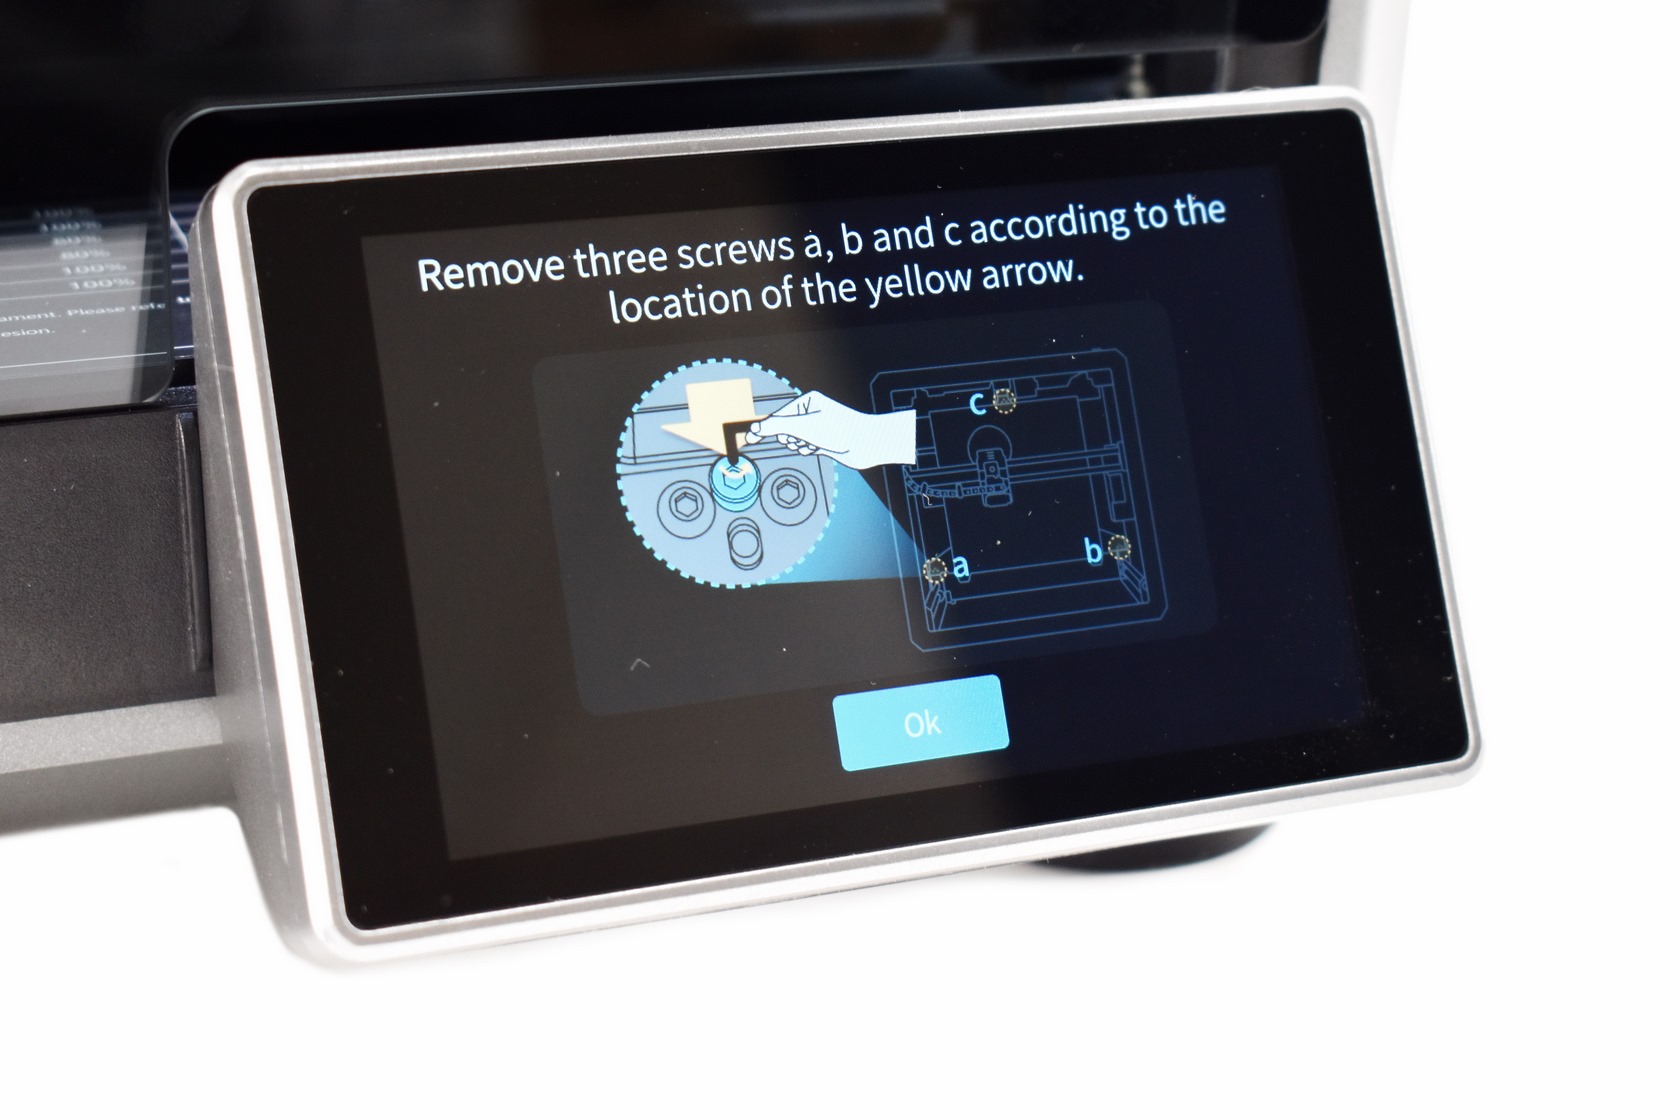
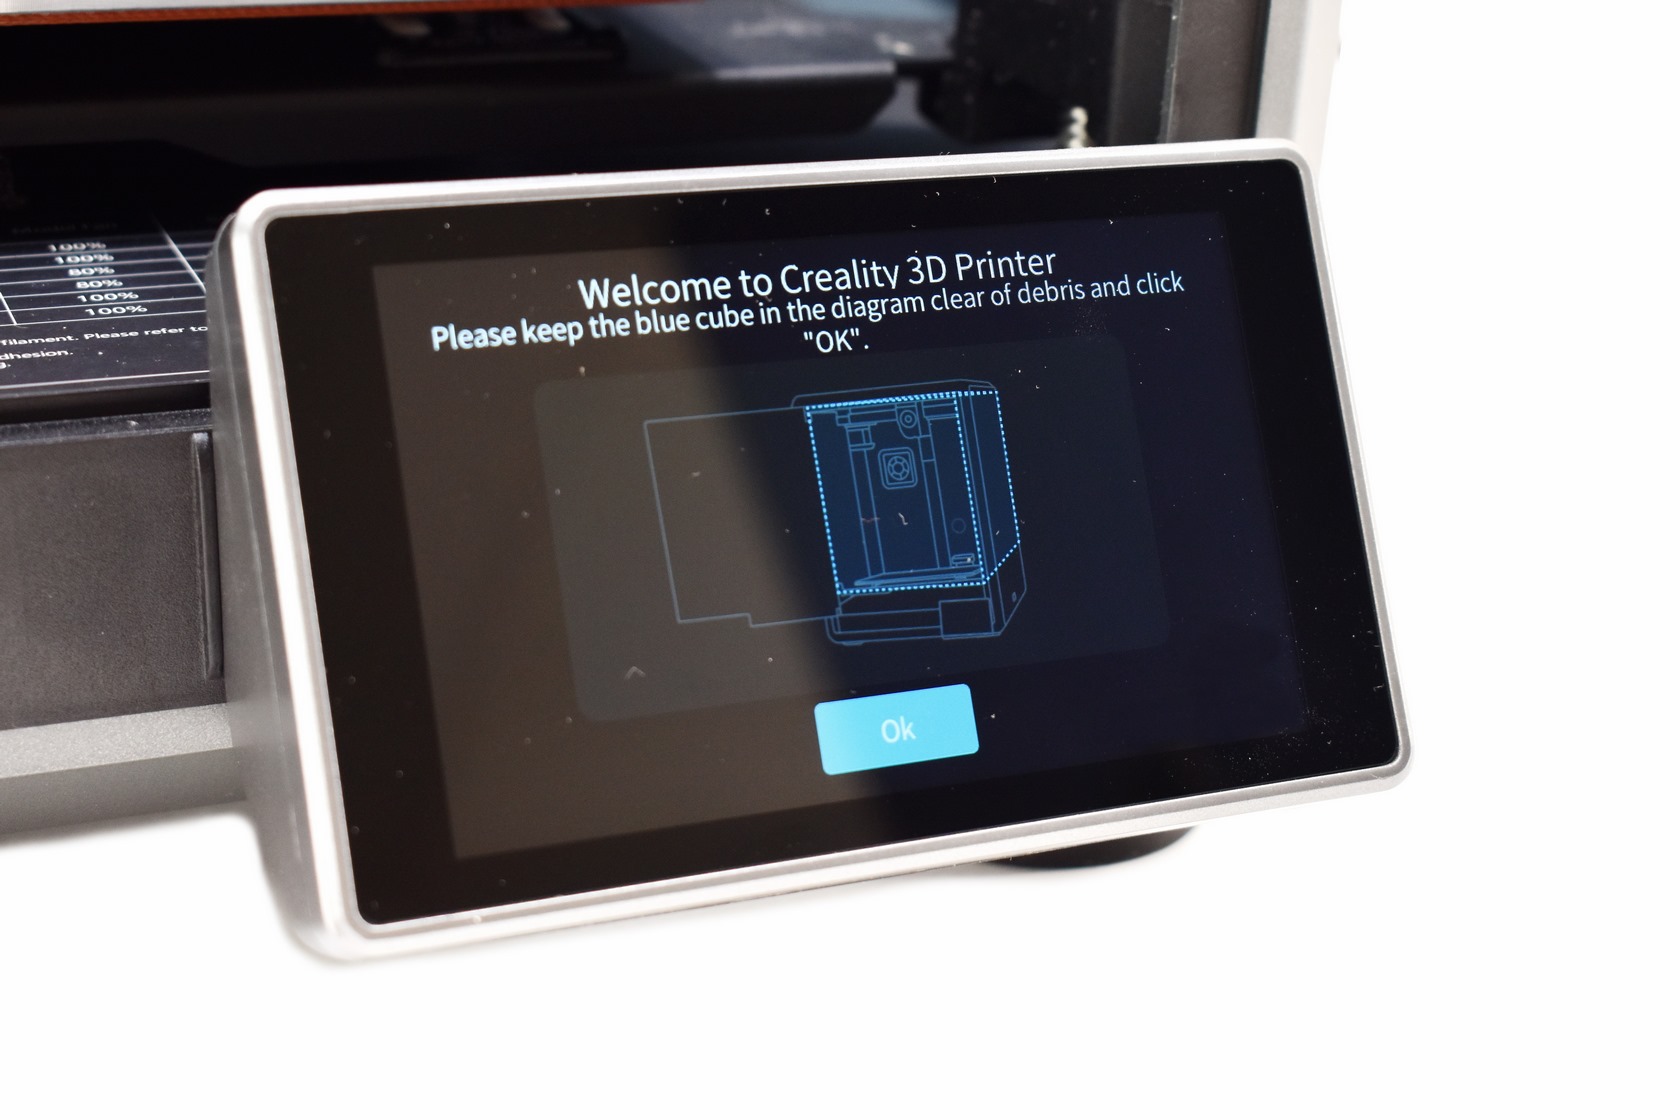
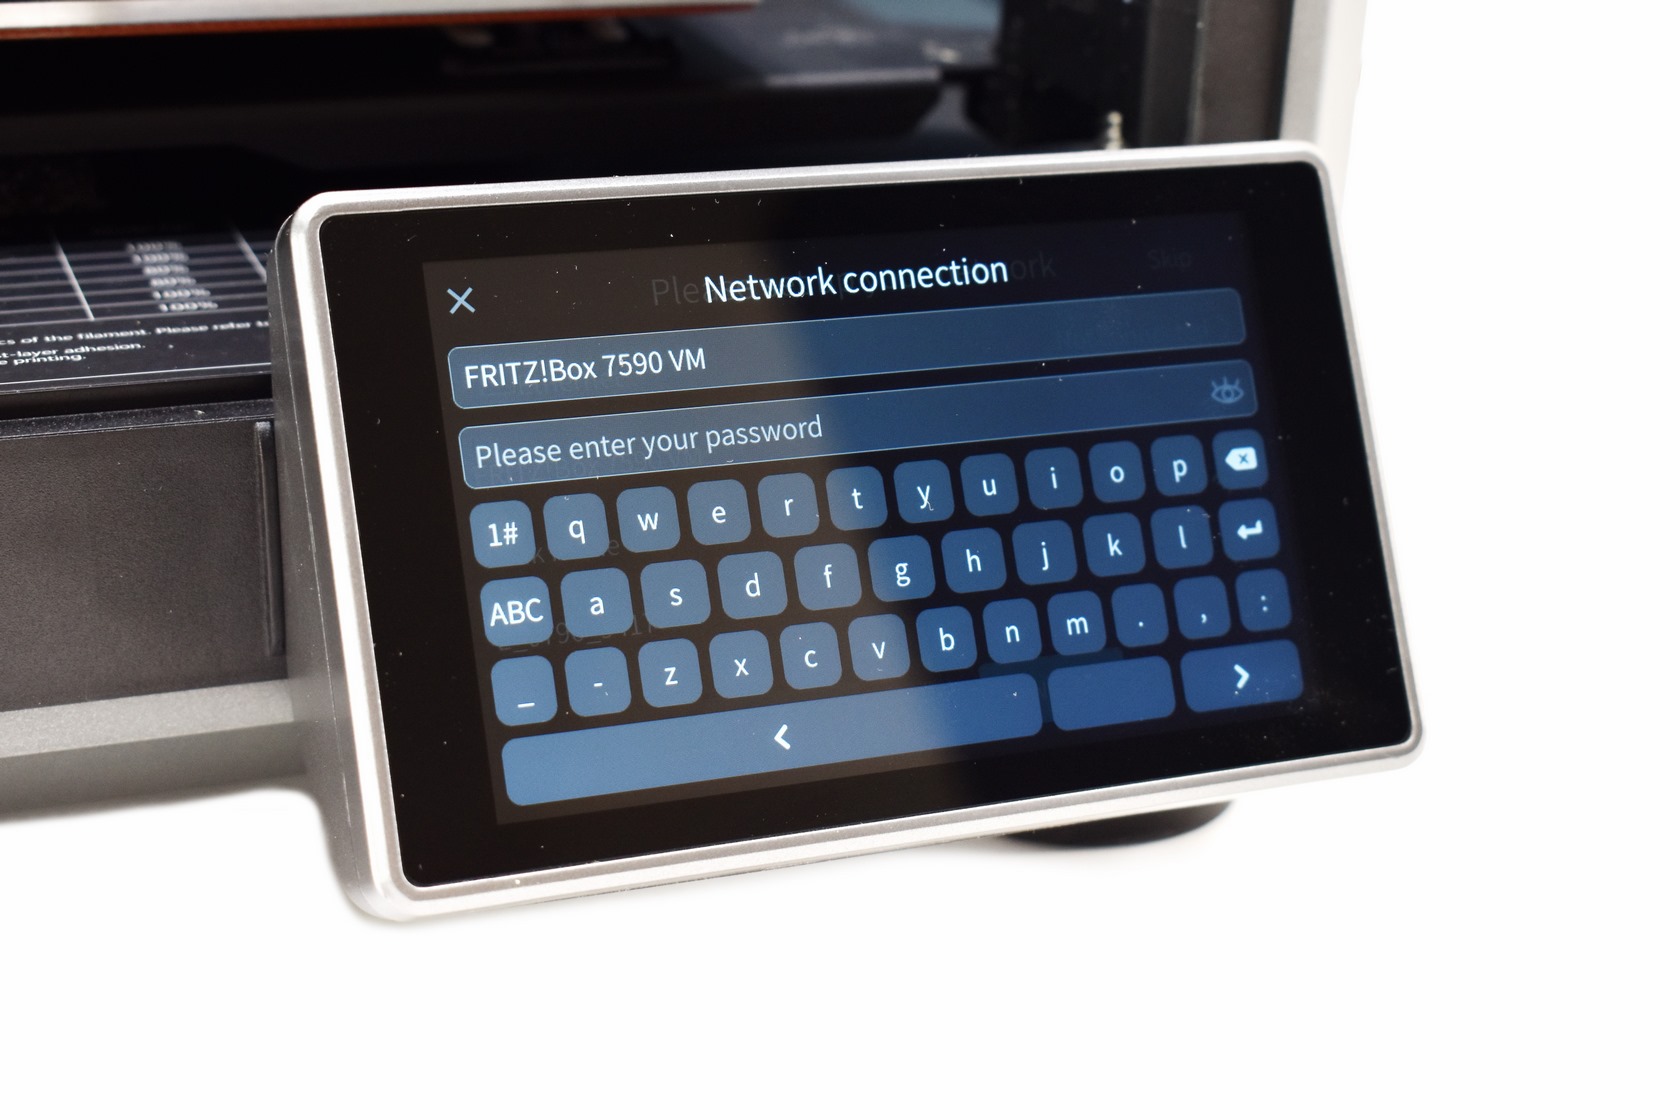
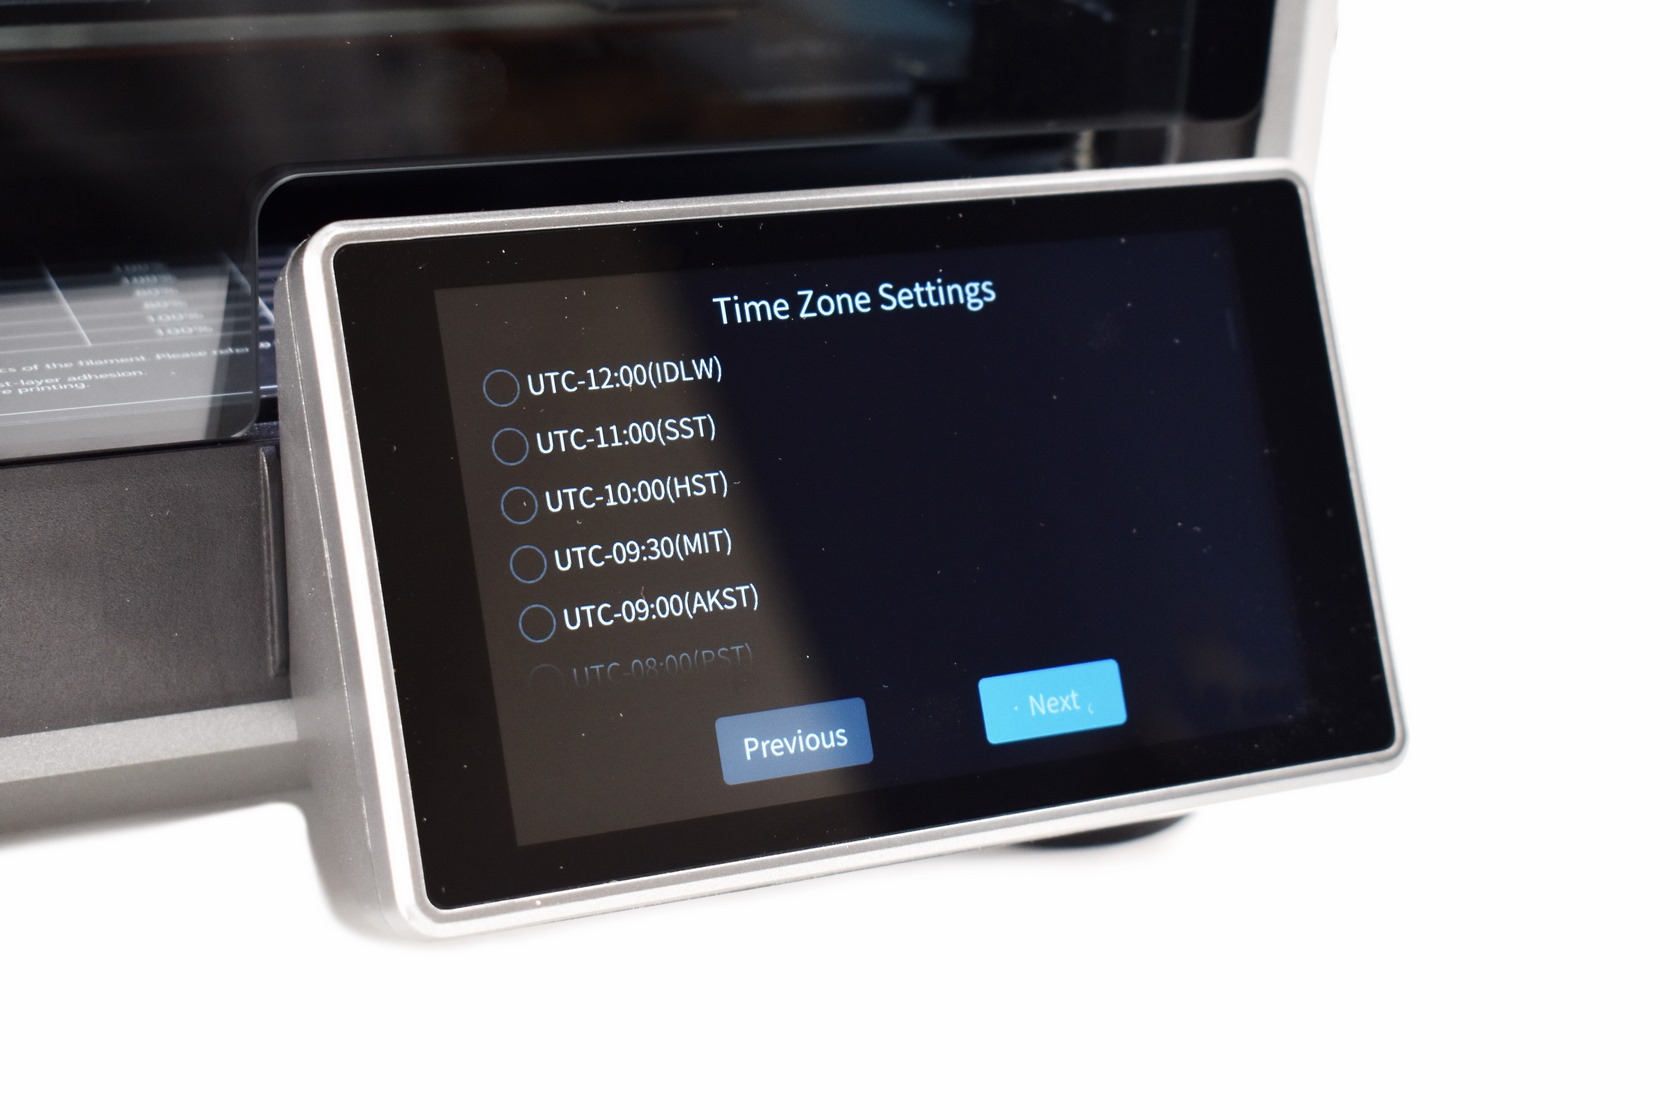
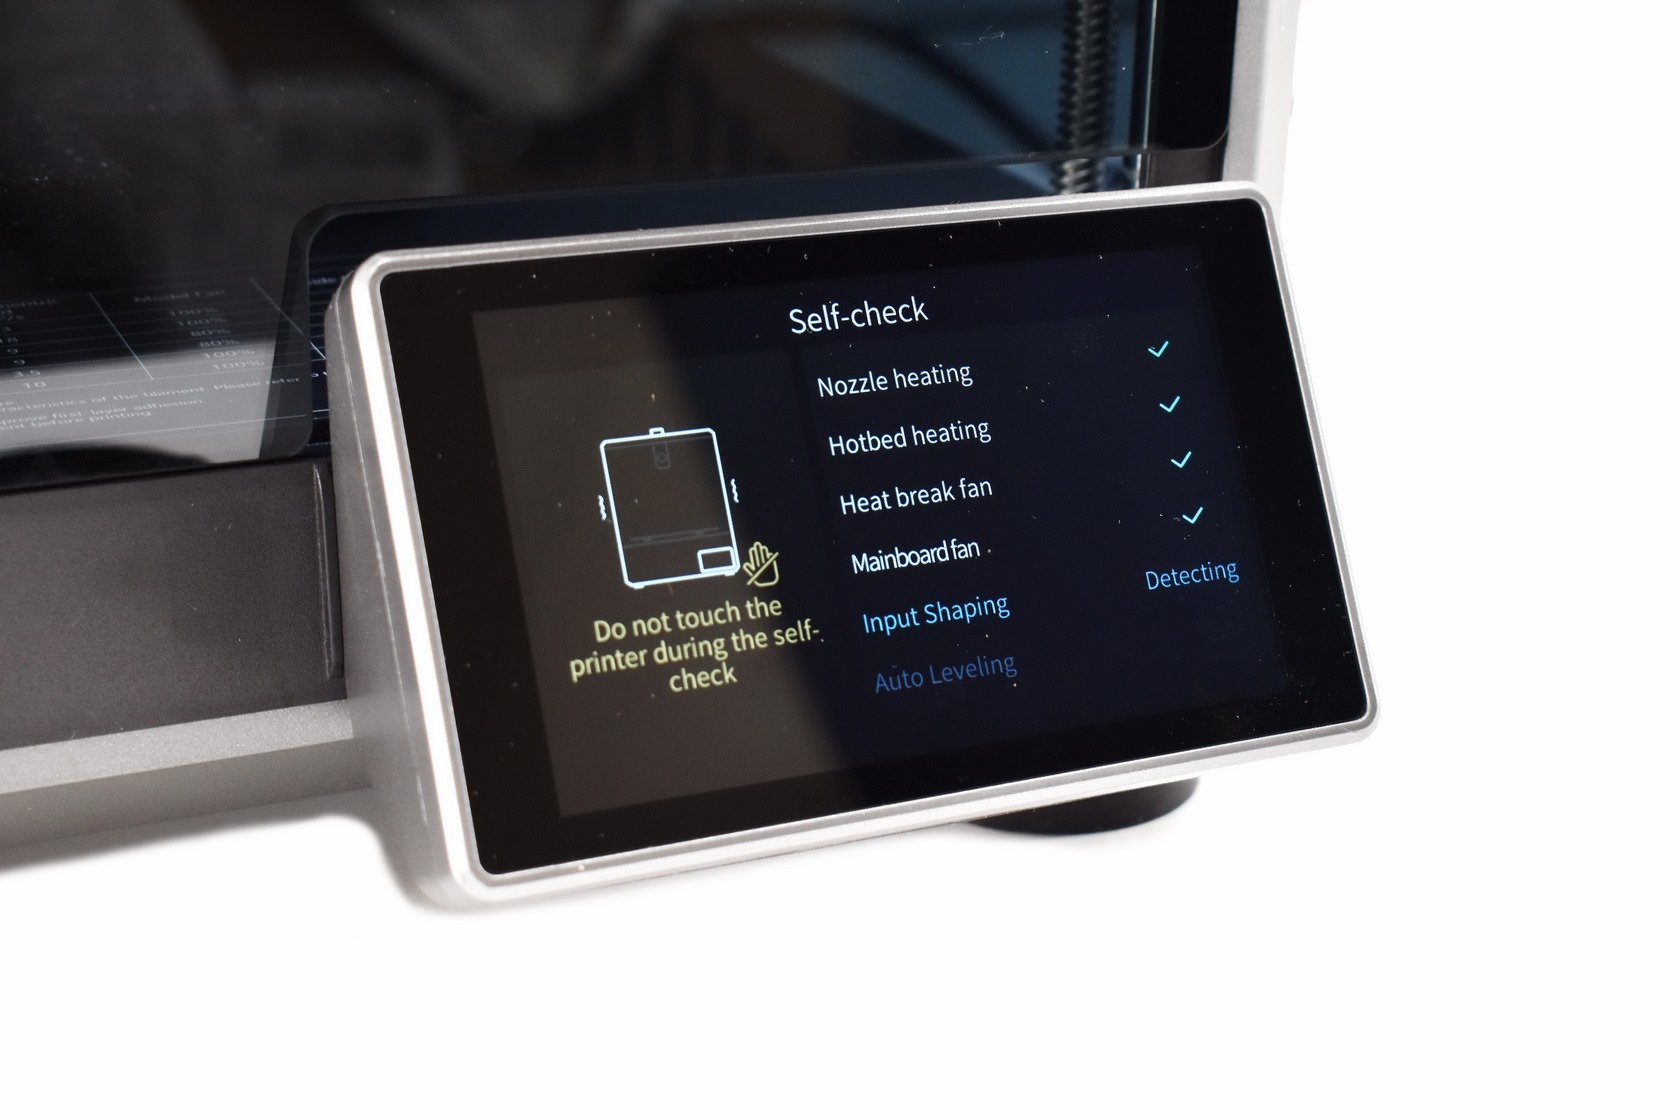 After the update procedure is complete you will need to select the language, release the screws holding the bed in place, allow the printer to do a complete check-up of its CoreXY components, setup wireless connectivity, set the time zone and finally let the printer do a quick self-check.
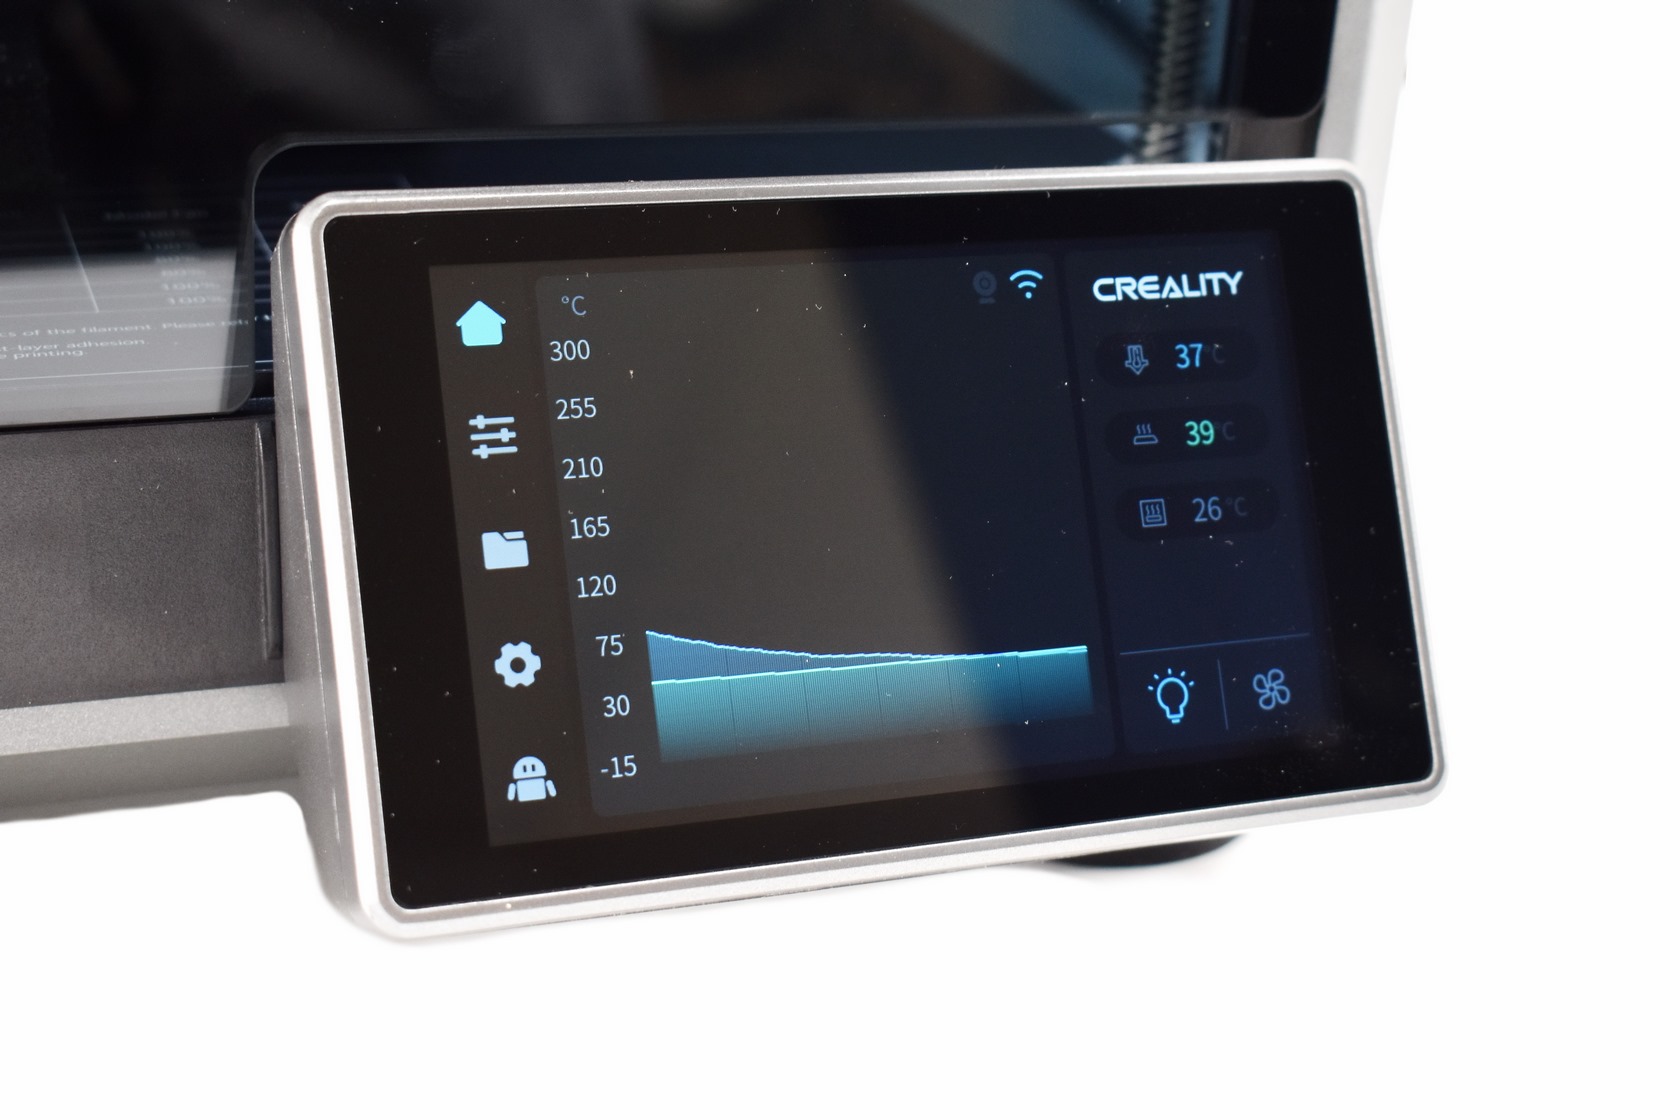
As expected, the home screen shows the temperature of each component and also allows you to turn the interior LEDs on/off and adjust the speed of the fans.
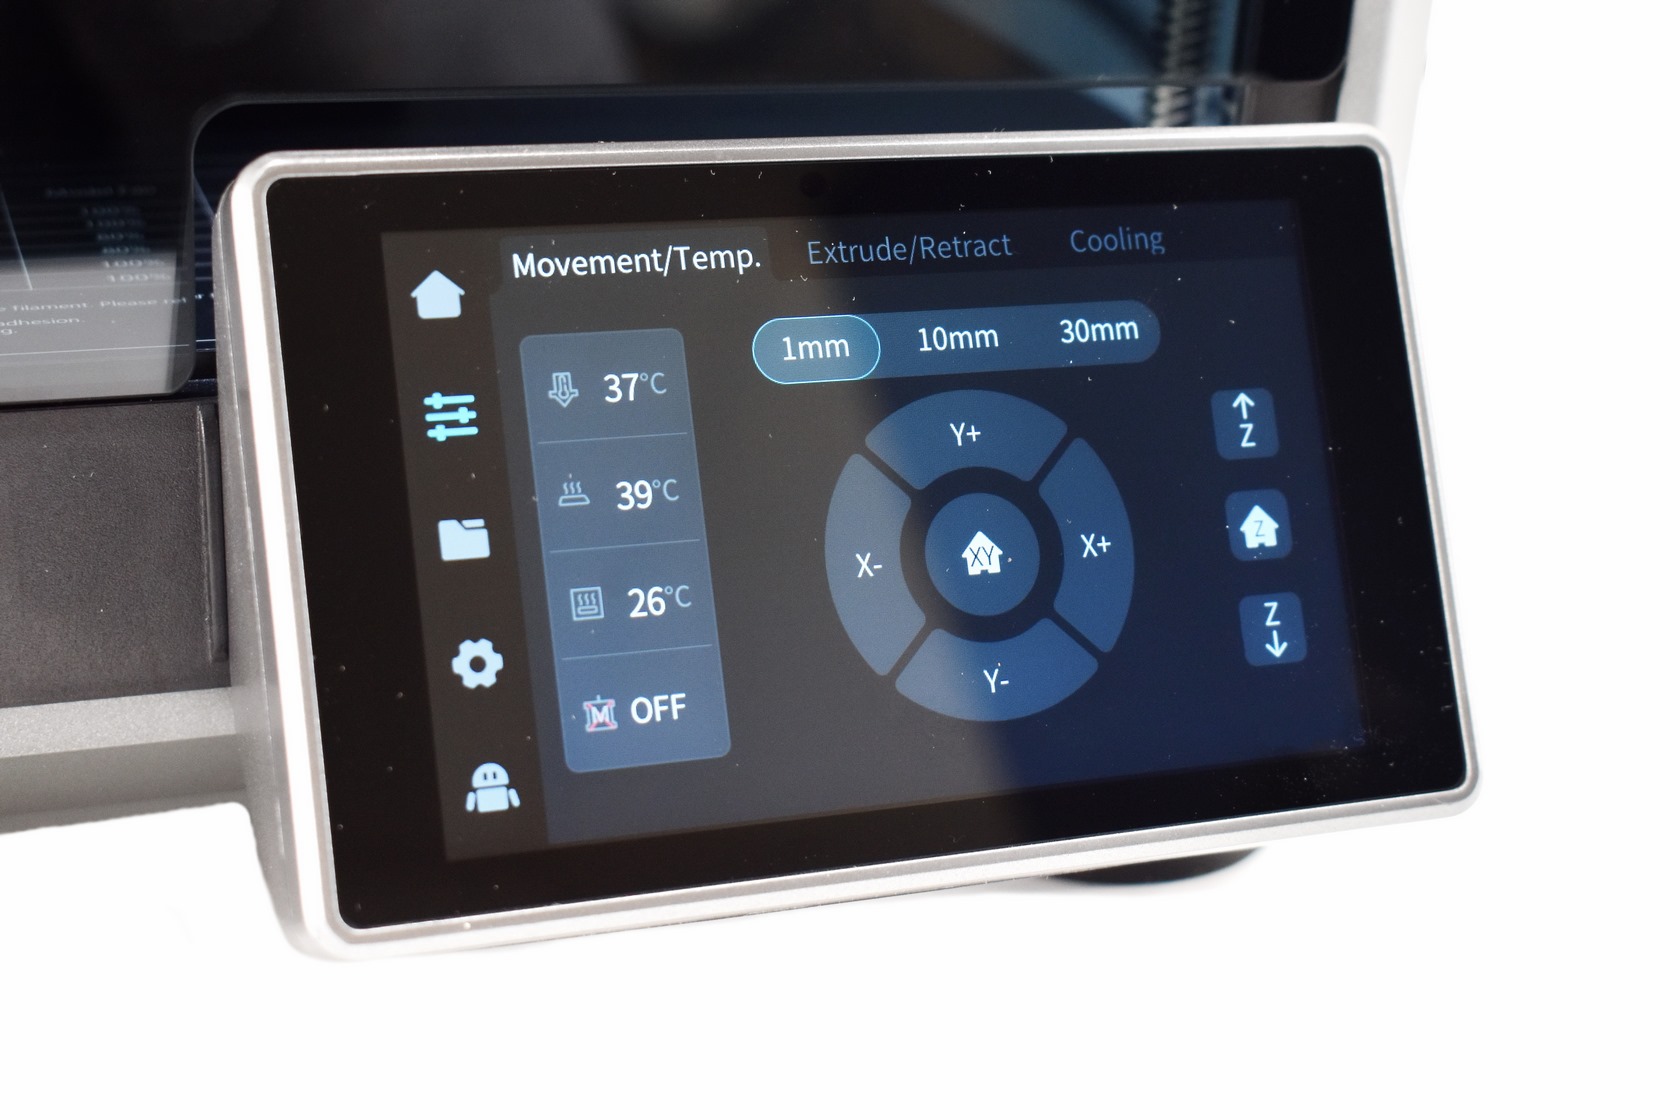
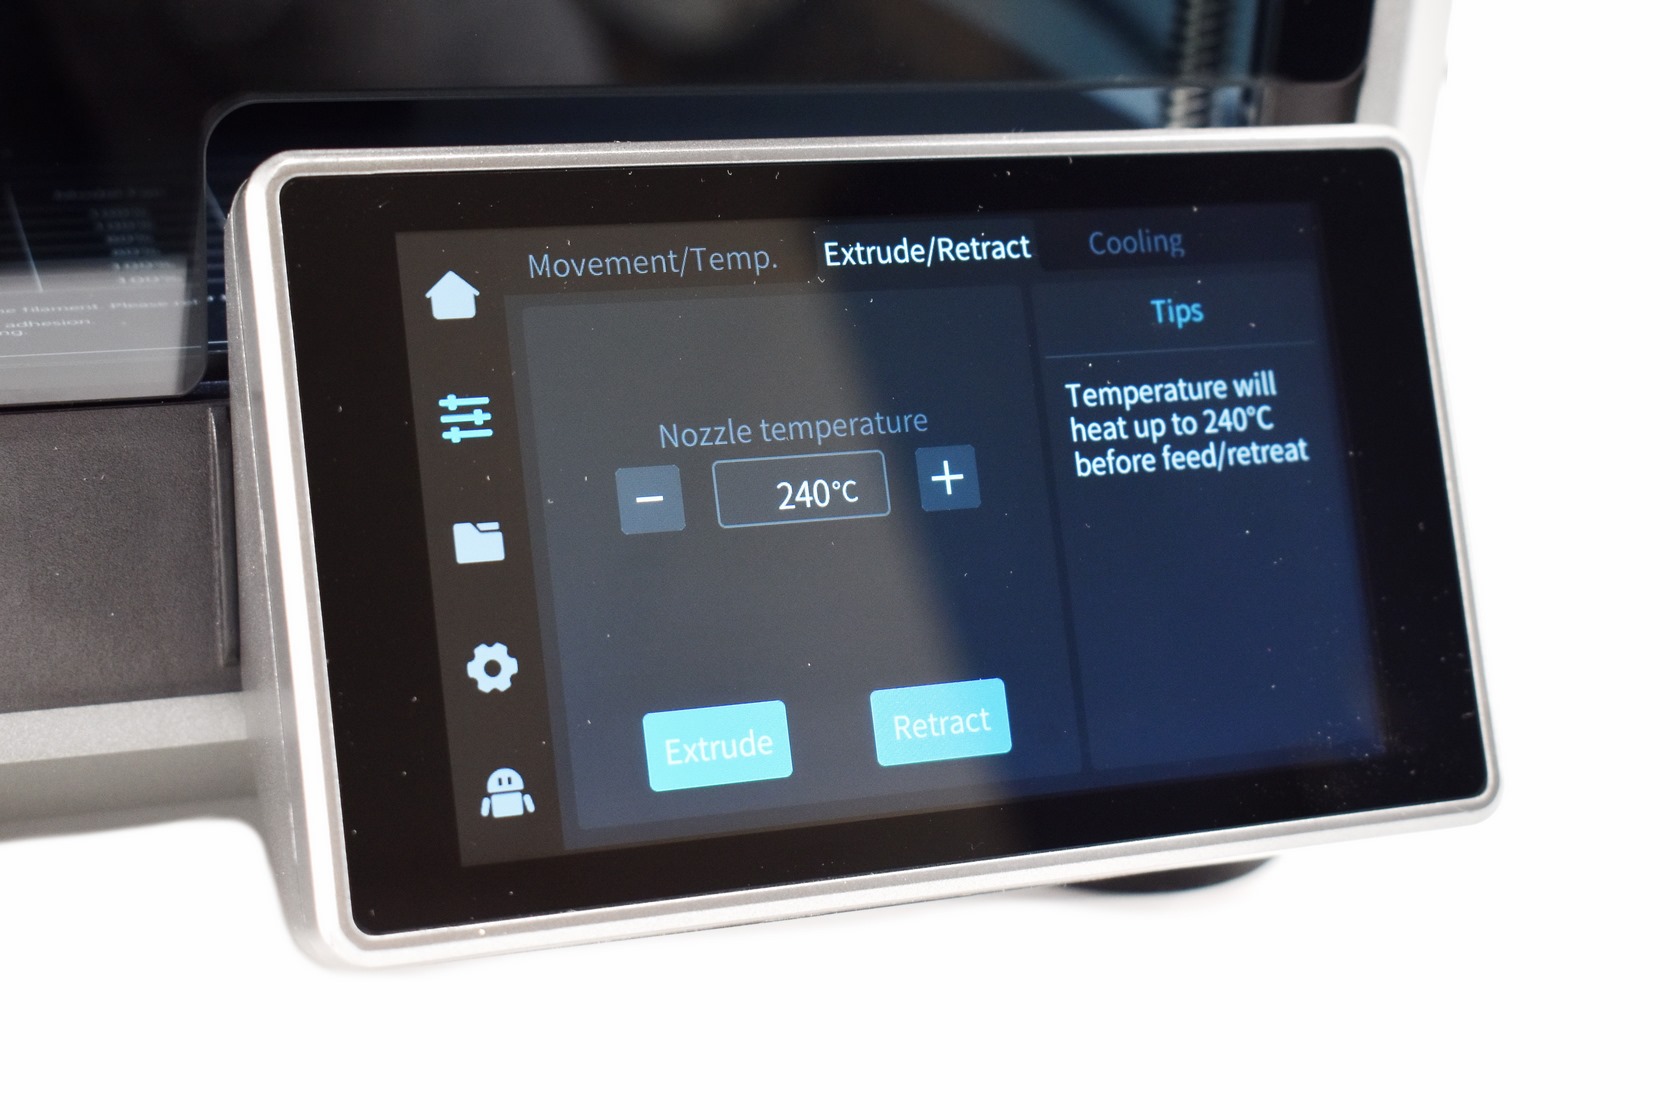
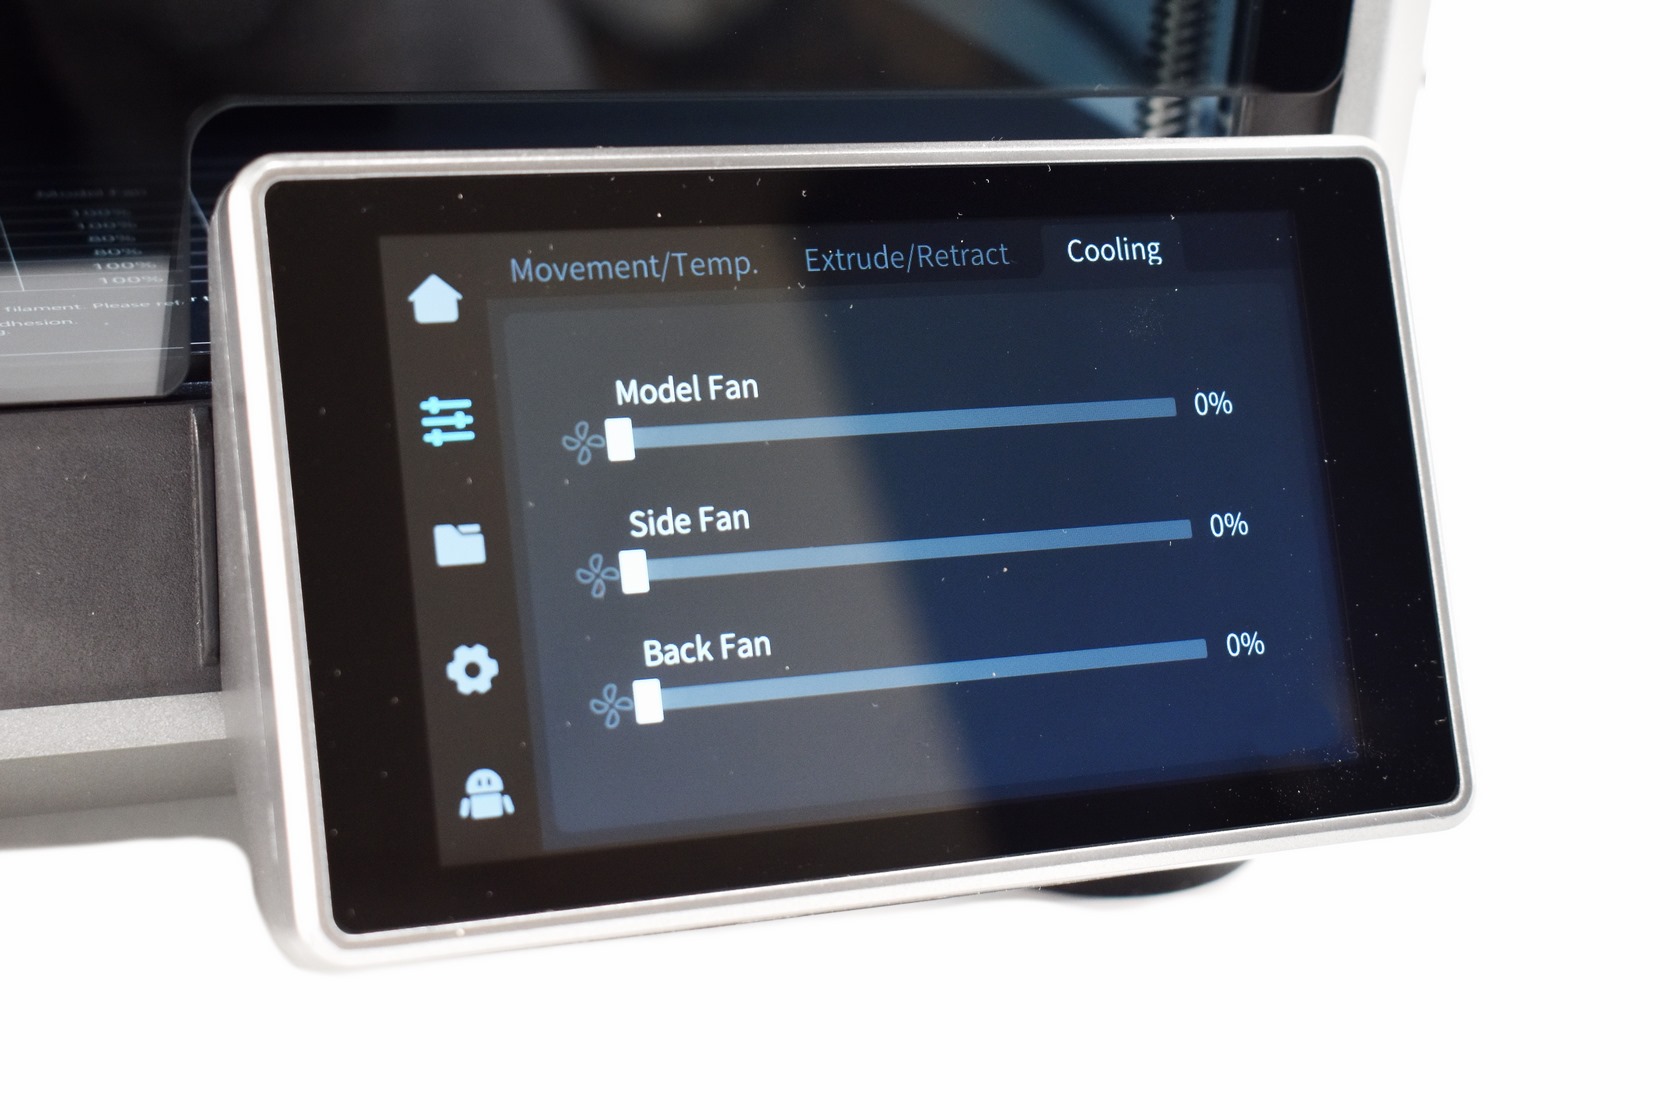 The second tab allows you to move the bed and the extruder, check temperatures, turn the extruder on/off, extrude/retract filament and again adjust the speed of the fans.
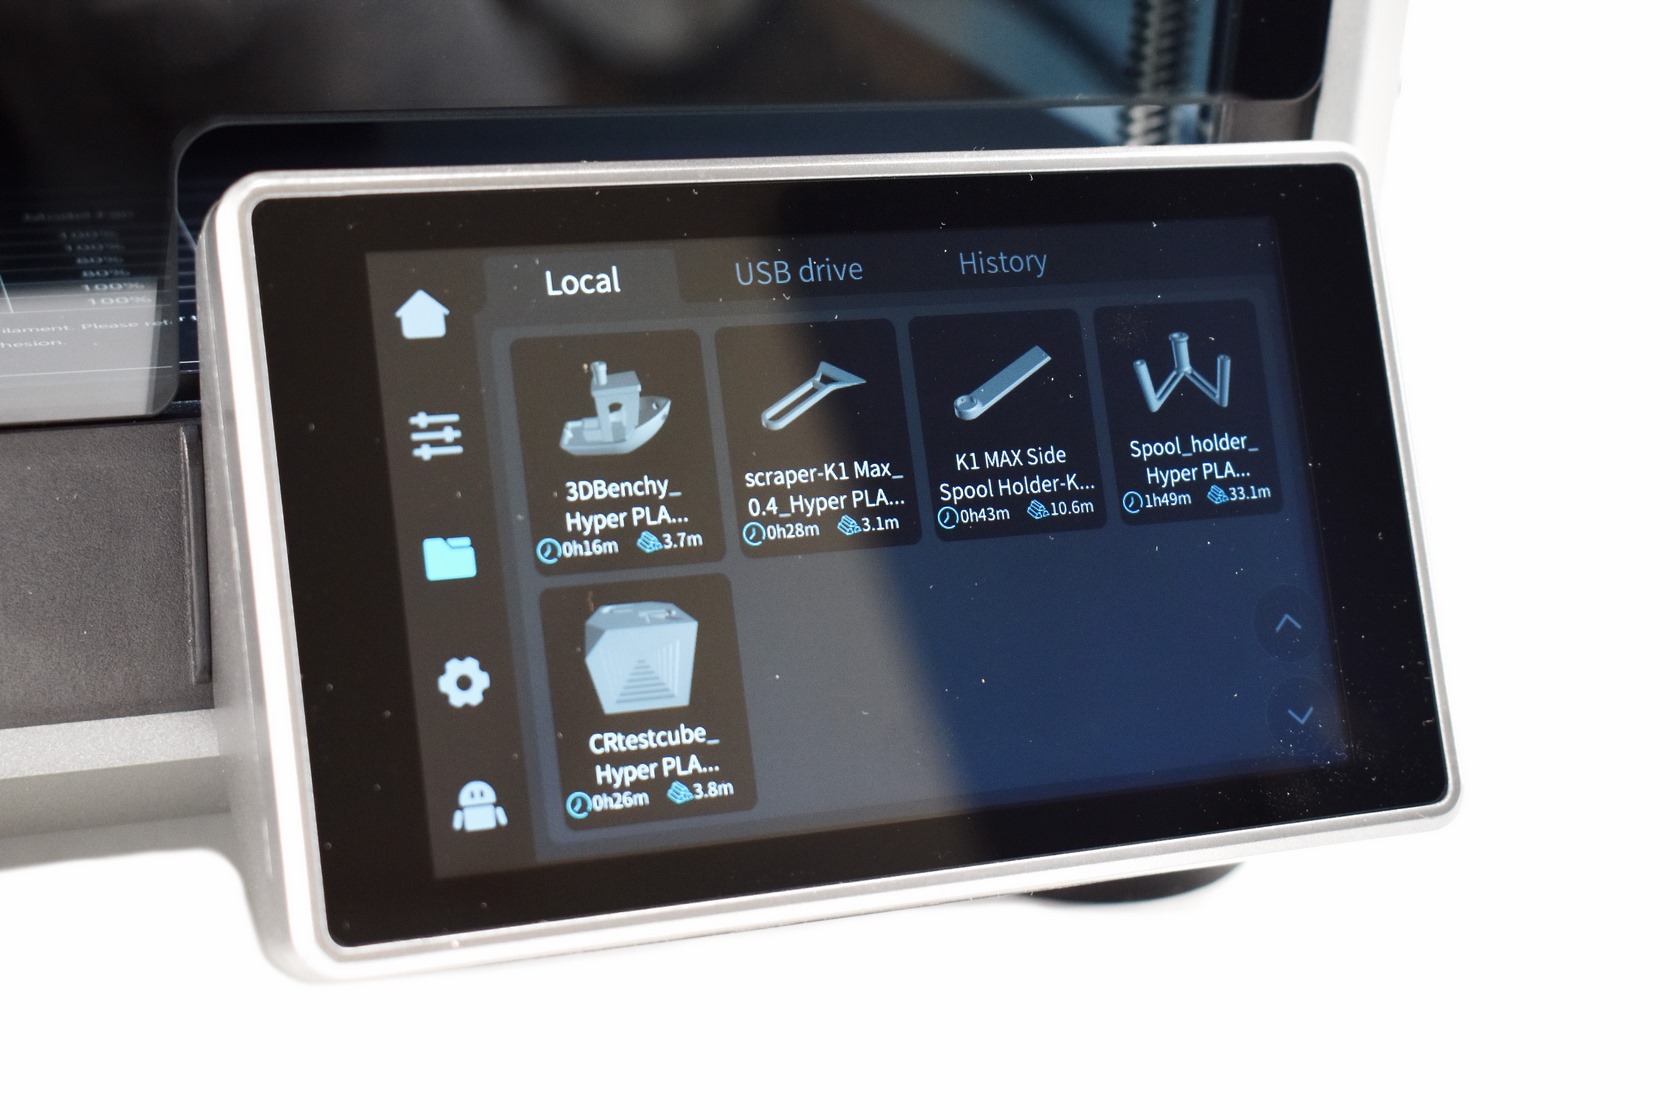
From the third tab you can load models either from the onboard flash, the USB or the network.
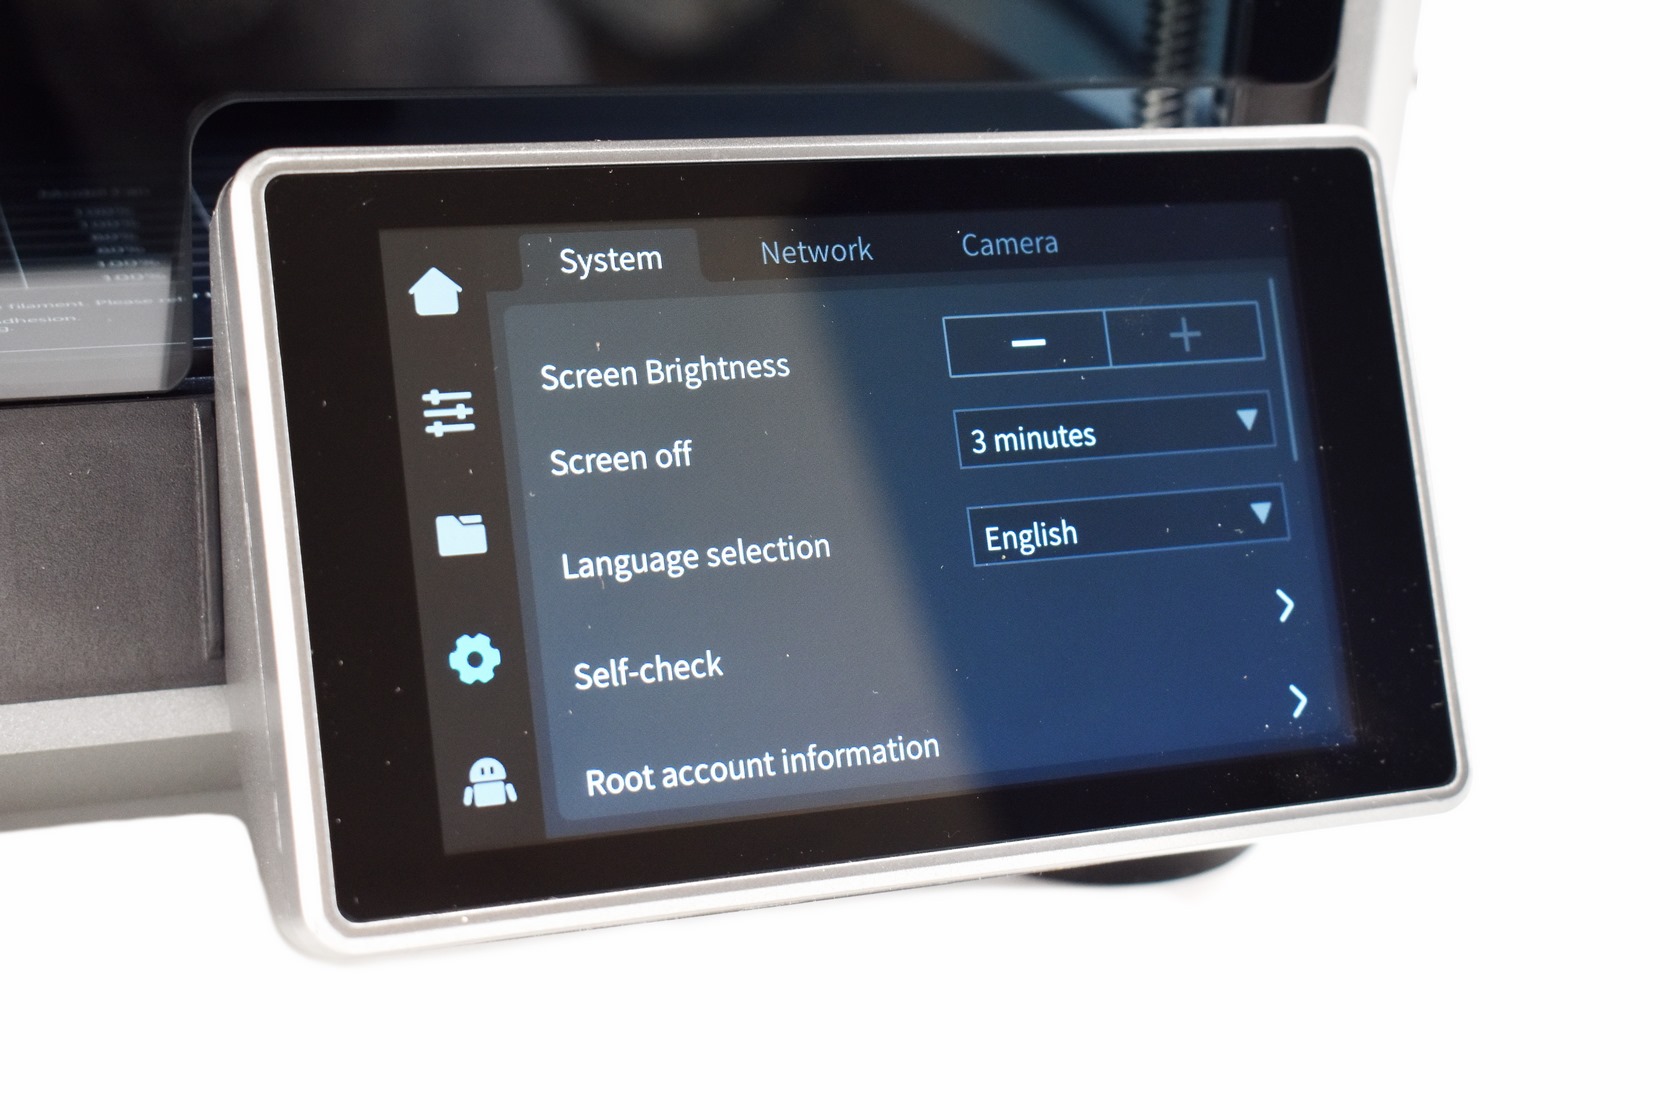
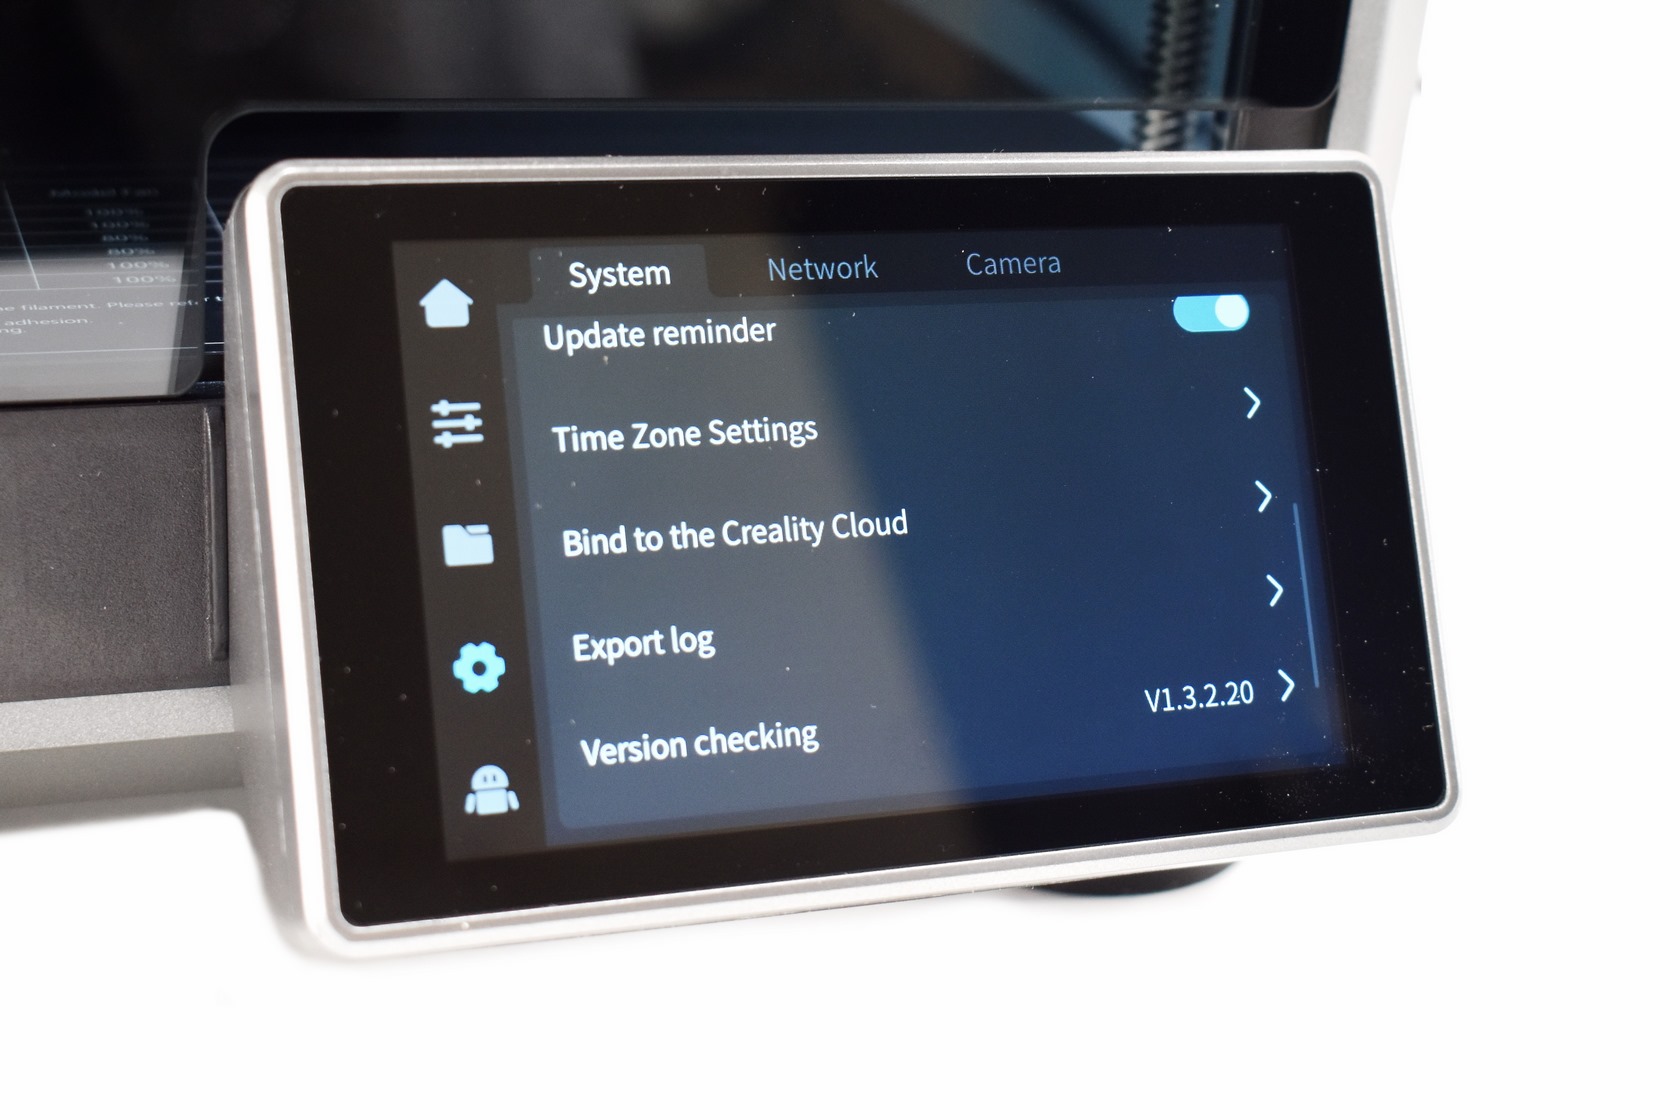

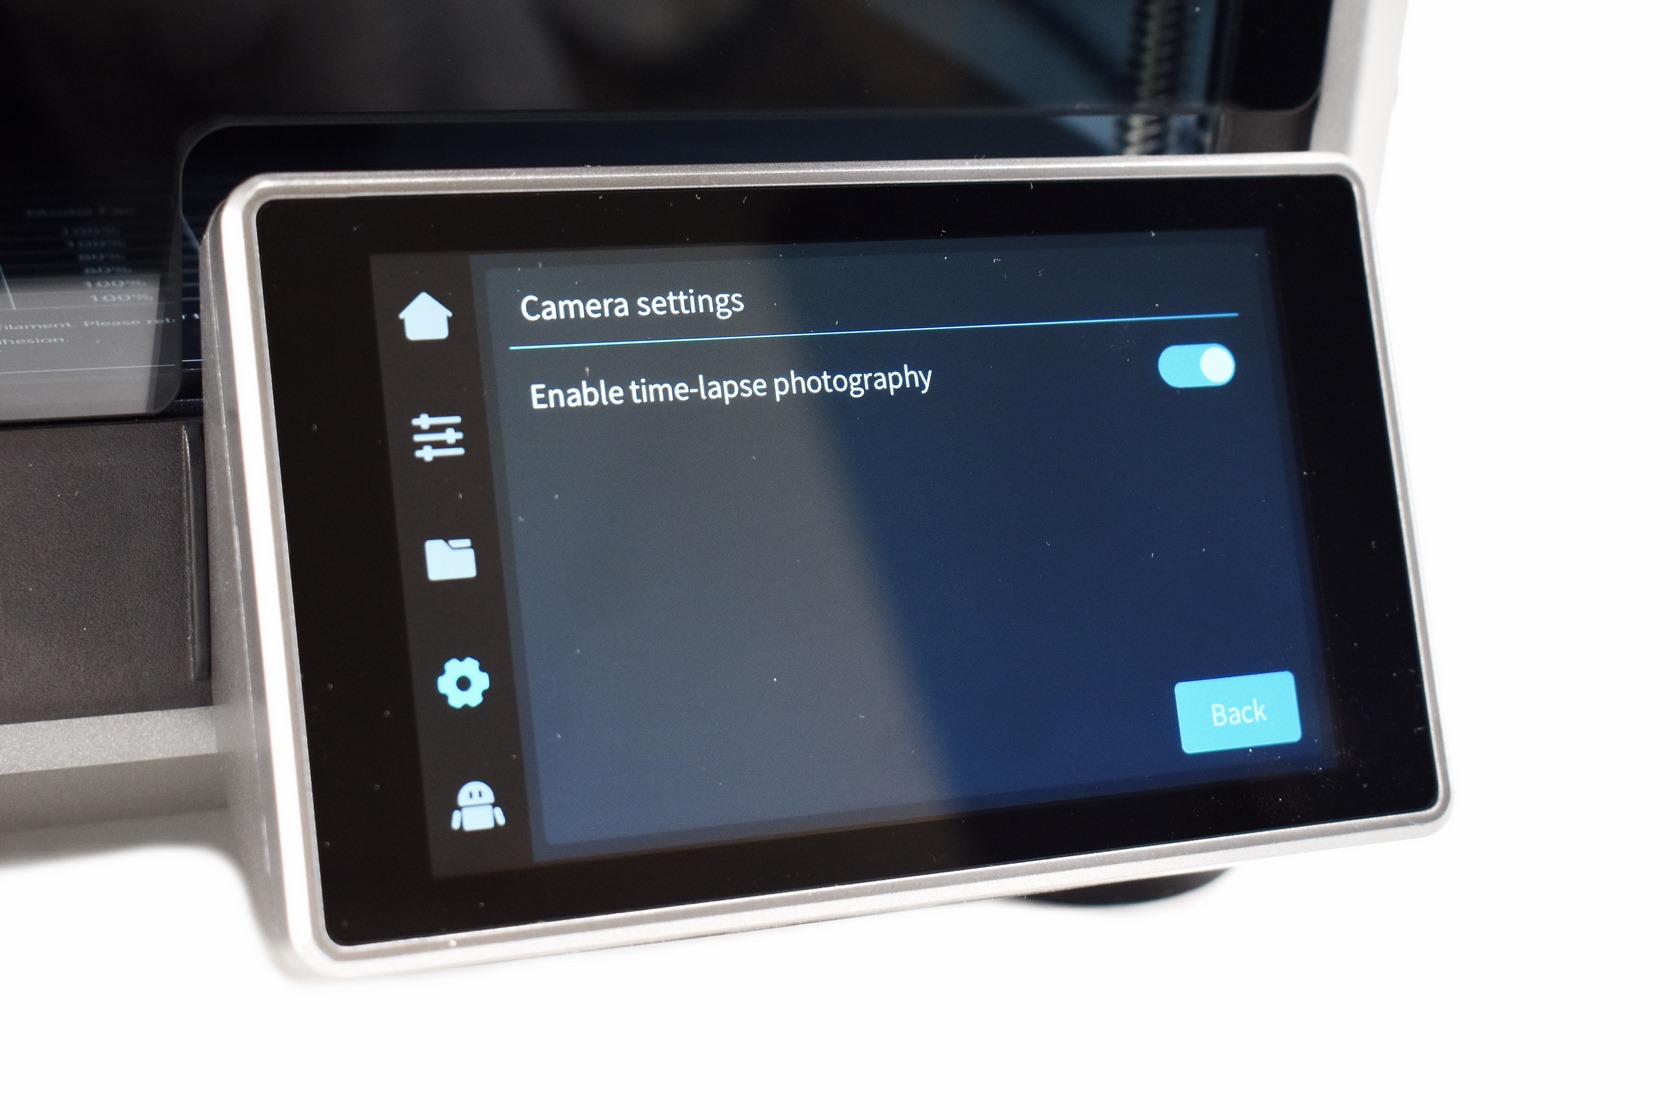
 Moving to the fourth tab from here you can adjust screen brightness, setup screen timeout, select language, perform a printer self-check, display root information, set the time zone, bind the printer to your Creality cloud account, export logs, check the current firmware version and finally you can also access all of the AI cameras settings (time-lapse is what really stands out).
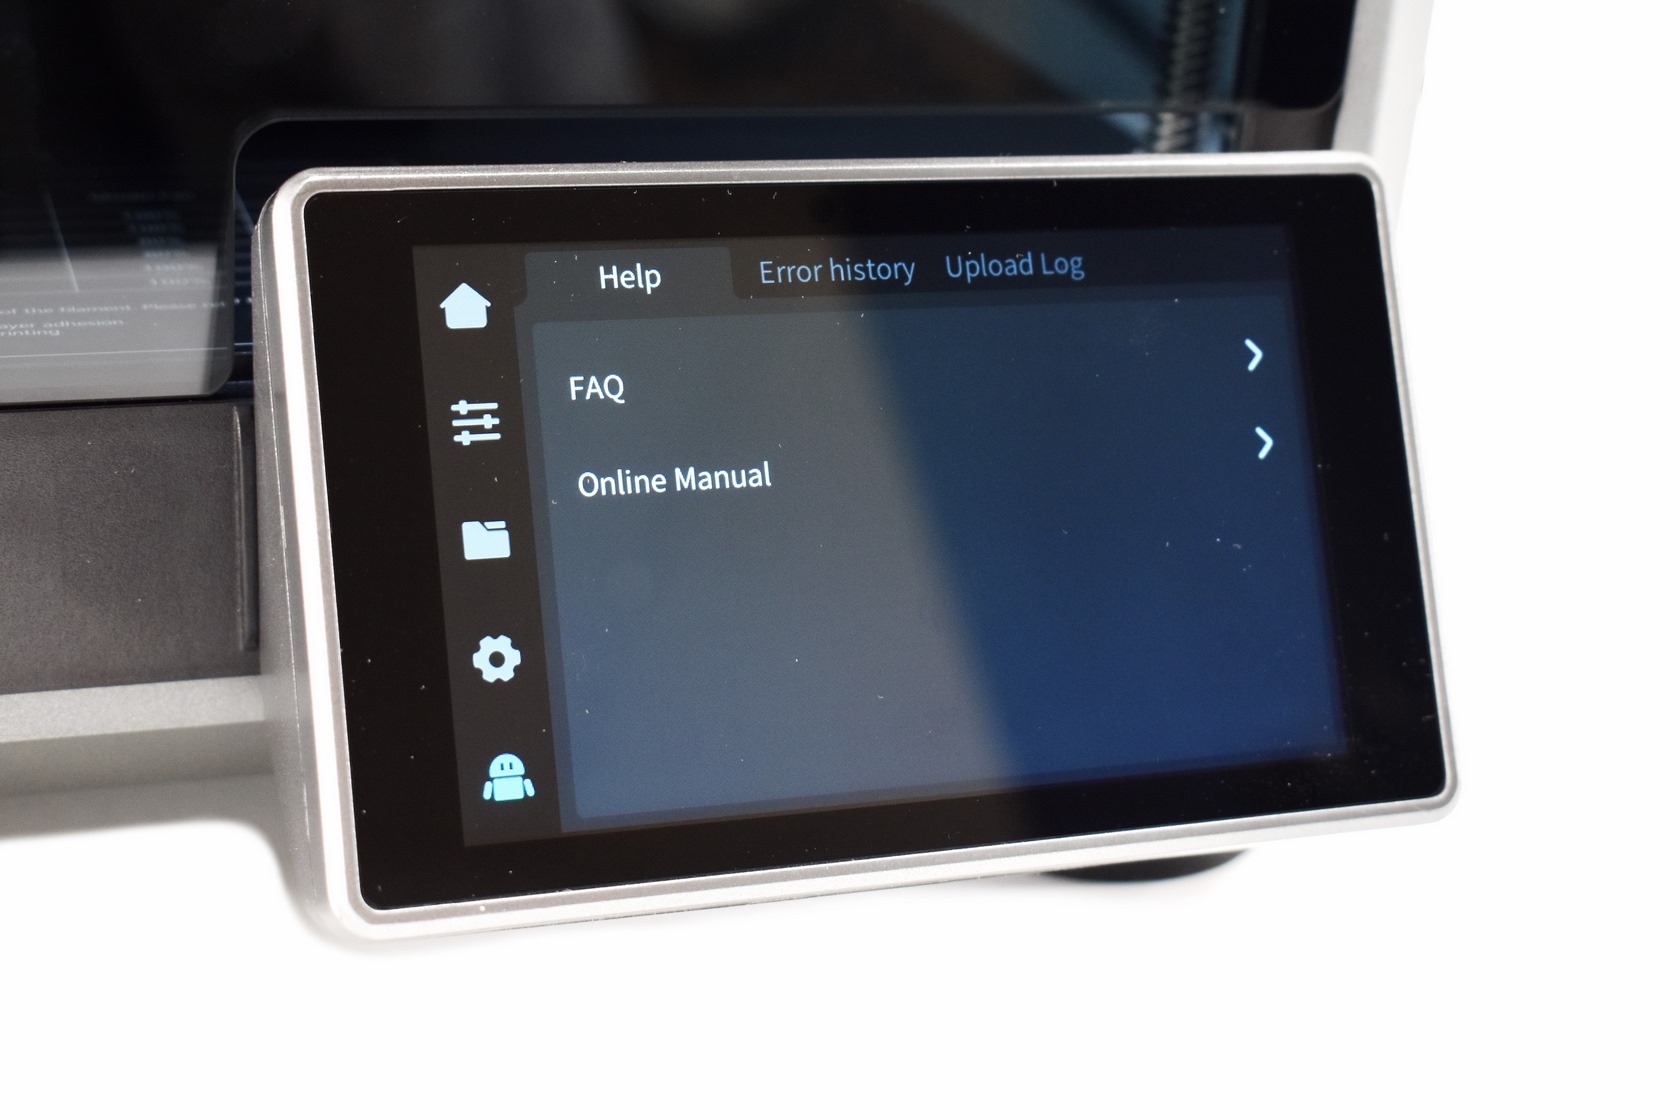
Finally, from the last tab you can access the FAQ and the online manual, check error history and upload logs.
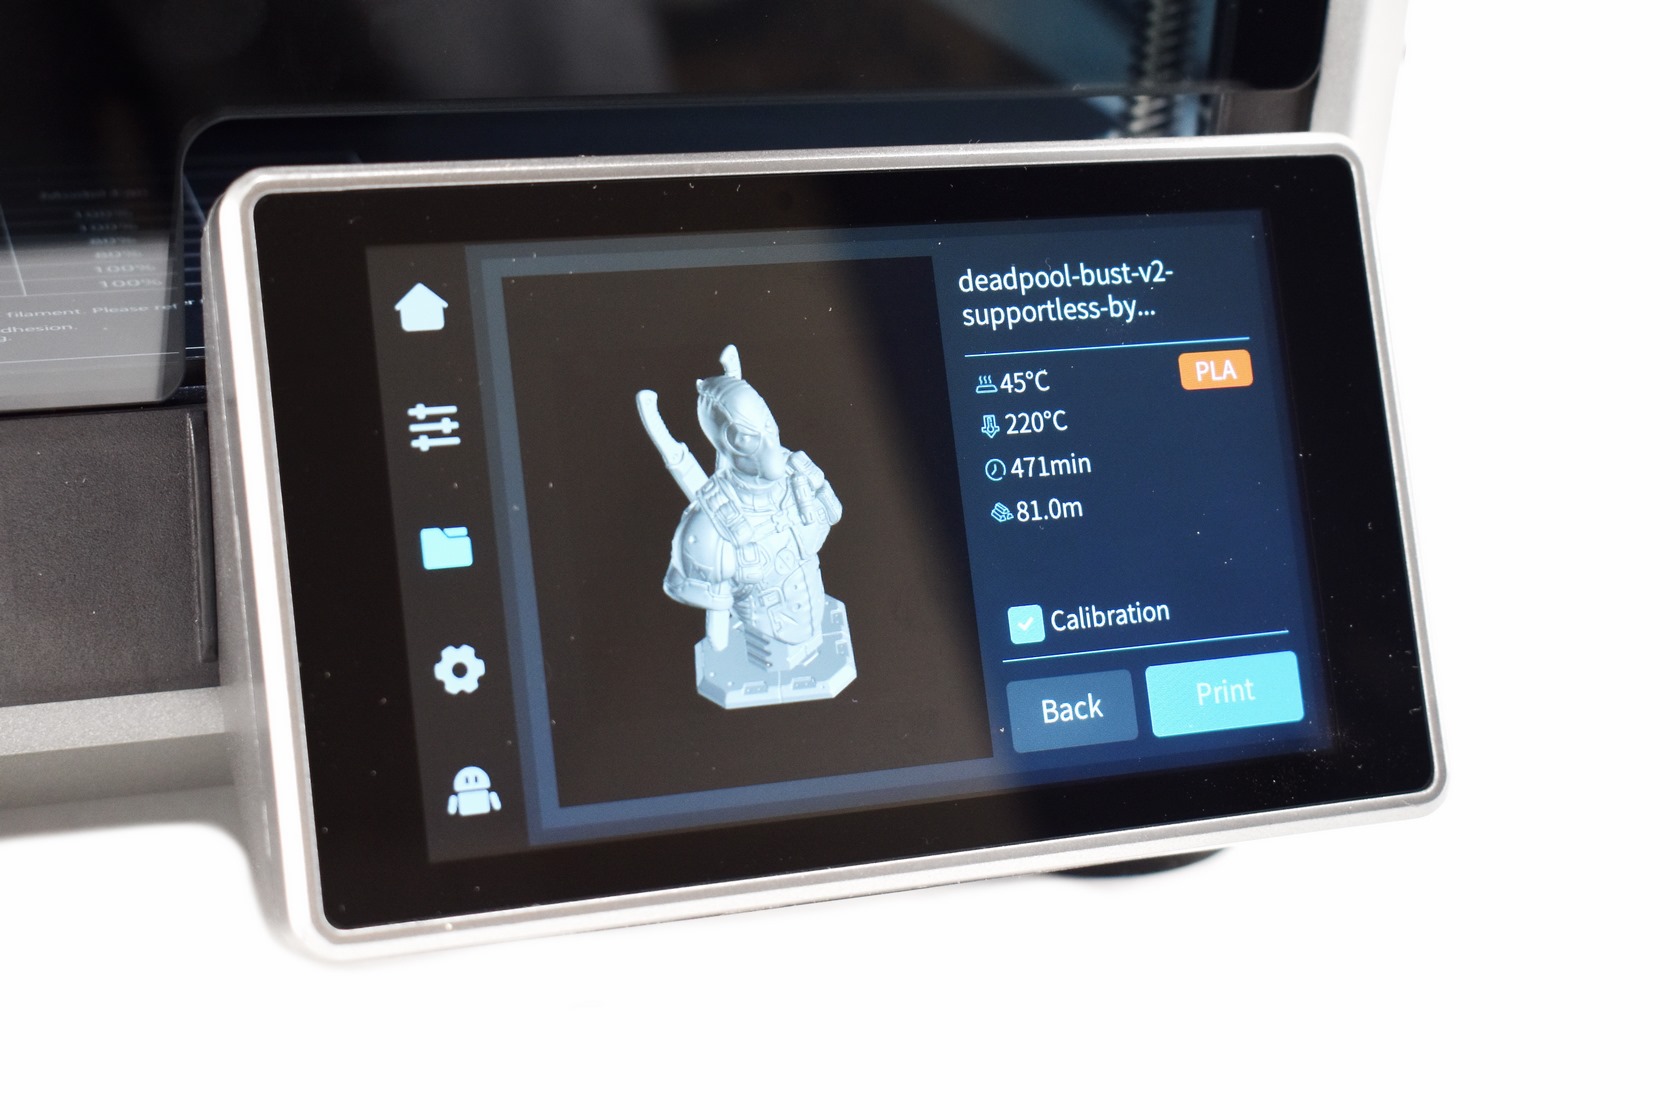
When you load a model you'll get the completion time, filament type, temperature and even a picture of the model which starts to fill according to print percentage (calibration is not really needed every time you do a print job - take note that this is not included in the completion time).
TESTING METHODOLOGY
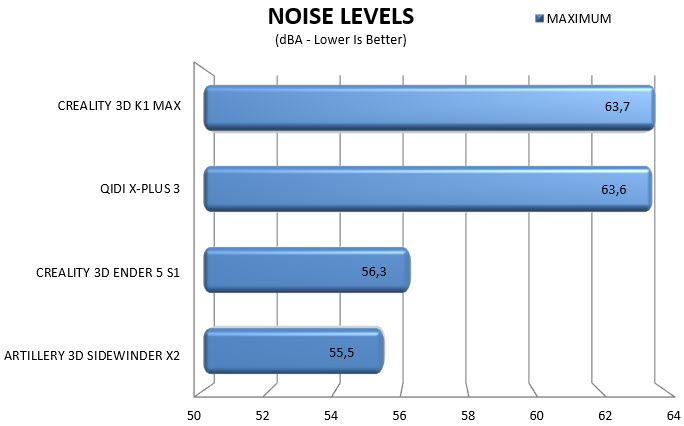
Since using Cura for all my tests went out the window when testing the X-Plus 3 by Qidi this time over i also decided to use Creality’ s very own print software with their K1 Max (fair is fair after all). Luckily i was again able to manually input the same settings with their software as well (quality of 0.16mm, 20% infill density and cubic infill pattern) but let's not forget that these are all different slicing software suites so results might not be quite 100% accurate between models. Nothing else changes of course so again I’ll be using 2 different sized models (downloaded from Cults3D / member Eastman) to record completion time at 100% speed. Second thing to test are noise levels and so once again I’ll be using my ExTech HD600 decibel meter placed roughly 30cm away to record the maximum noise coming from the 3D printer while printing. As for the 3rd test with the help of an UPS and two power meters I decided to also record not only the lowest and highest but also the average instant power consumption of the 3D printer in my hands.
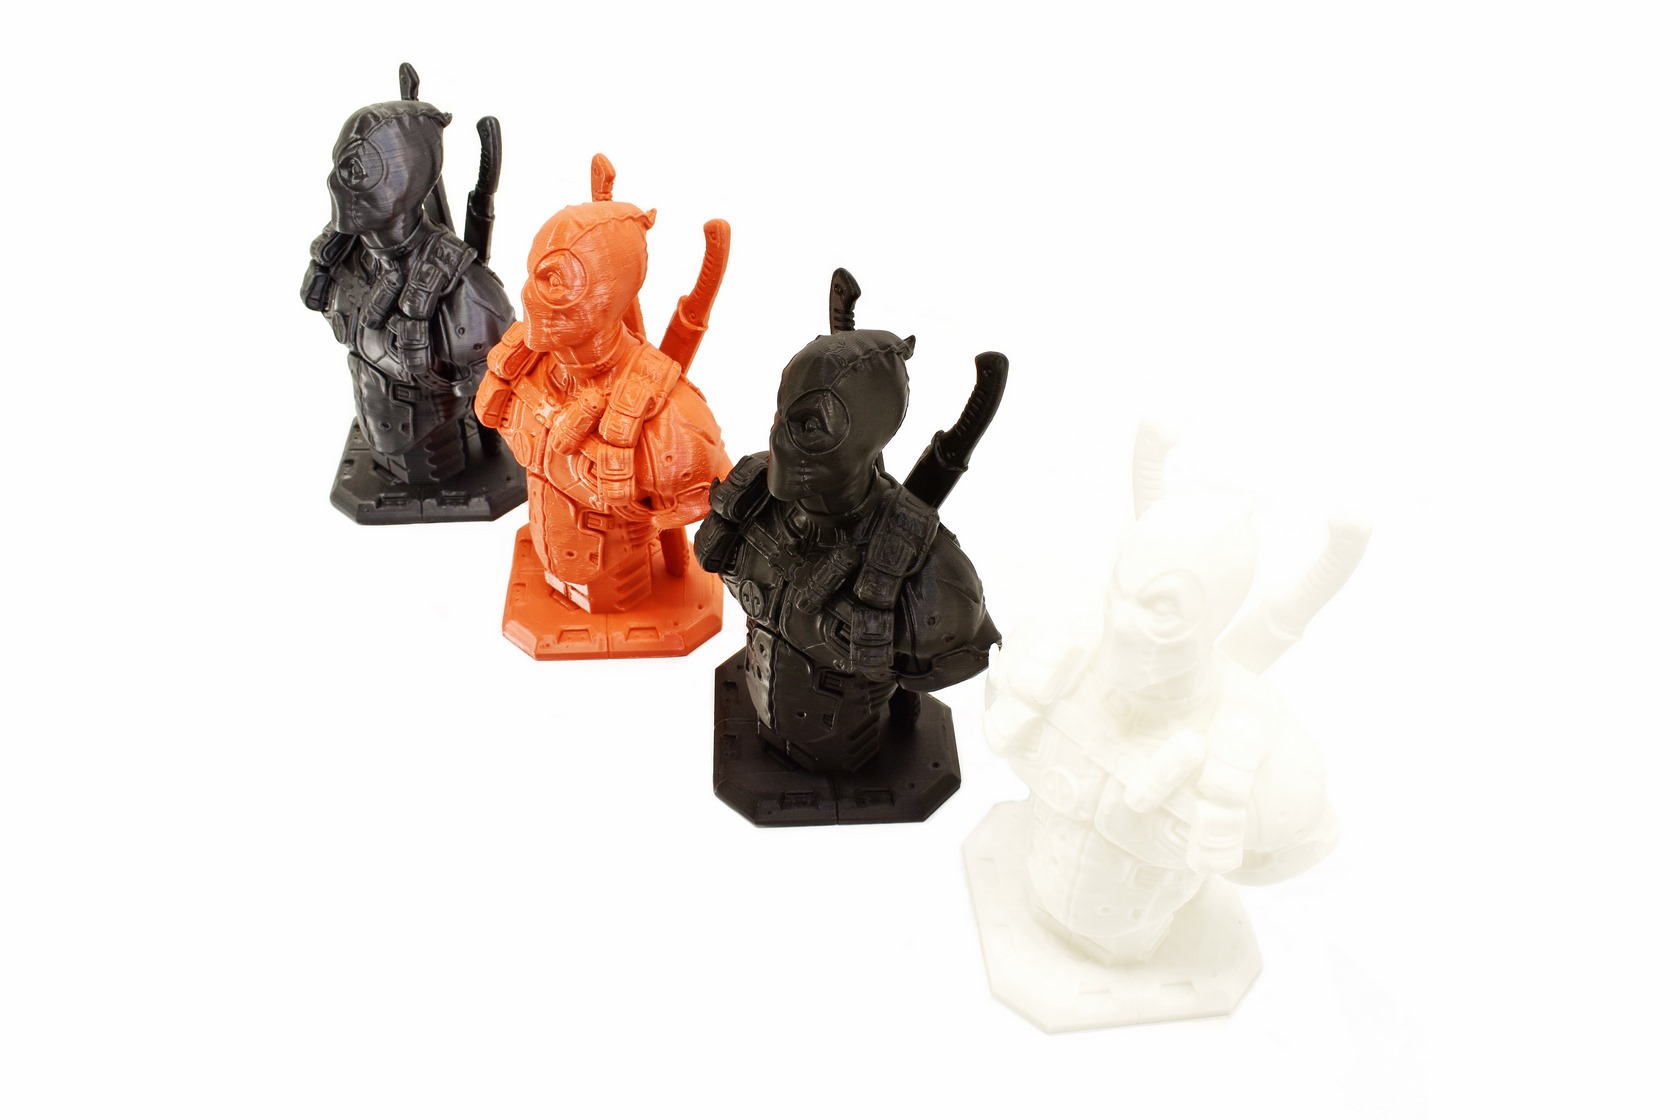
Now i did promise to do side by side comparisons and so once again even though my favourite (alas a tiny lead) is the model produced by the Sidewinder X2 by Artillery 3D the ones by Qidi and their X-Plus 3 and Creality and their K1 Max tie for second place (good detail, smooth surface).
TEST RESULTS
CONCLUSION
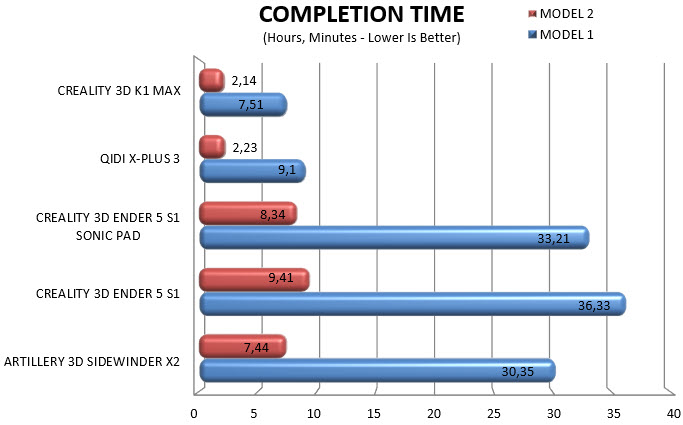
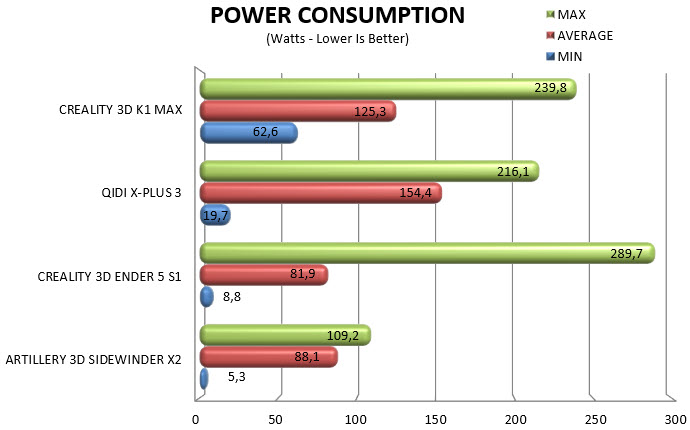
The X-Plus 3 by Qidi is a very fast 3D printer and so I didn’t expect to get anything faster right afterwards and well, the K1 Max by Creality is just that, faster. Yes, 7 hours and 51 minutes versus 9 hours and 10 minutes might not be a game changer for some people (for professionals however I do expect that it will play a role in their decision) but it’s quite impressive for two models that have the same printing speed. Power consumption at times does surpass that of the X-Plus 3 by Qidi both in min and max but average was actually smaller in the end and well, that’s also a good result for the K1 Max. Noise levels on the other hand are nearly identical to that of the X-Plus 3 and well, I didn’t expect that (more robust enclosure and Creality does claim noise and vibrations are optimized in the K1 Max). That being said noise levels is probably the last thing most people will care about when choosing a high-speed 3D printer. Once again what really stands out with the K1 Max are its AI features like the camera and the LiDAR sensor which not only help with bed leveling and can even detect abnormalities during printing (as long as you do enable that feature) but watching your model get printed in time-lapse is nice (video on both TikTok and YouTube).
The K1 Max is among the top-end models Creality currently has in their product lines and so it’s retail price which is set at USD938.34 inside the USA (Amazon.com) and at 1040.98Euros inside the EU (Amazon.de) is well justified. Yes, it might be slightly over some similar models like the Qidi X-Plus 3 for example but you’re getting extra features (AI/Aluminum Enclosure/Tempered Glass Panels) which more than make up for that. At the end of the day the K1 Max High Speed 3D Printer by Creality may not be the best model money can buy today but it’s probably the best at up to and around USD1000/1000Euros and for that it certainly deserves the Platinum Award.

PROS
- Very Good Build Quality (Die Cast Aluminum Enclosure / Tempered Glass Panels)
- Very Fast (600m/s)
- Print Quality
- Heated & Flexible Bed
- Dual Direct Drive Extruder
- AI LiDAR Sensor (Bed Leveling / Detects Printing Abnormalities)
- Manual & AI Automatic Leveling
- Hardened Steel Nozzle
- 4.3 Inch Color Touch Screen Display
- AI Camera (Time-Lapse / Real Time Monitoring / Detects Printing Abnormalities)
- Ethernet, WiFi & USB 2.0 Port
- Air Filter (Filters Printing Particles)
CONS
- Noise Levels
- Power Consumption