
 O-Sense

.jpg)


INSTALLATION - FINISHED LOOKS
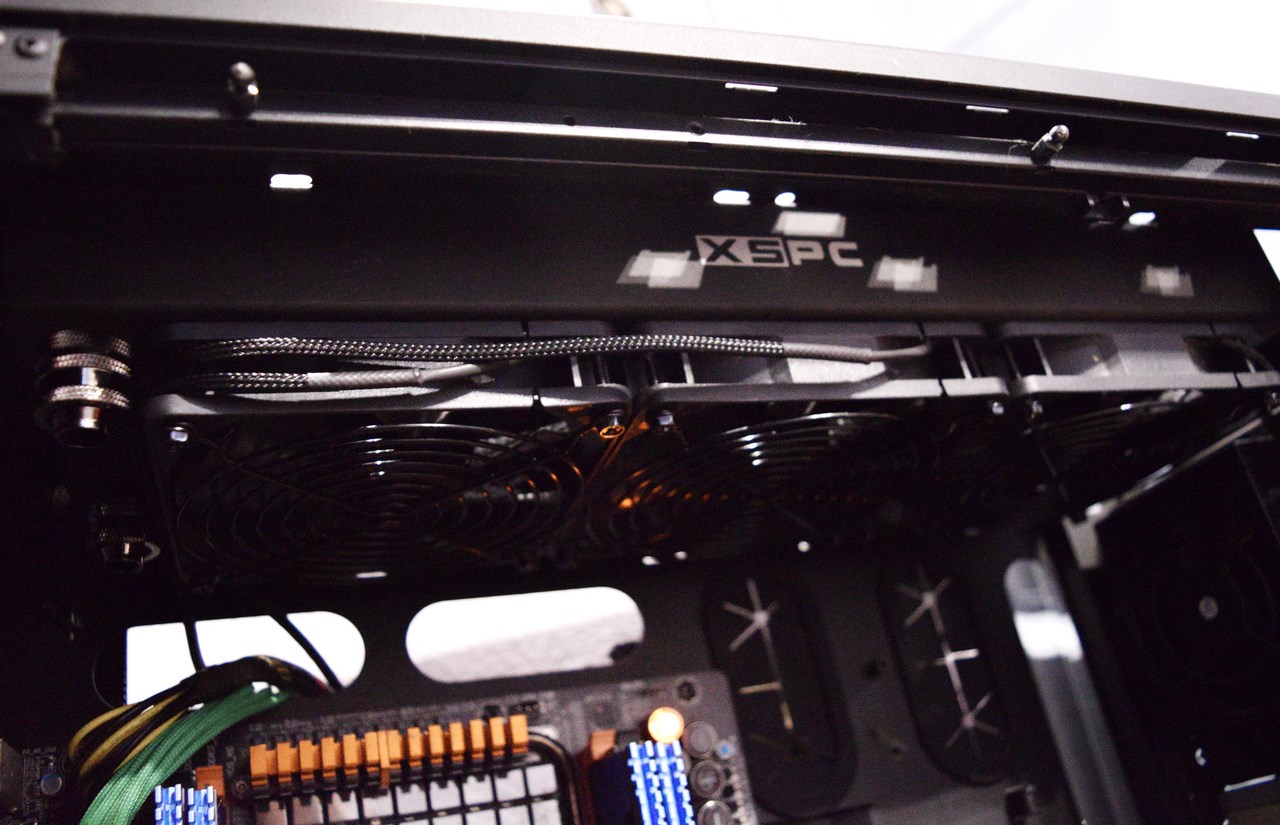
By mounting the three Pro 120mm fans onto the AX360 radiator you now need at least 65mm of space at the top/front of your tower (not much of a challenge for the Obsidian 900D since need be you could easily mount the fans on top of the radiator and the X4 Photon 170 reservoir/pump on the bottom).
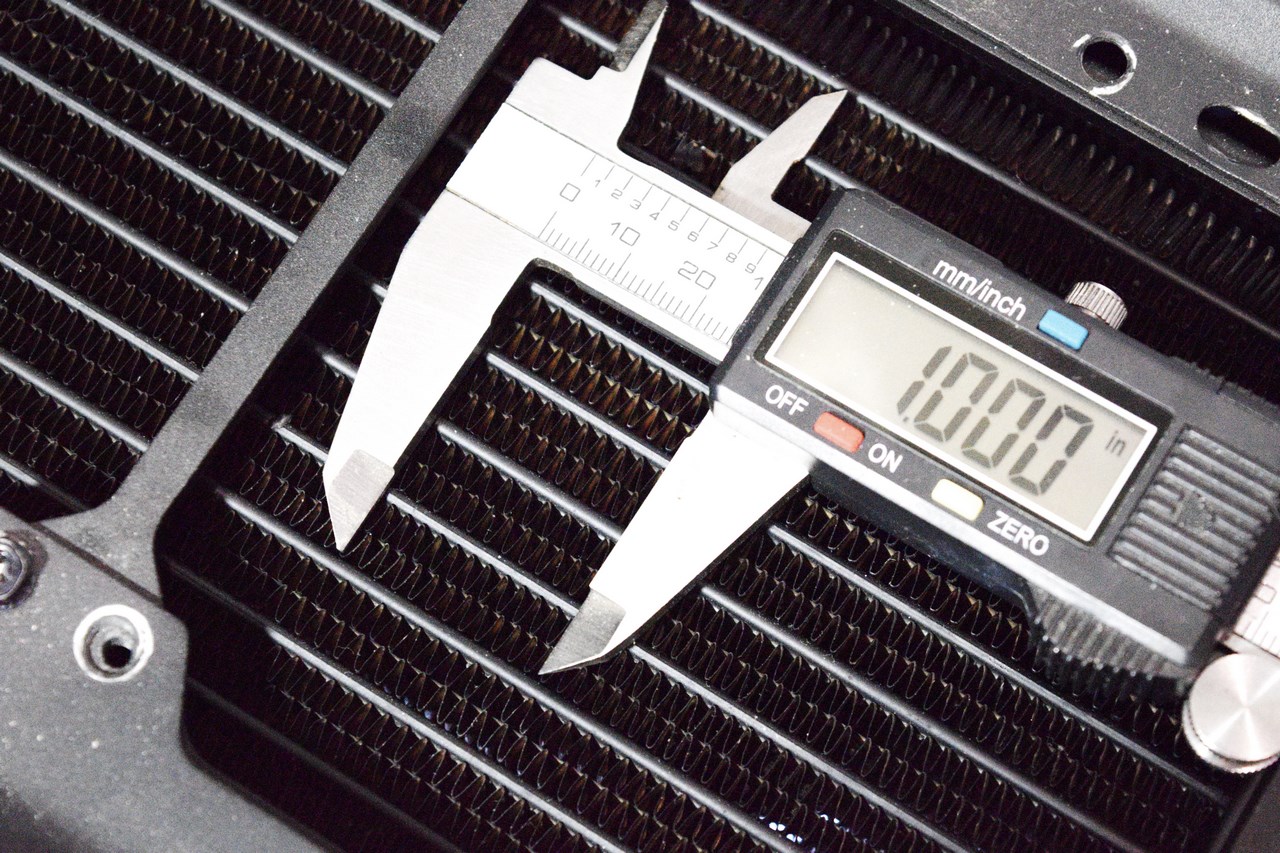
We forgot to do a fin count prior to mounting the radiator so here it is, the AX360 has roughly a total of 23 fins per inch (if you're wondering why we avoid taking pictures of installed kits it's clearly because unlike our photo bench the main lab lacks the lighting needed to do a proper job).
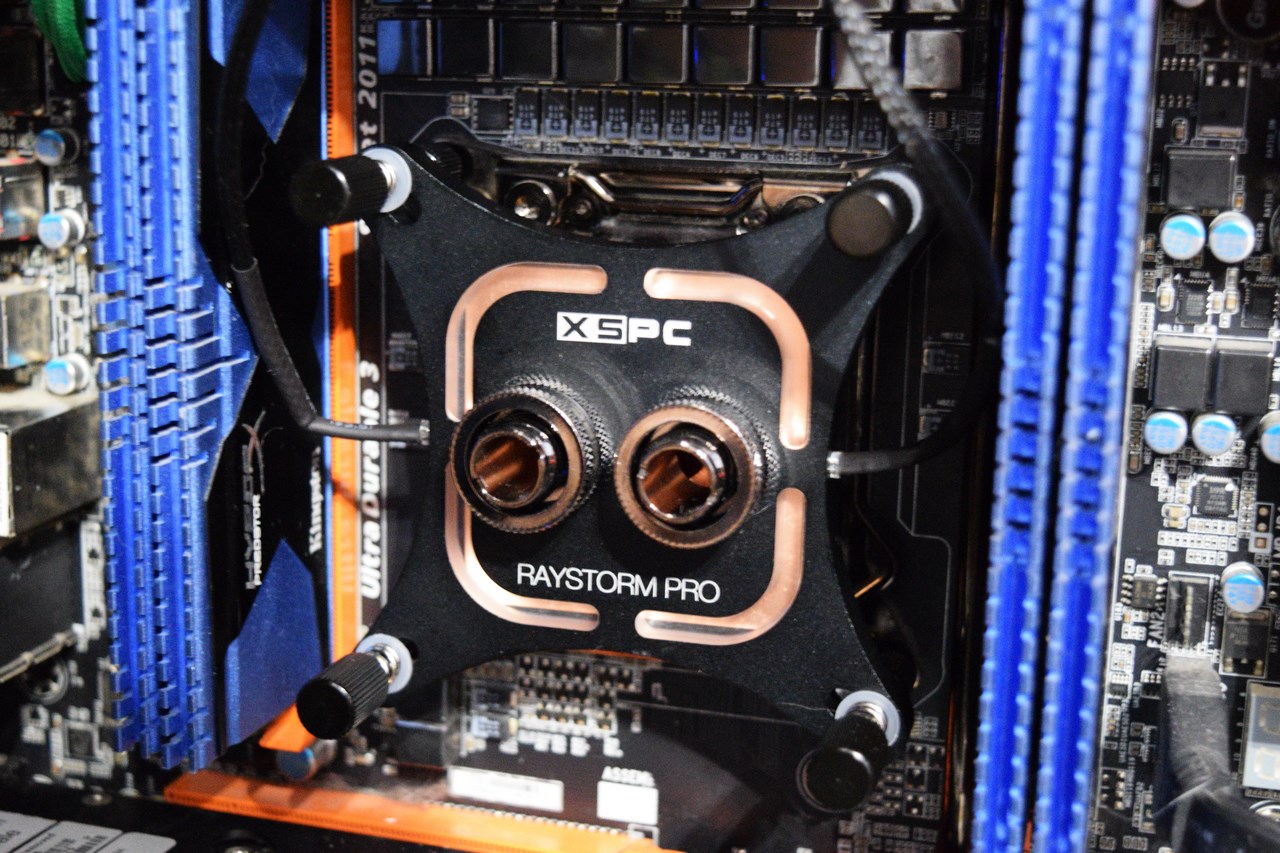
Next is the RayStorm Pro waterblock which once again is extremely easy to install since you just need to mount the 4 bars, place the waterblock and secure it in place using the bundled thumbscrews.
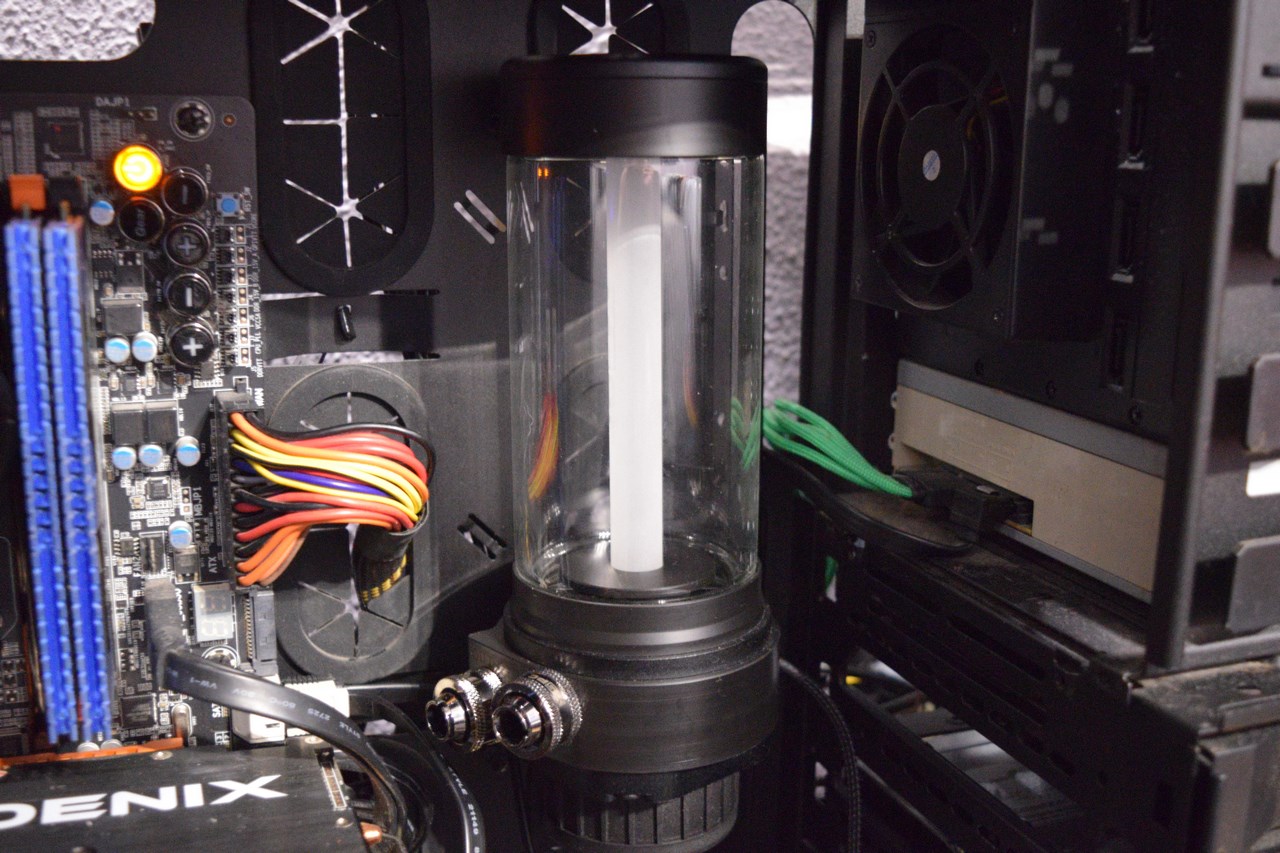
Mounting the X4 Photon 170 reservoir/pump combo can be done either vertically as in the above picture or horizontally (as mentioned already you can even attach it onto the AX360 radiator).
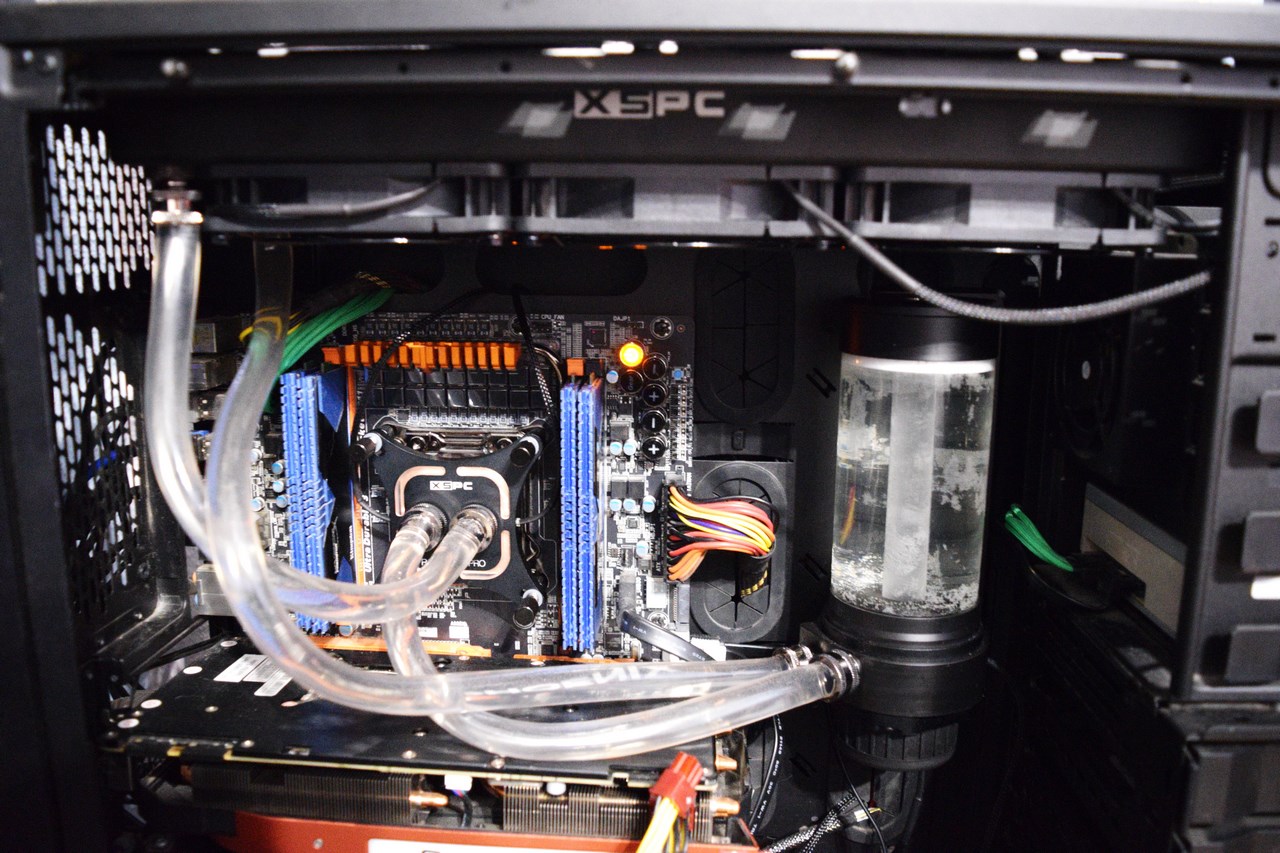
Cutting the bundled hose and attaching it to the fittings is the final step prior to filling the reservoir with liquid (it's always best if you test the kit with the reservoir/pump combo outside the tower to check for leaks - also unless you'd like to damage the pump never start it without liquid running through it).
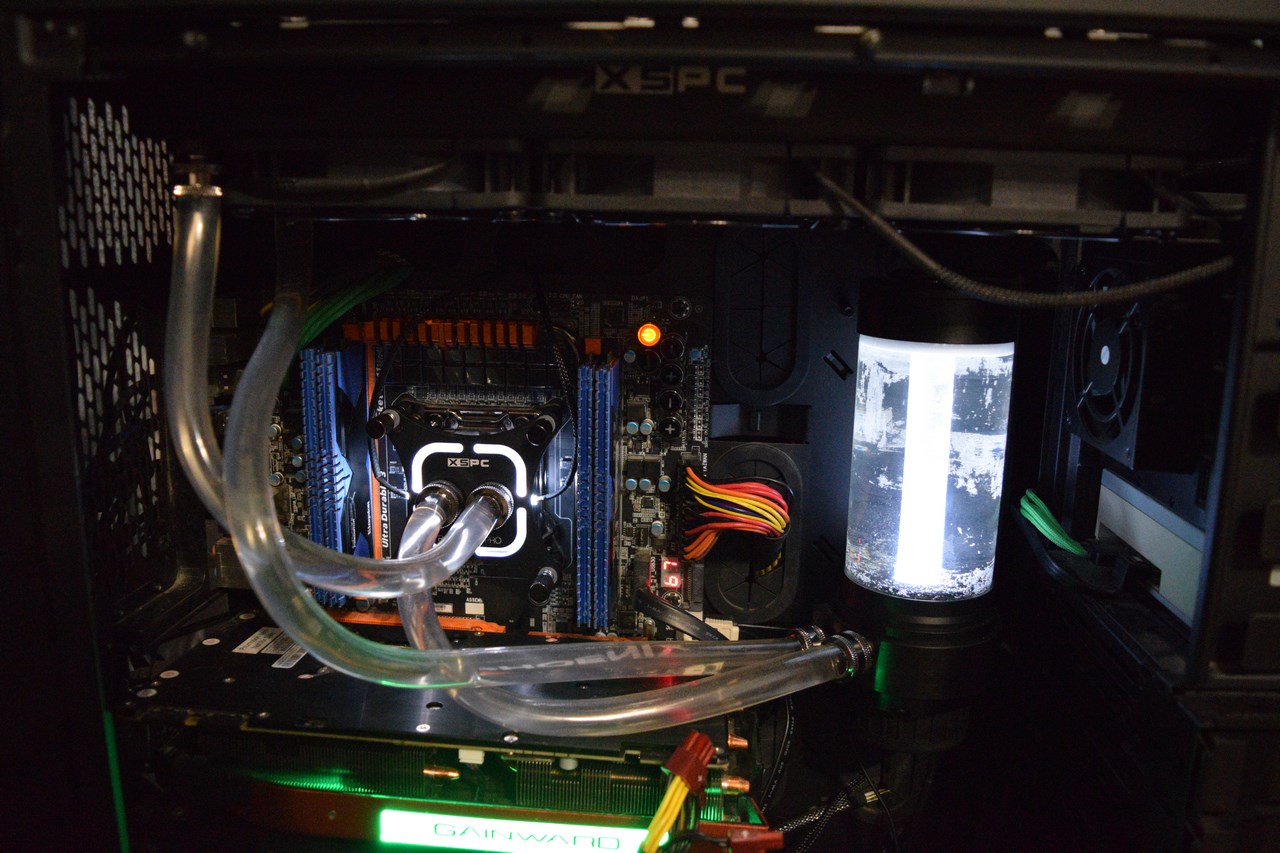
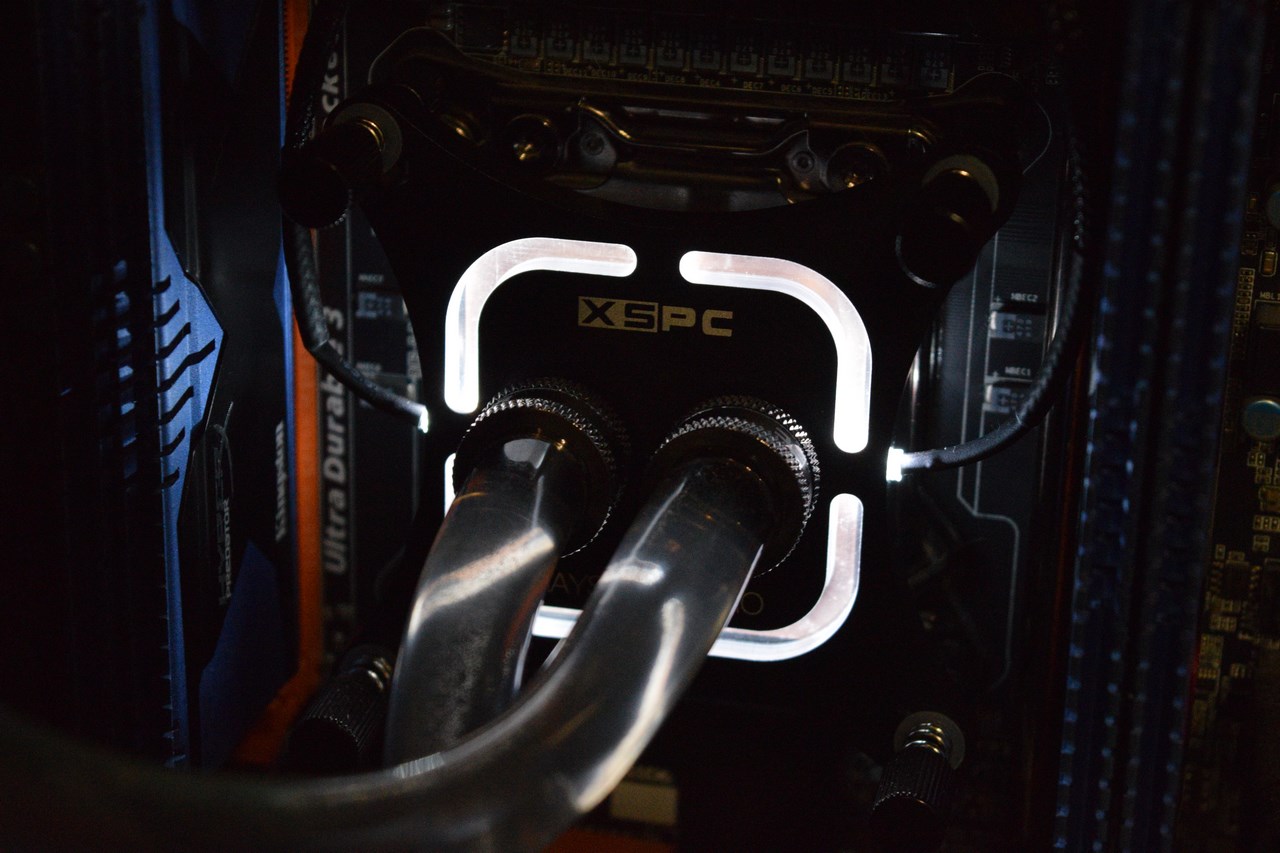
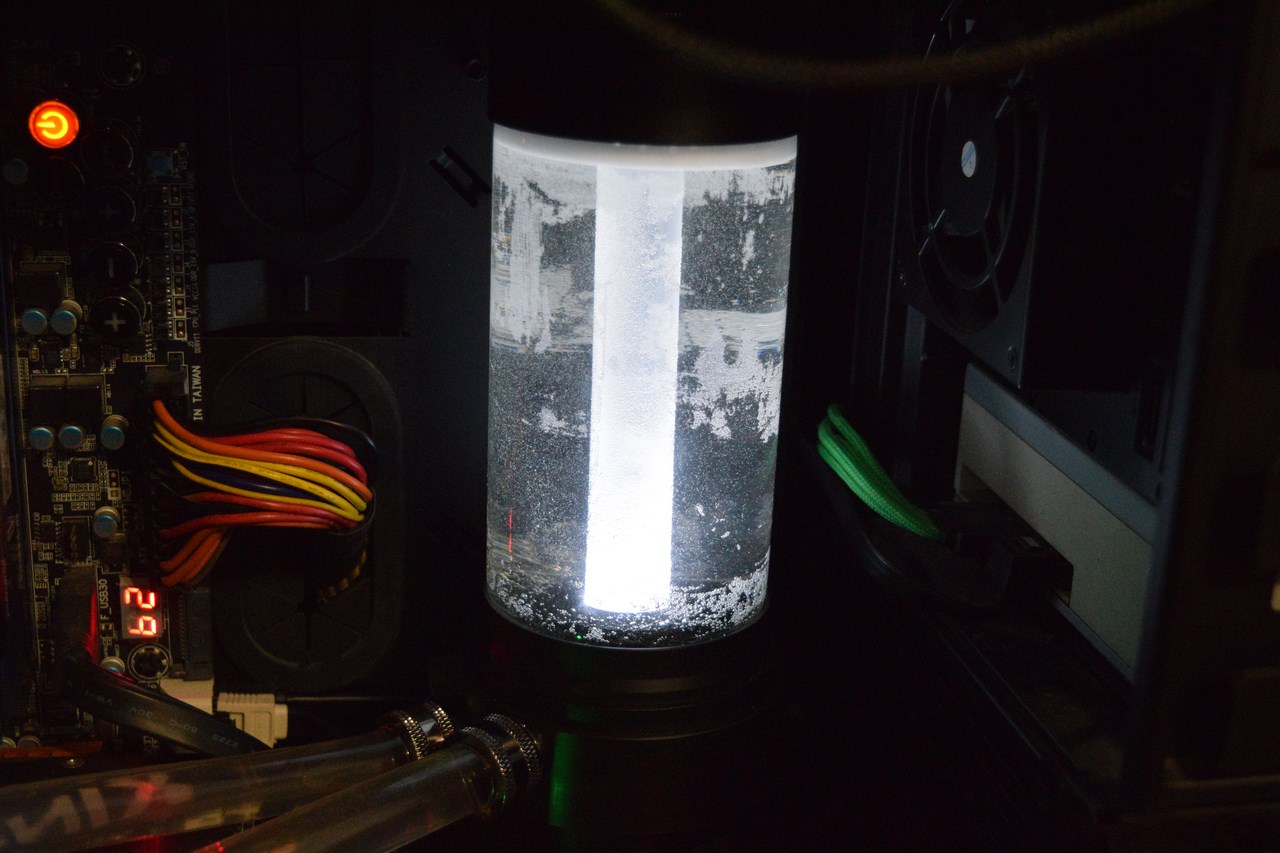
With a total of three white LEDs (two in the waterblock and one in the reservoir) the RayStorm Pro X4 Photon AX360 Kit looks very nice (would look even better with RGB LEDs - XSPC has already made that possible).


.png)

